Start your business journey online
How to setup Firebase database for enabling chat in your Dating app?
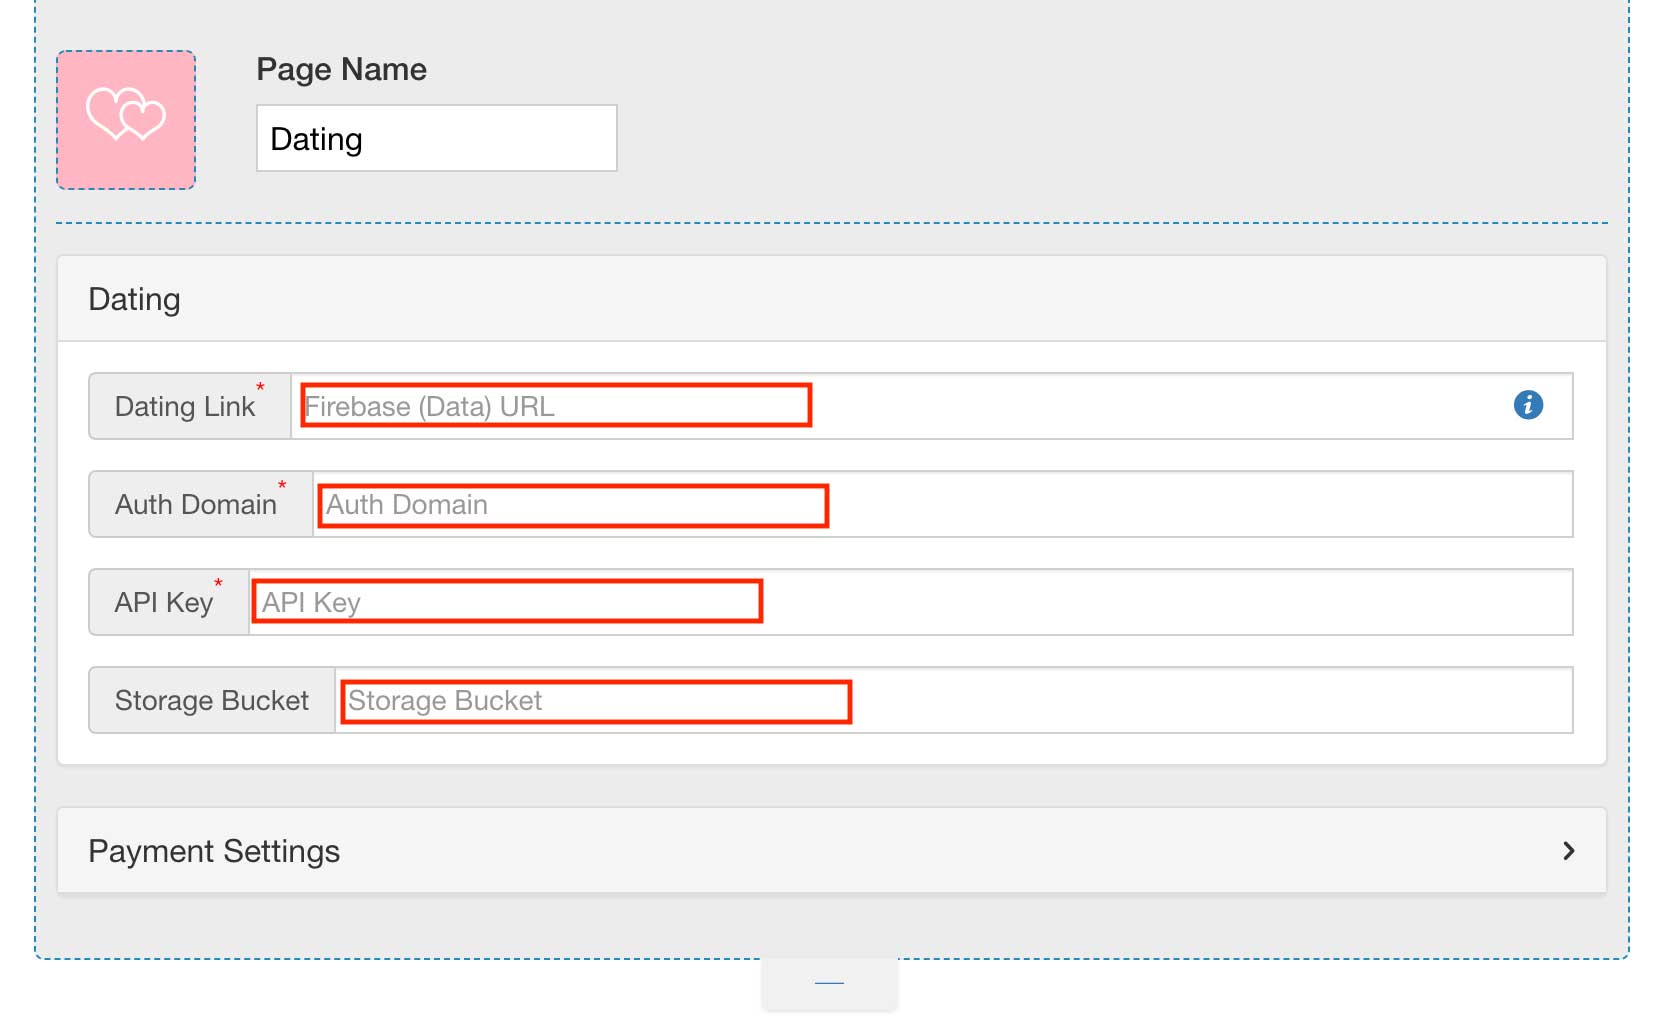
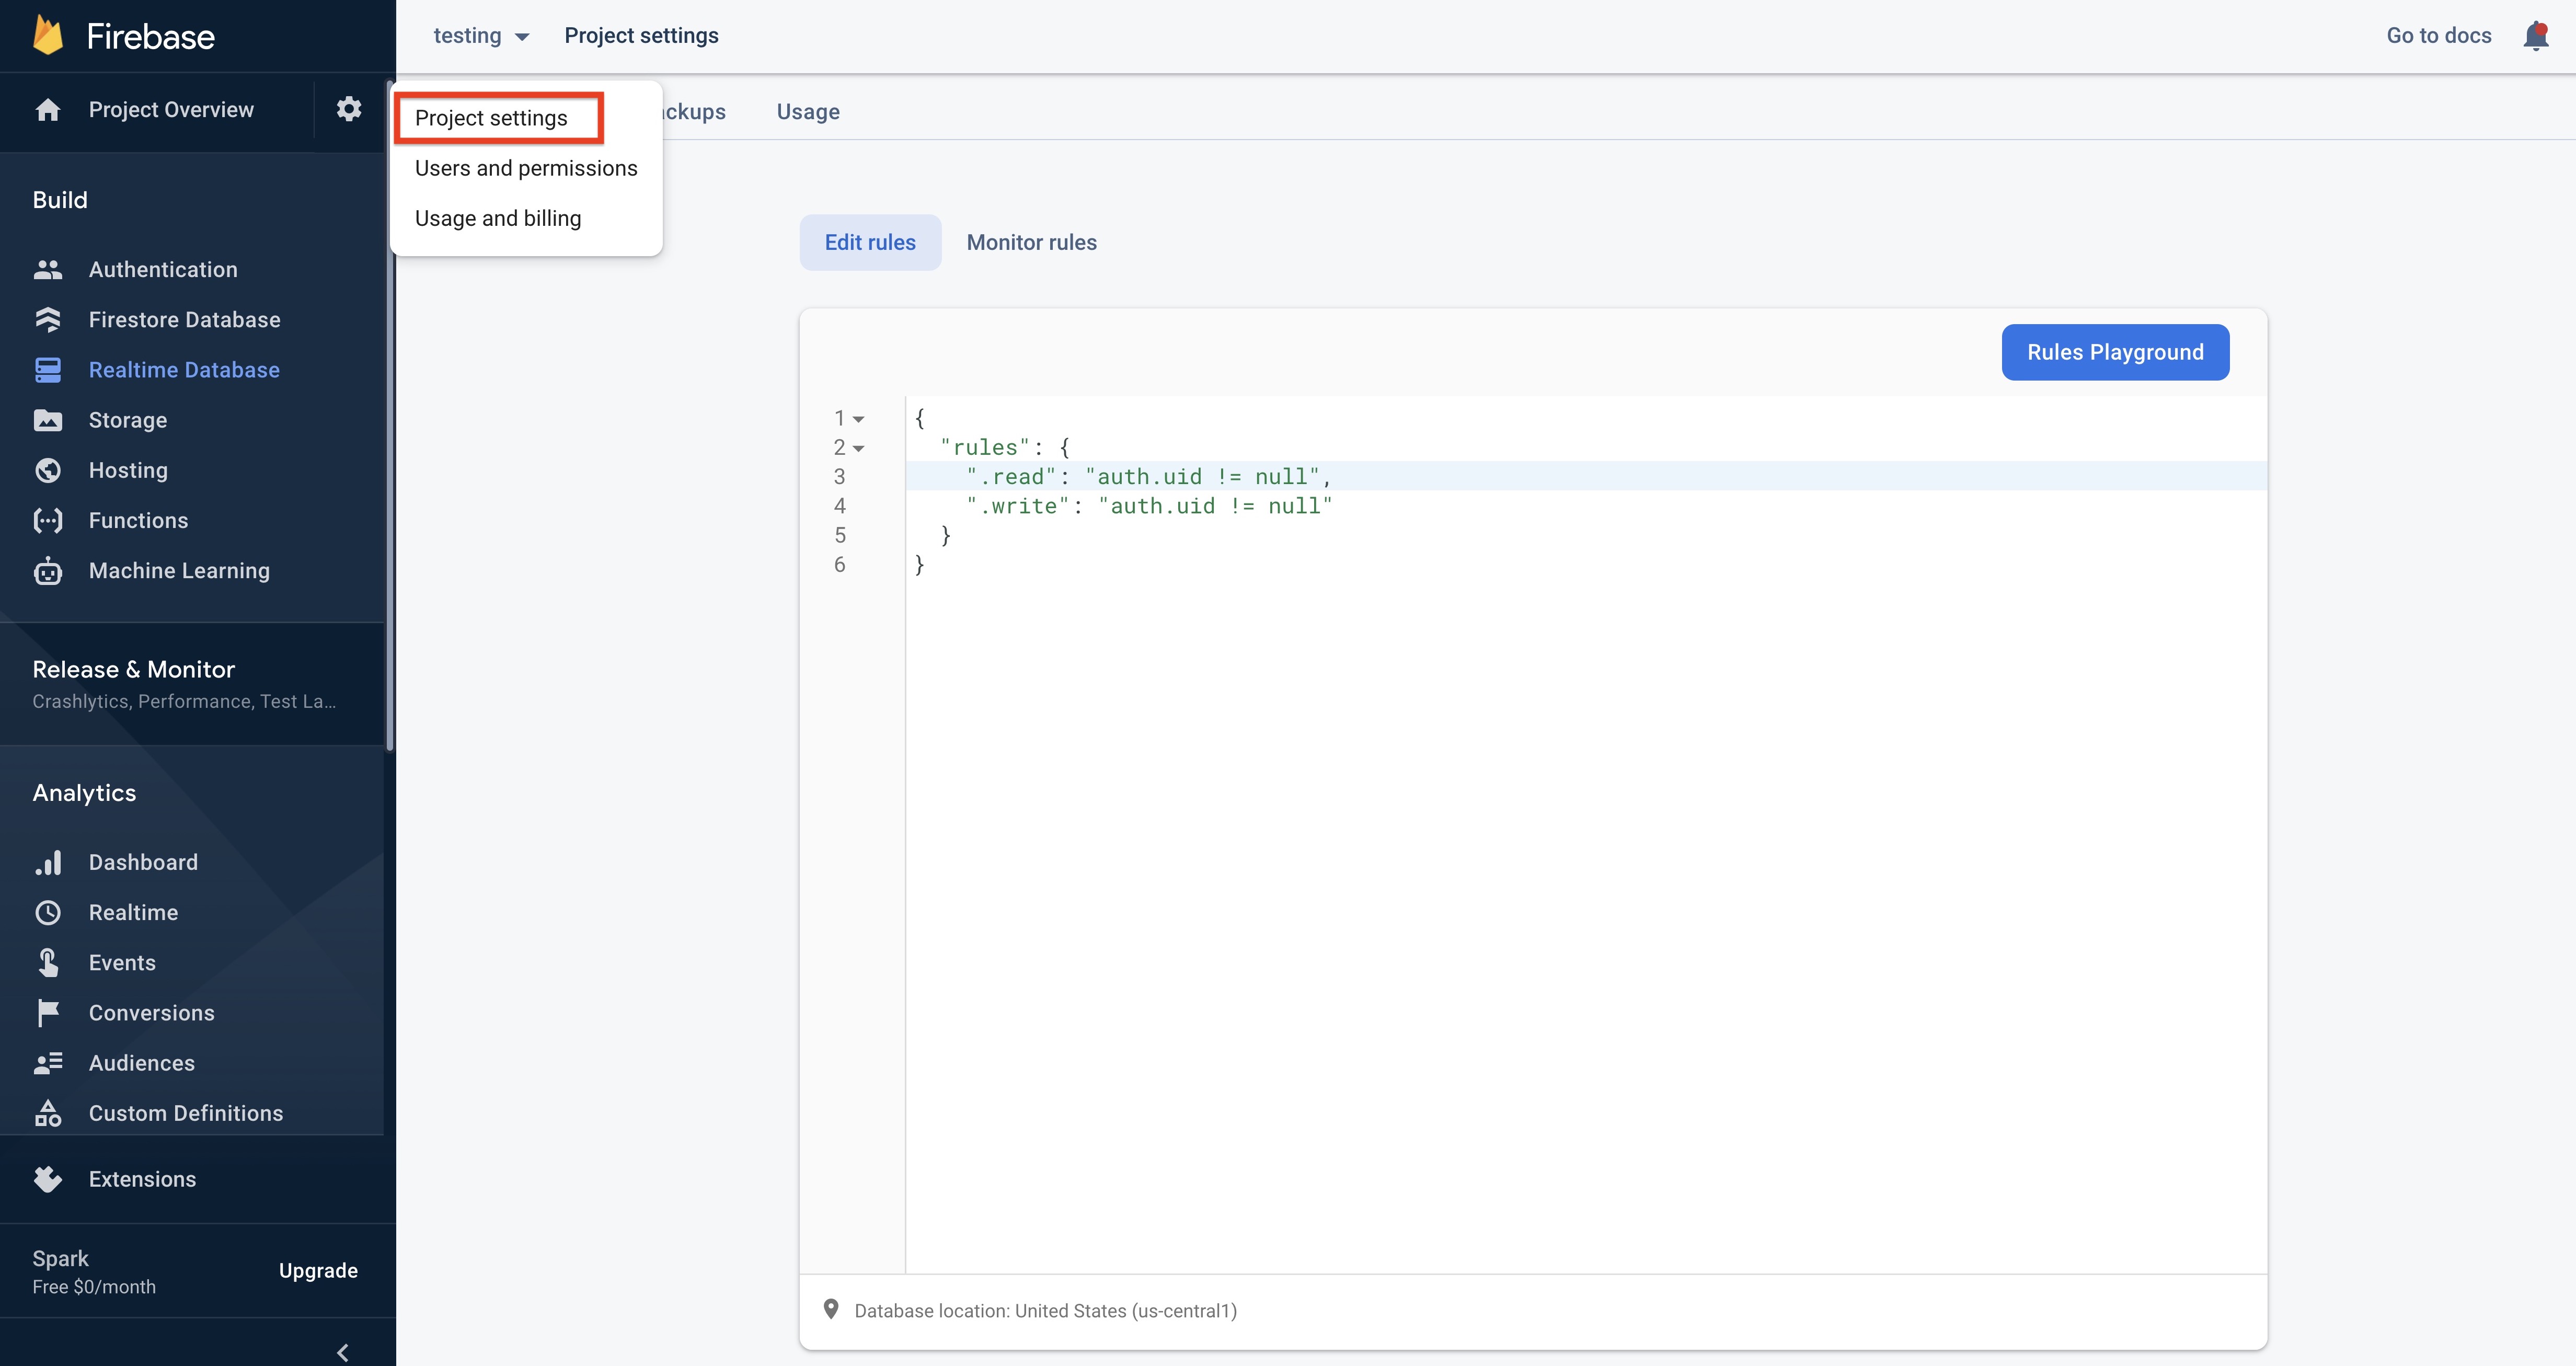
For obtaining API Key, Auth Domain, Database URL and Storage Bucket follow below mention steps :
Step 1 : Go to Firebase
Step 2 : If you have a Firebase account, Signin, else Signup Step 3 : Click on Get Started
 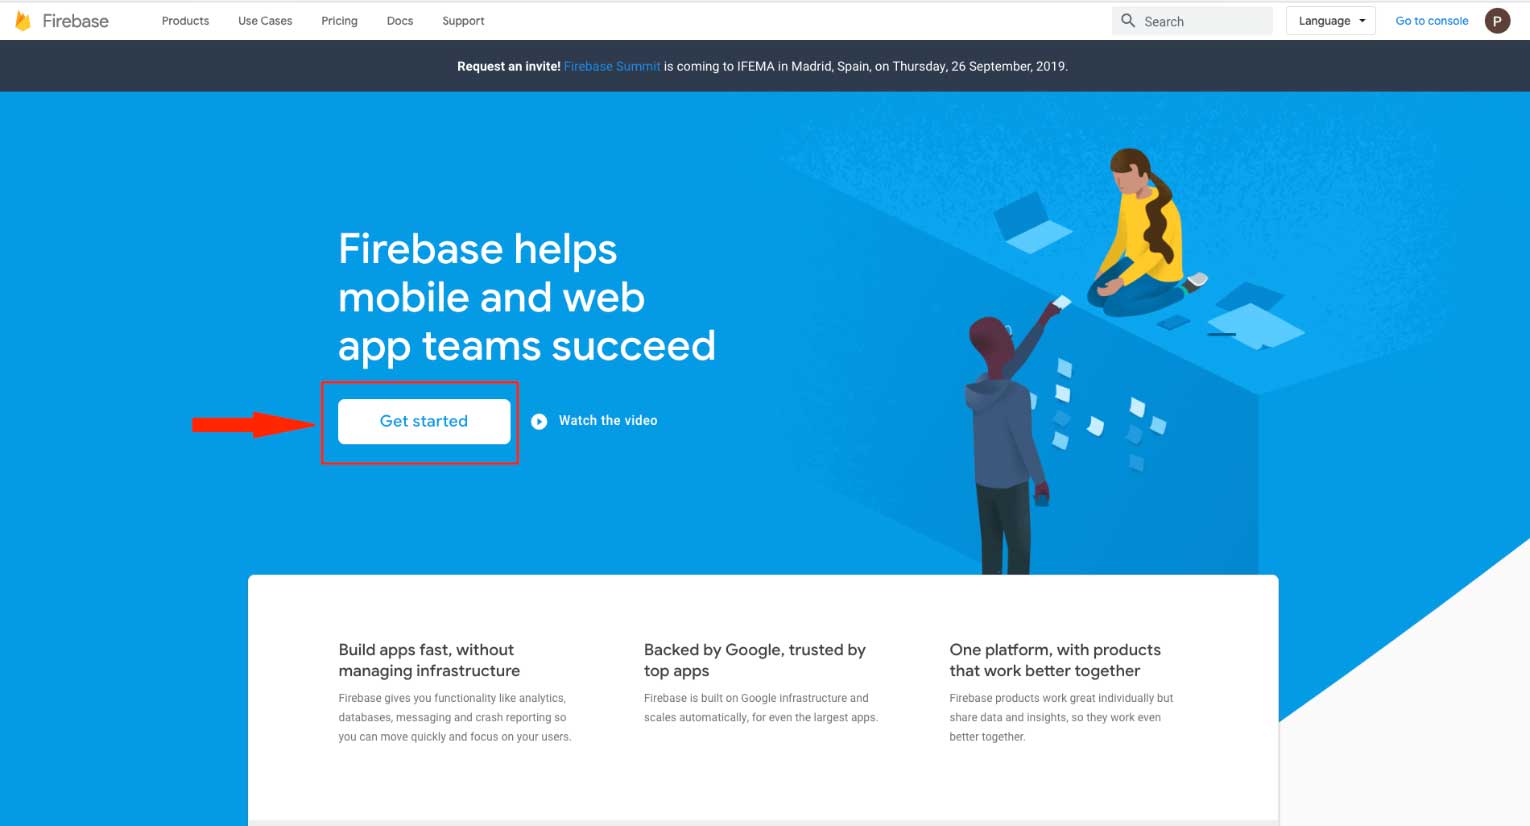 Step 4 : Click on Create a Project
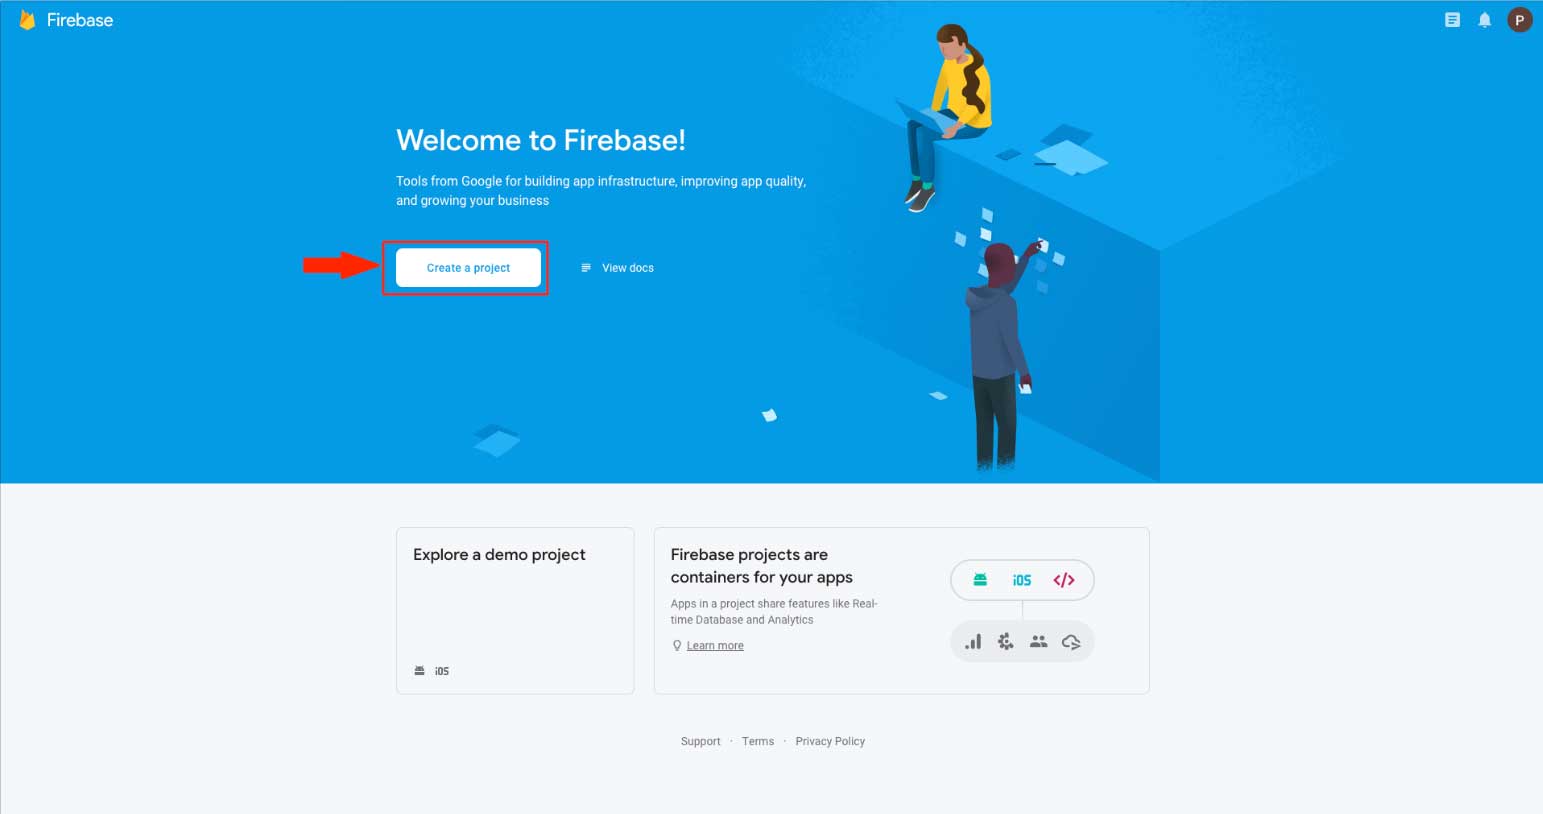 Step 5 : Enter your project name
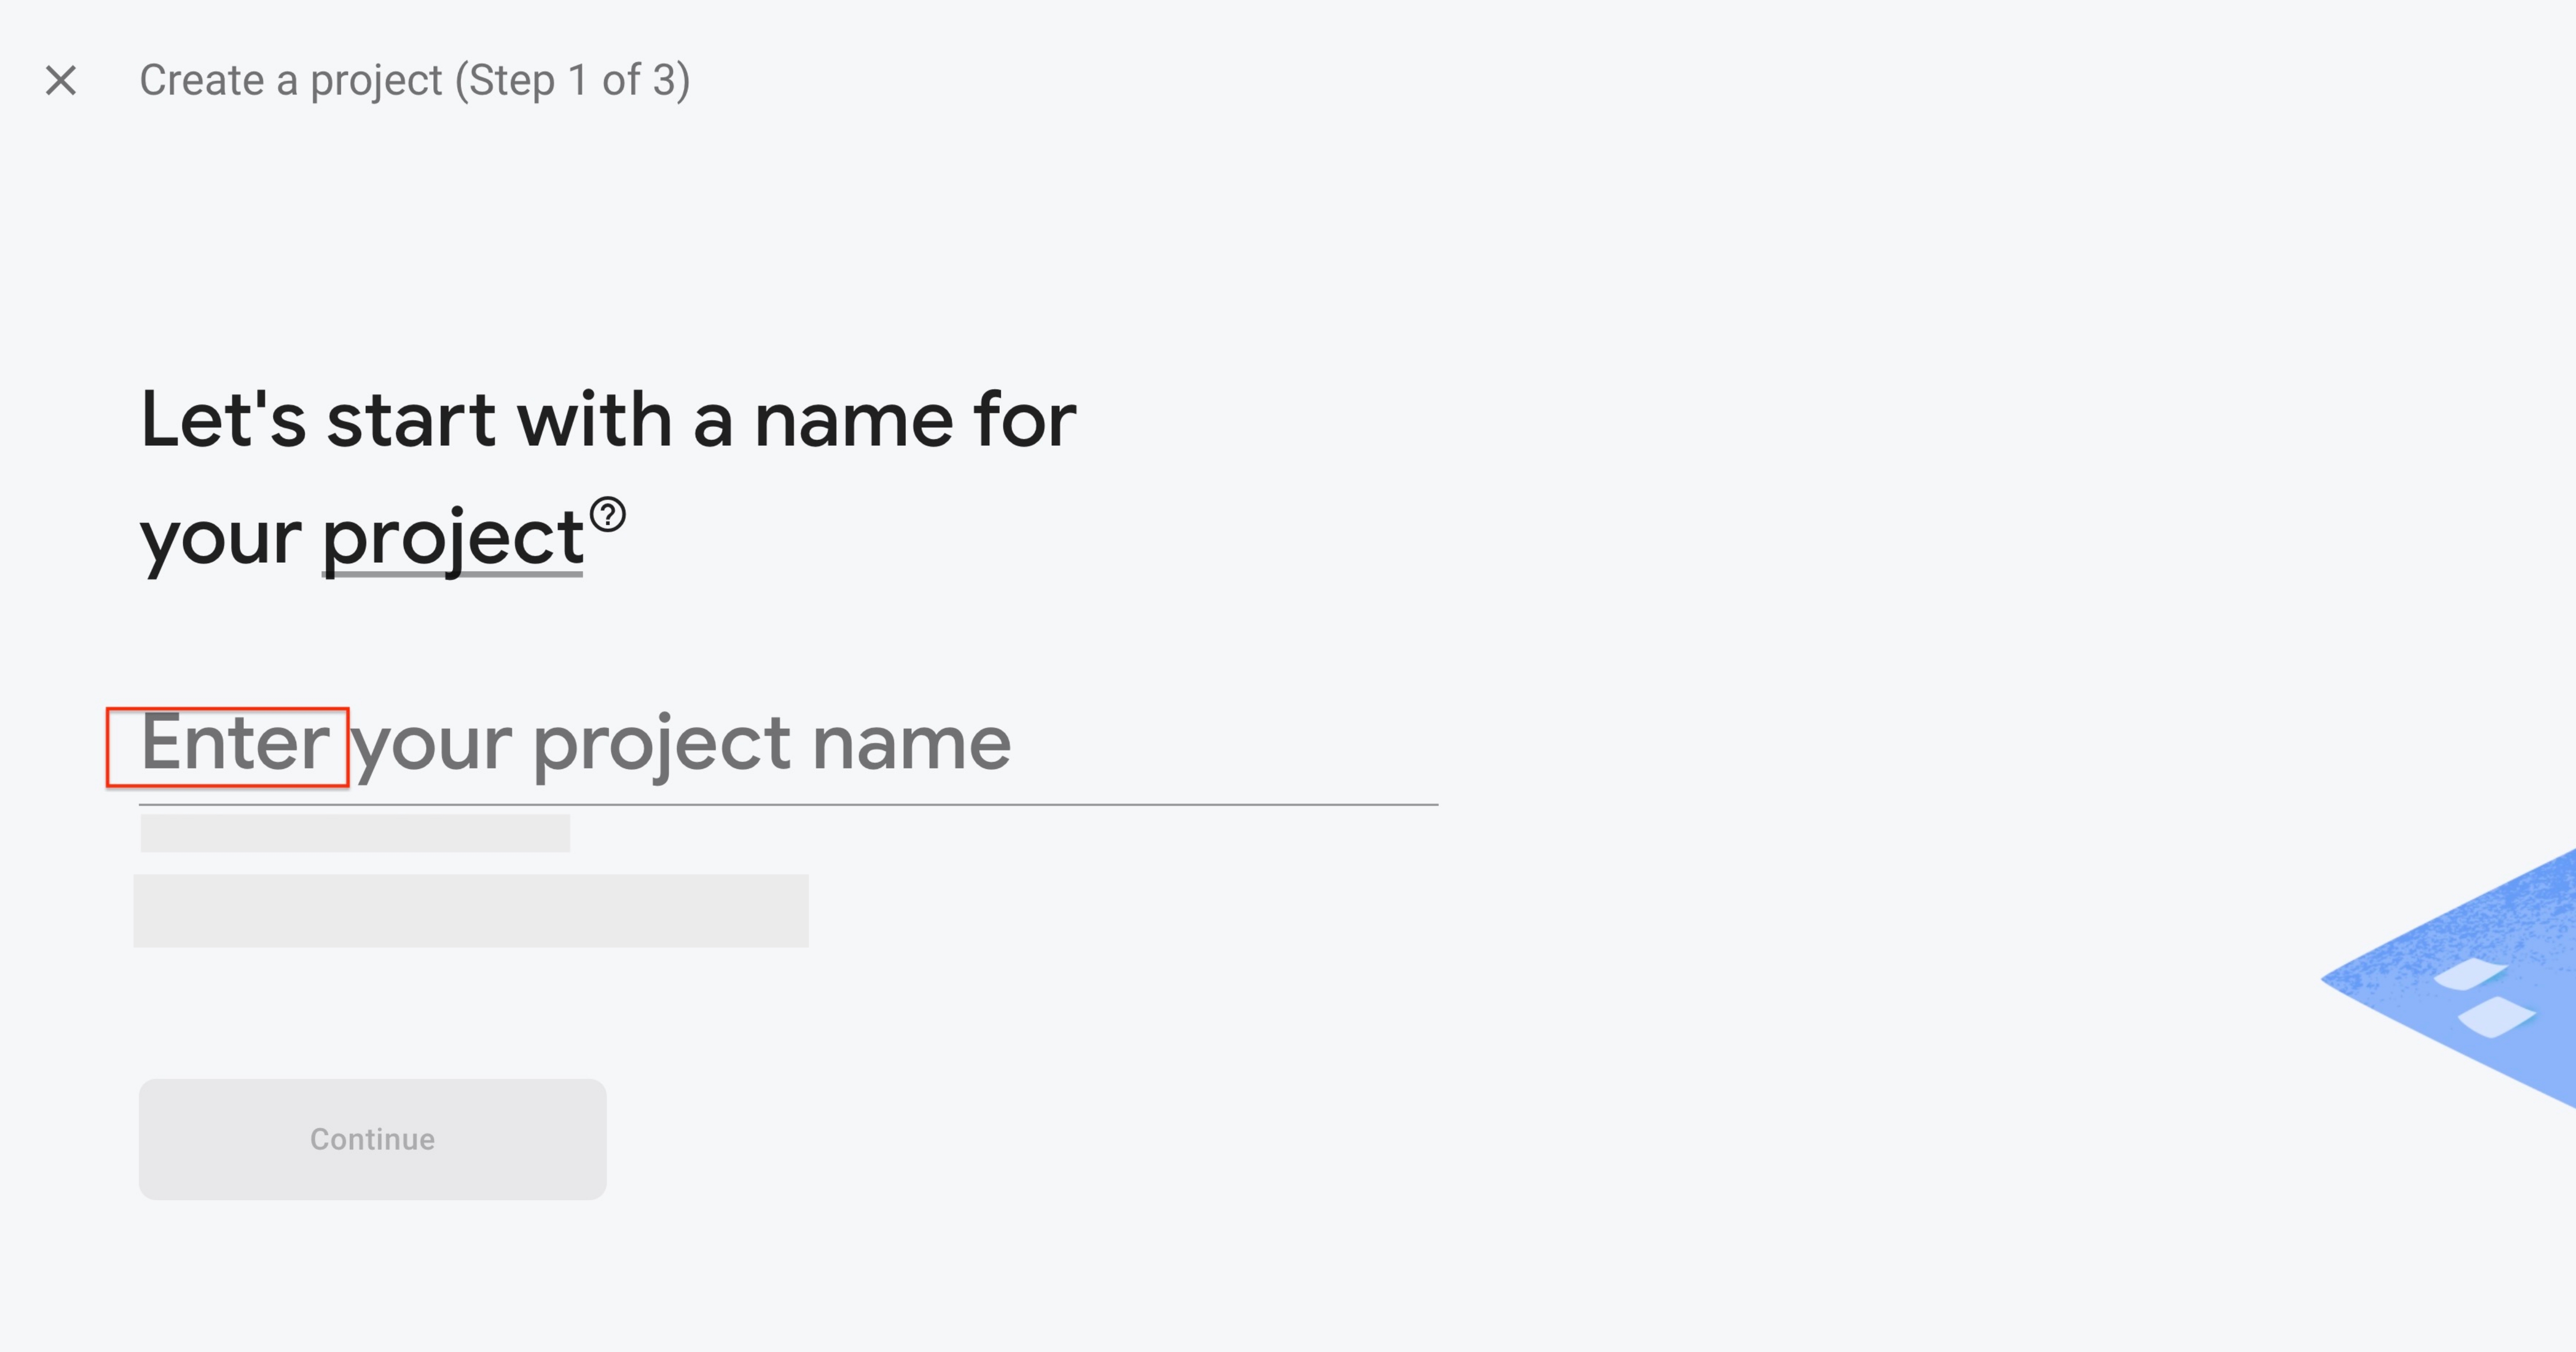 Step 6 : Click on Continue
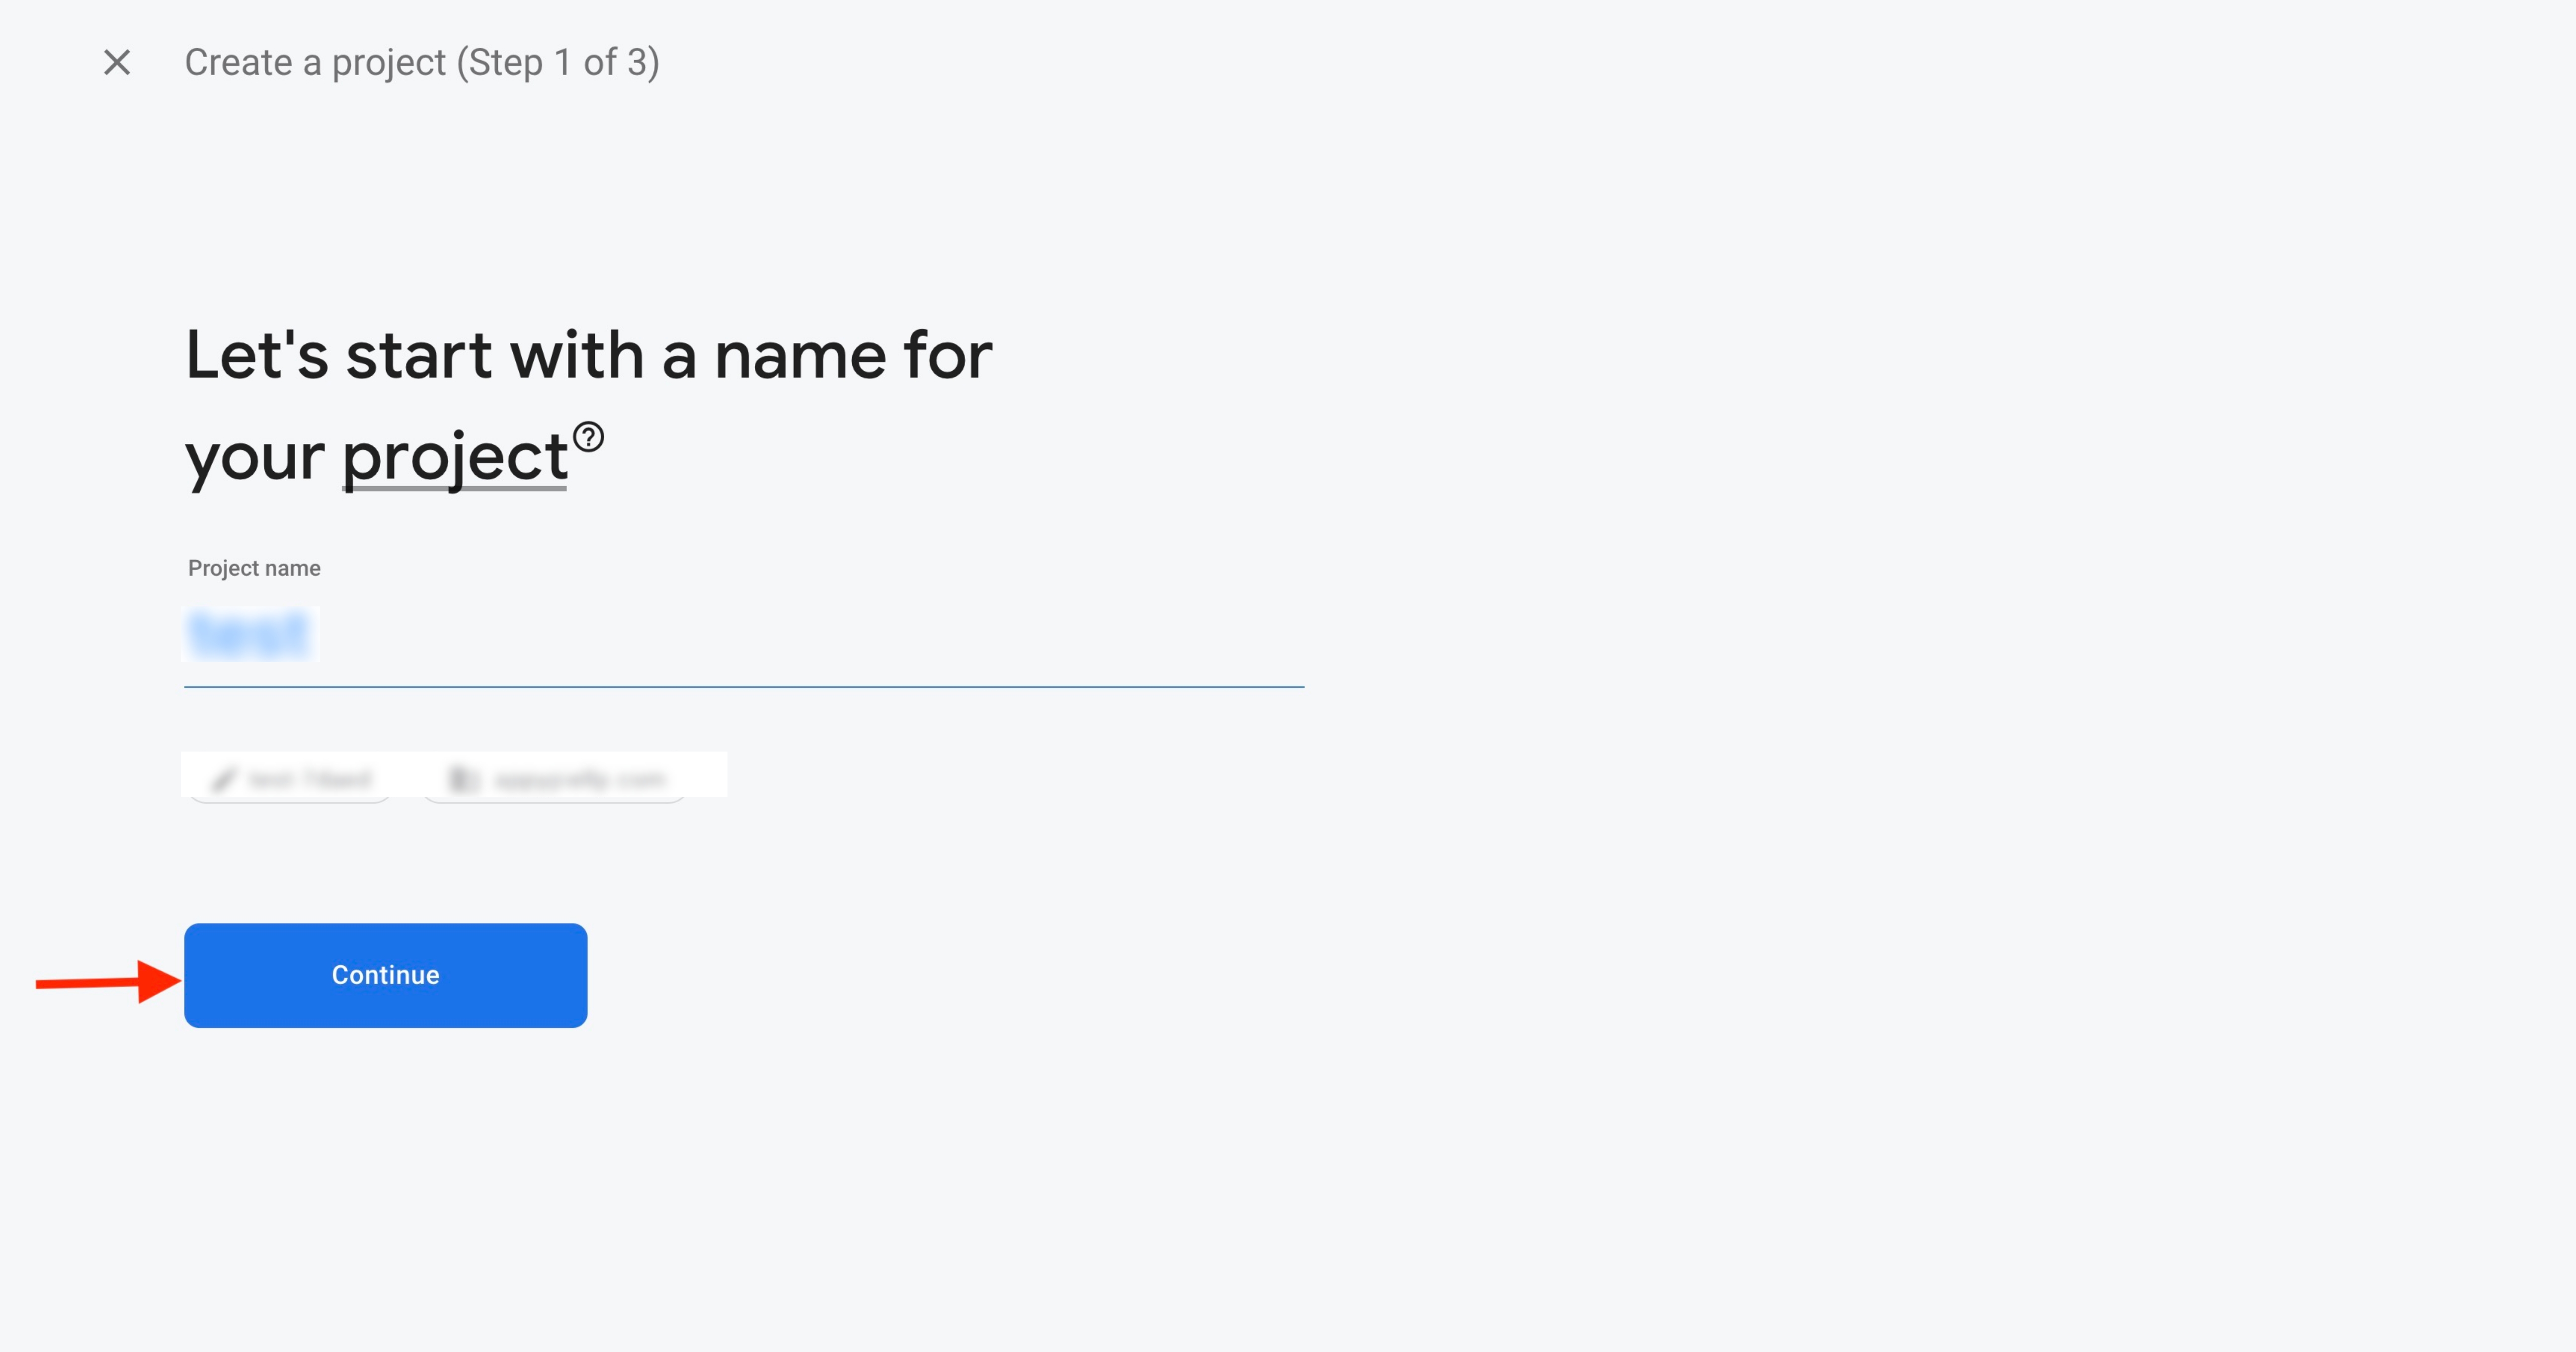
Step 7 : Enable Google Analytics for your project and click on Continue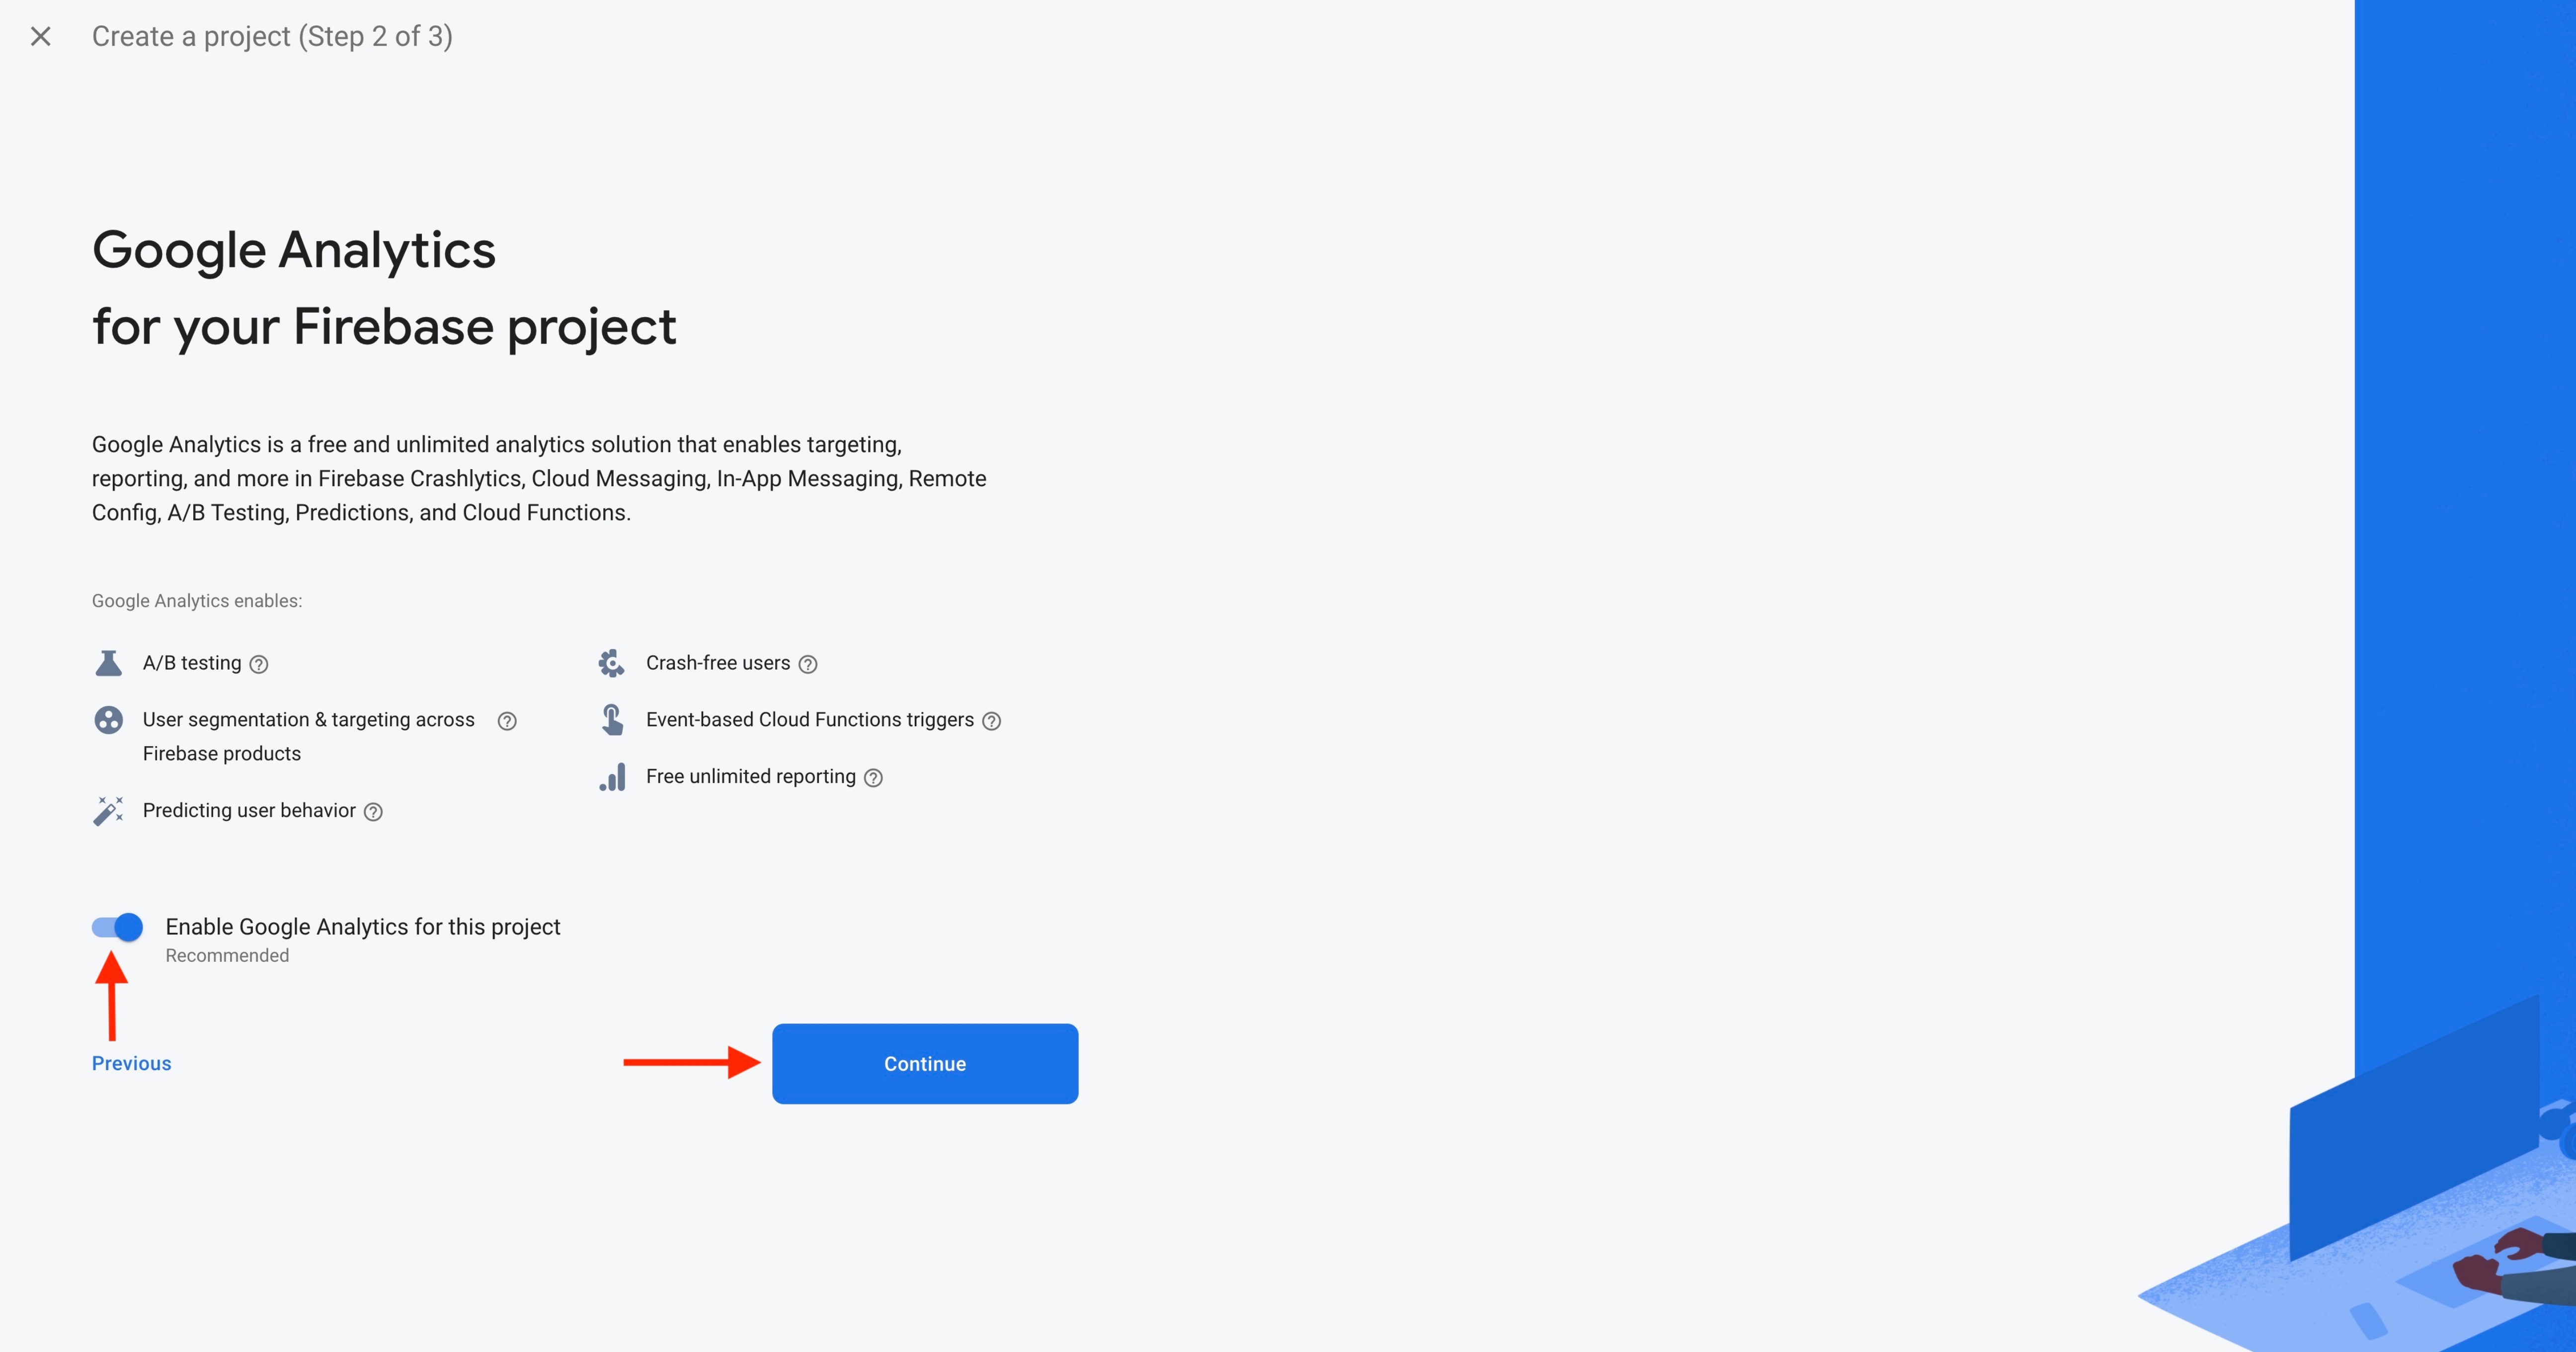 Step 8 : Open Configure Google Analytics dropdown menu
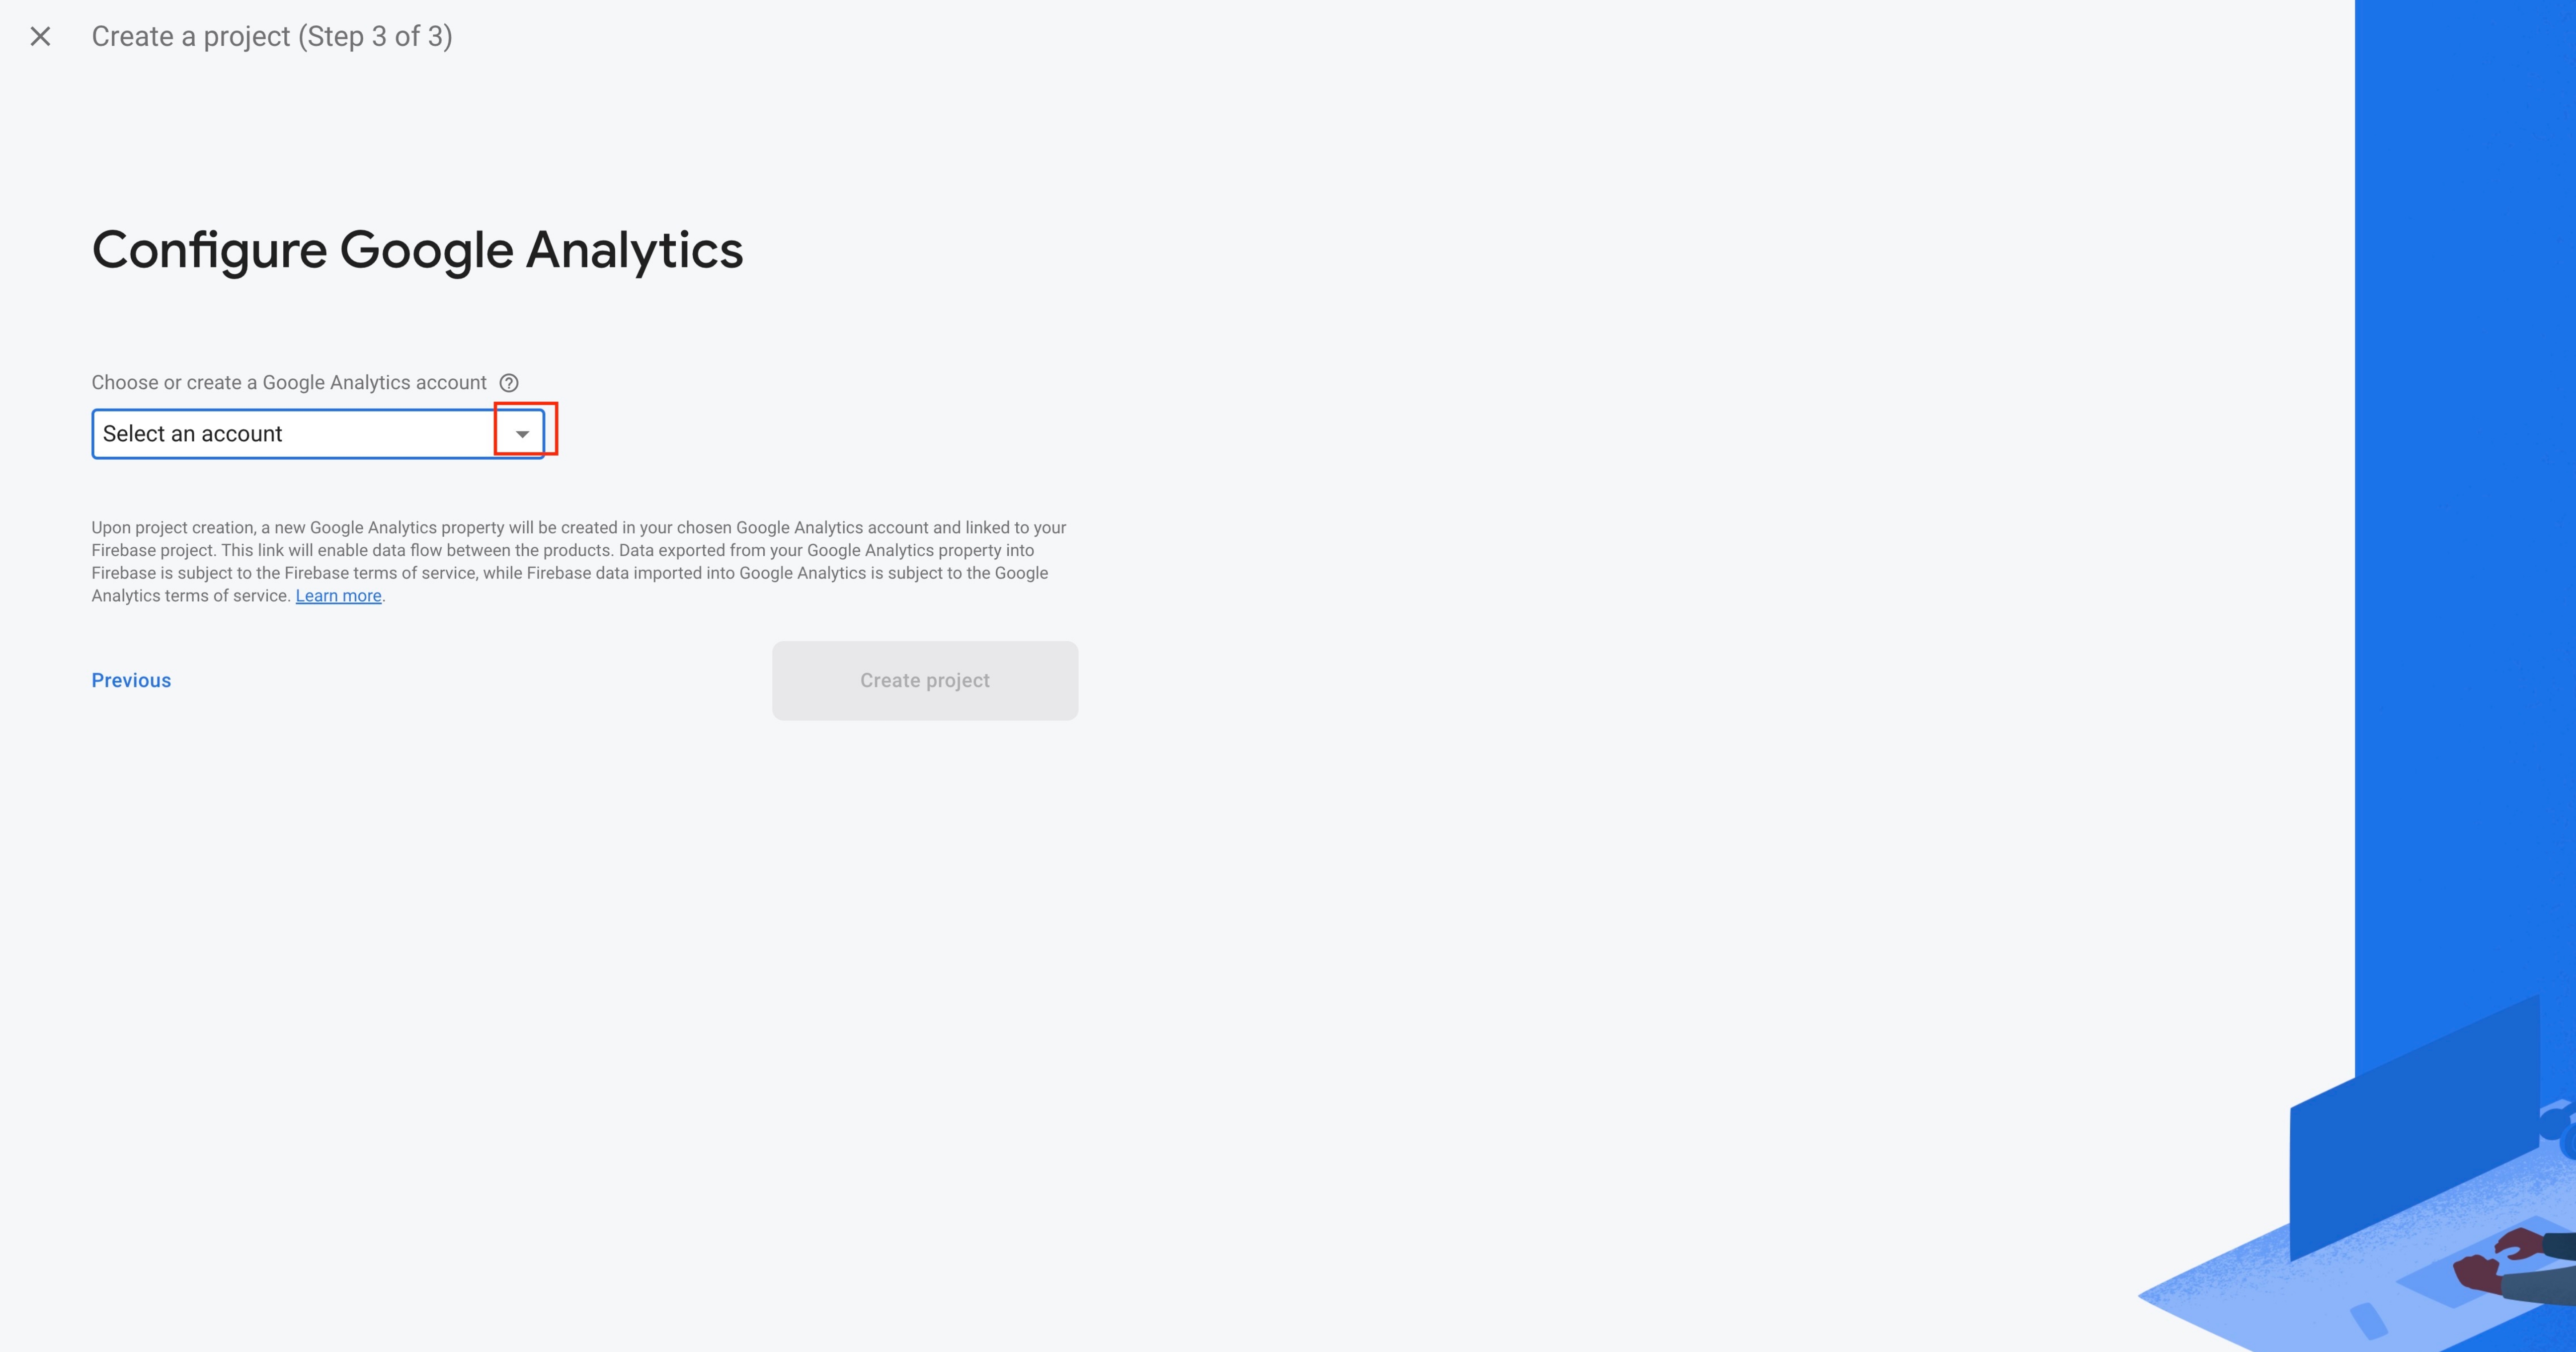
Step 9 : Select the Default Account for Firebase from the dropdown menu or create a new account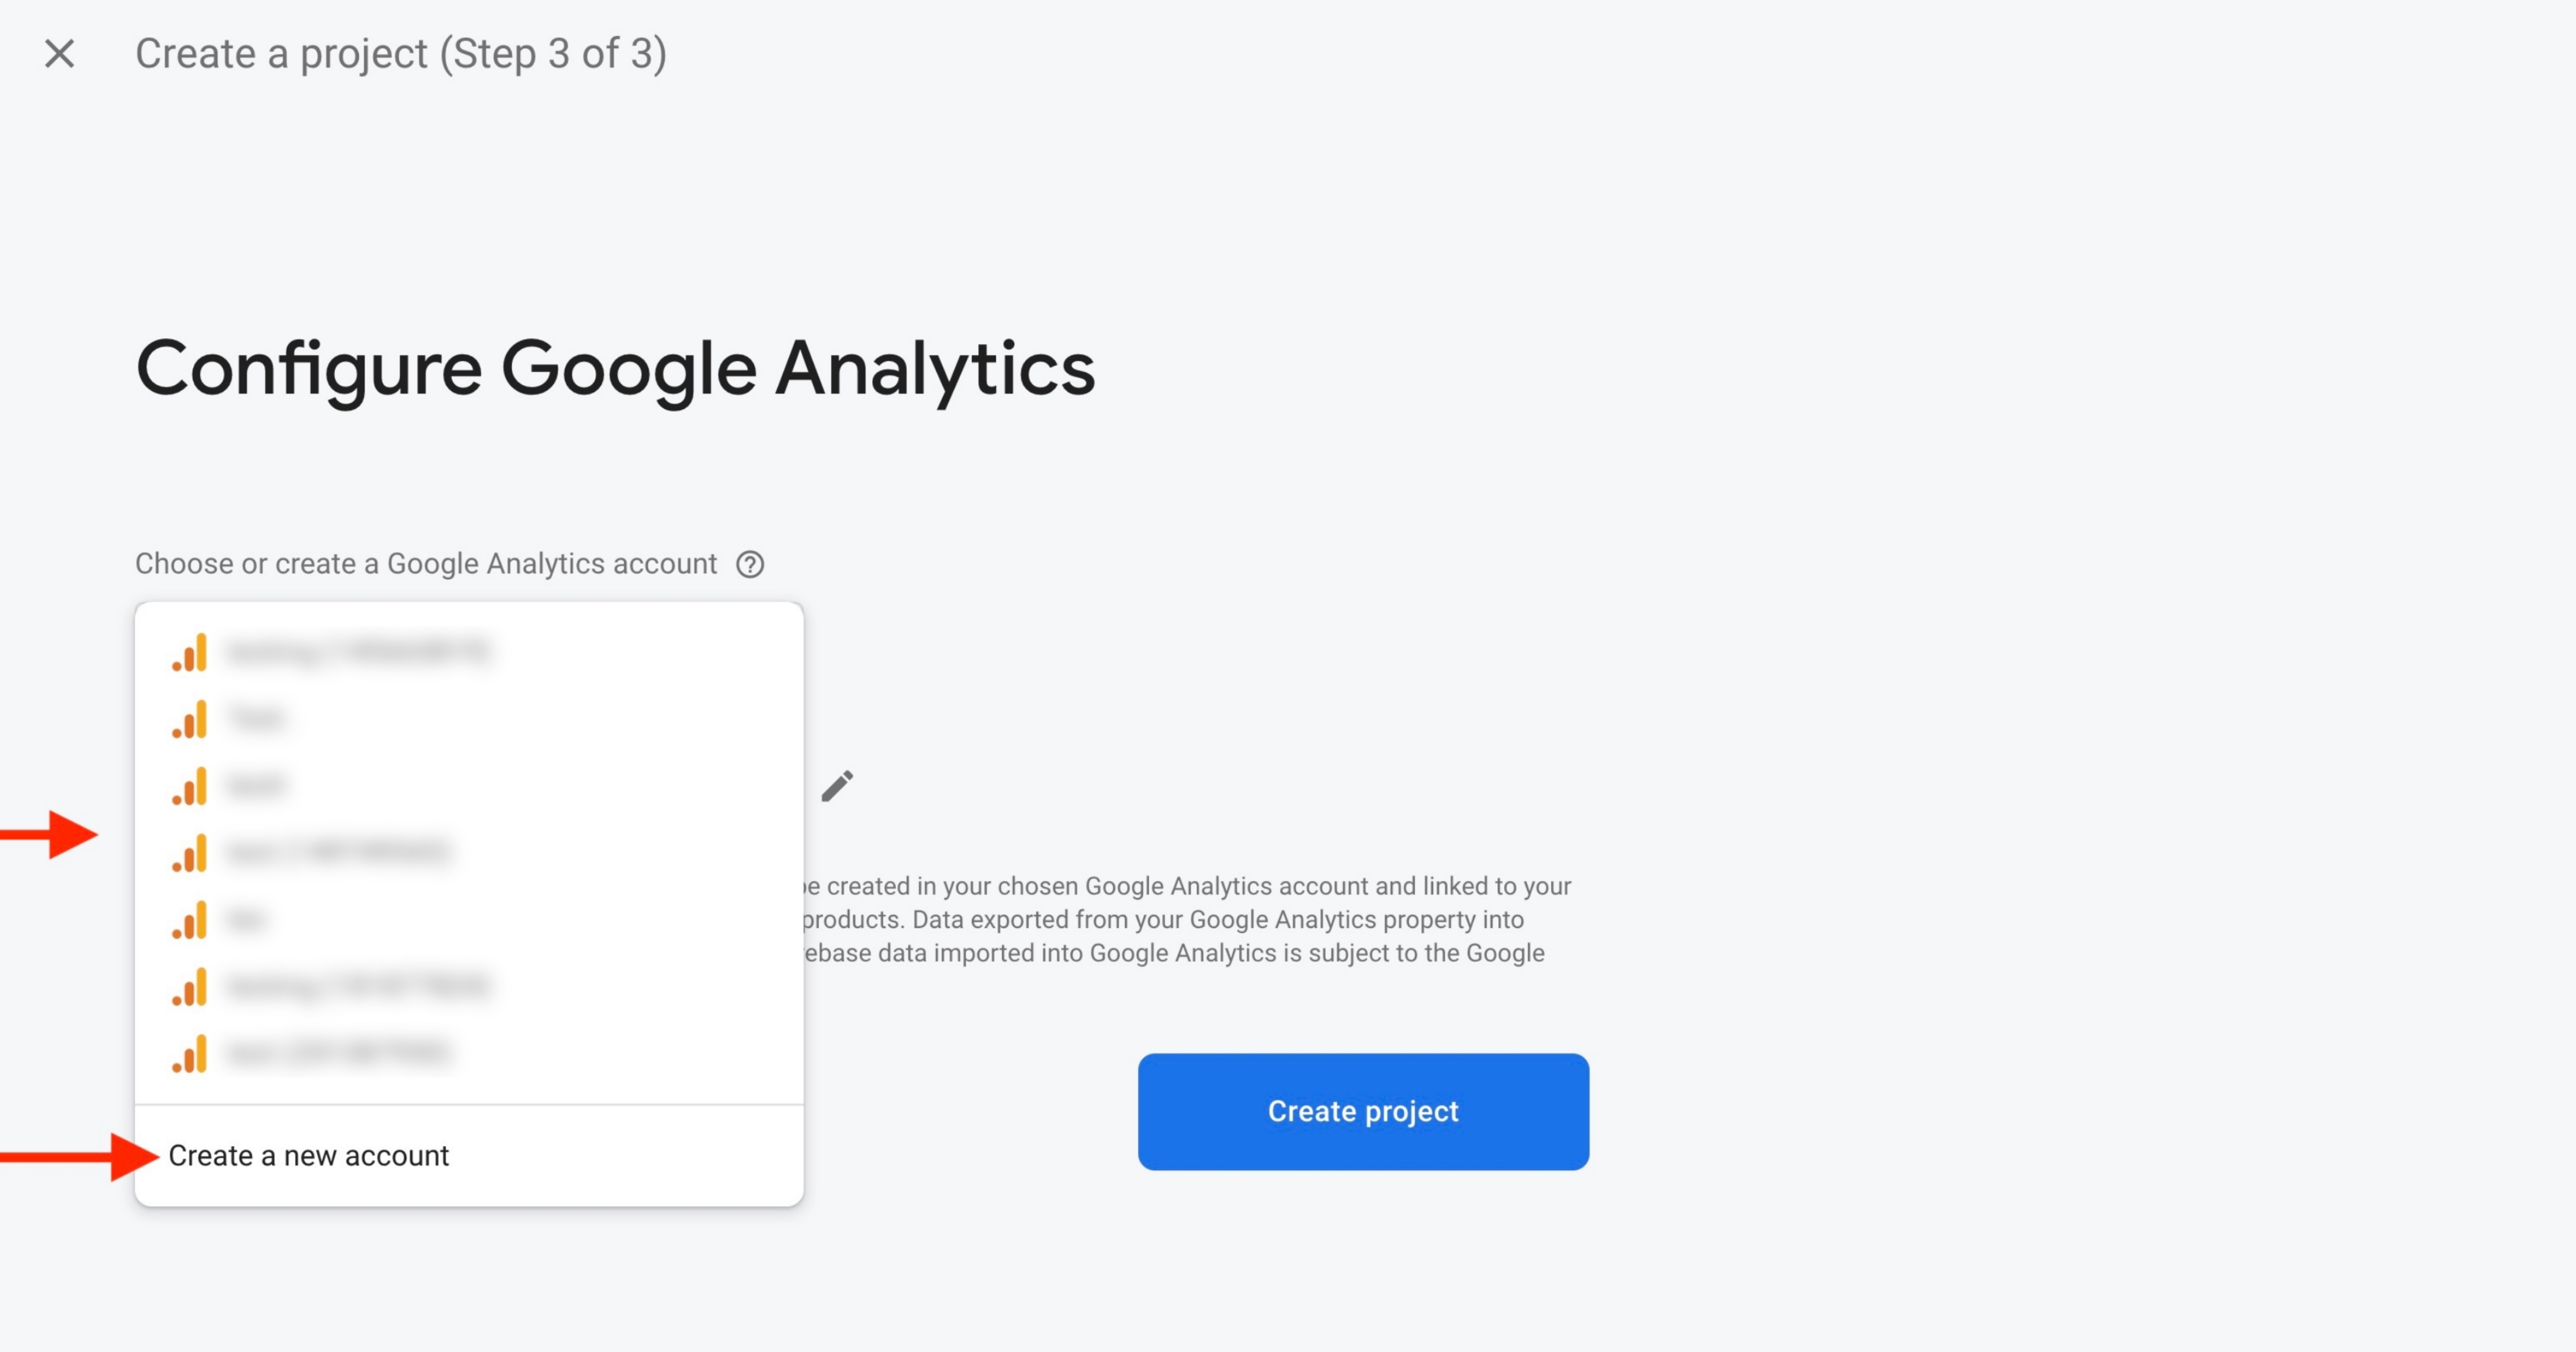
Step 10 : Click on Create Project.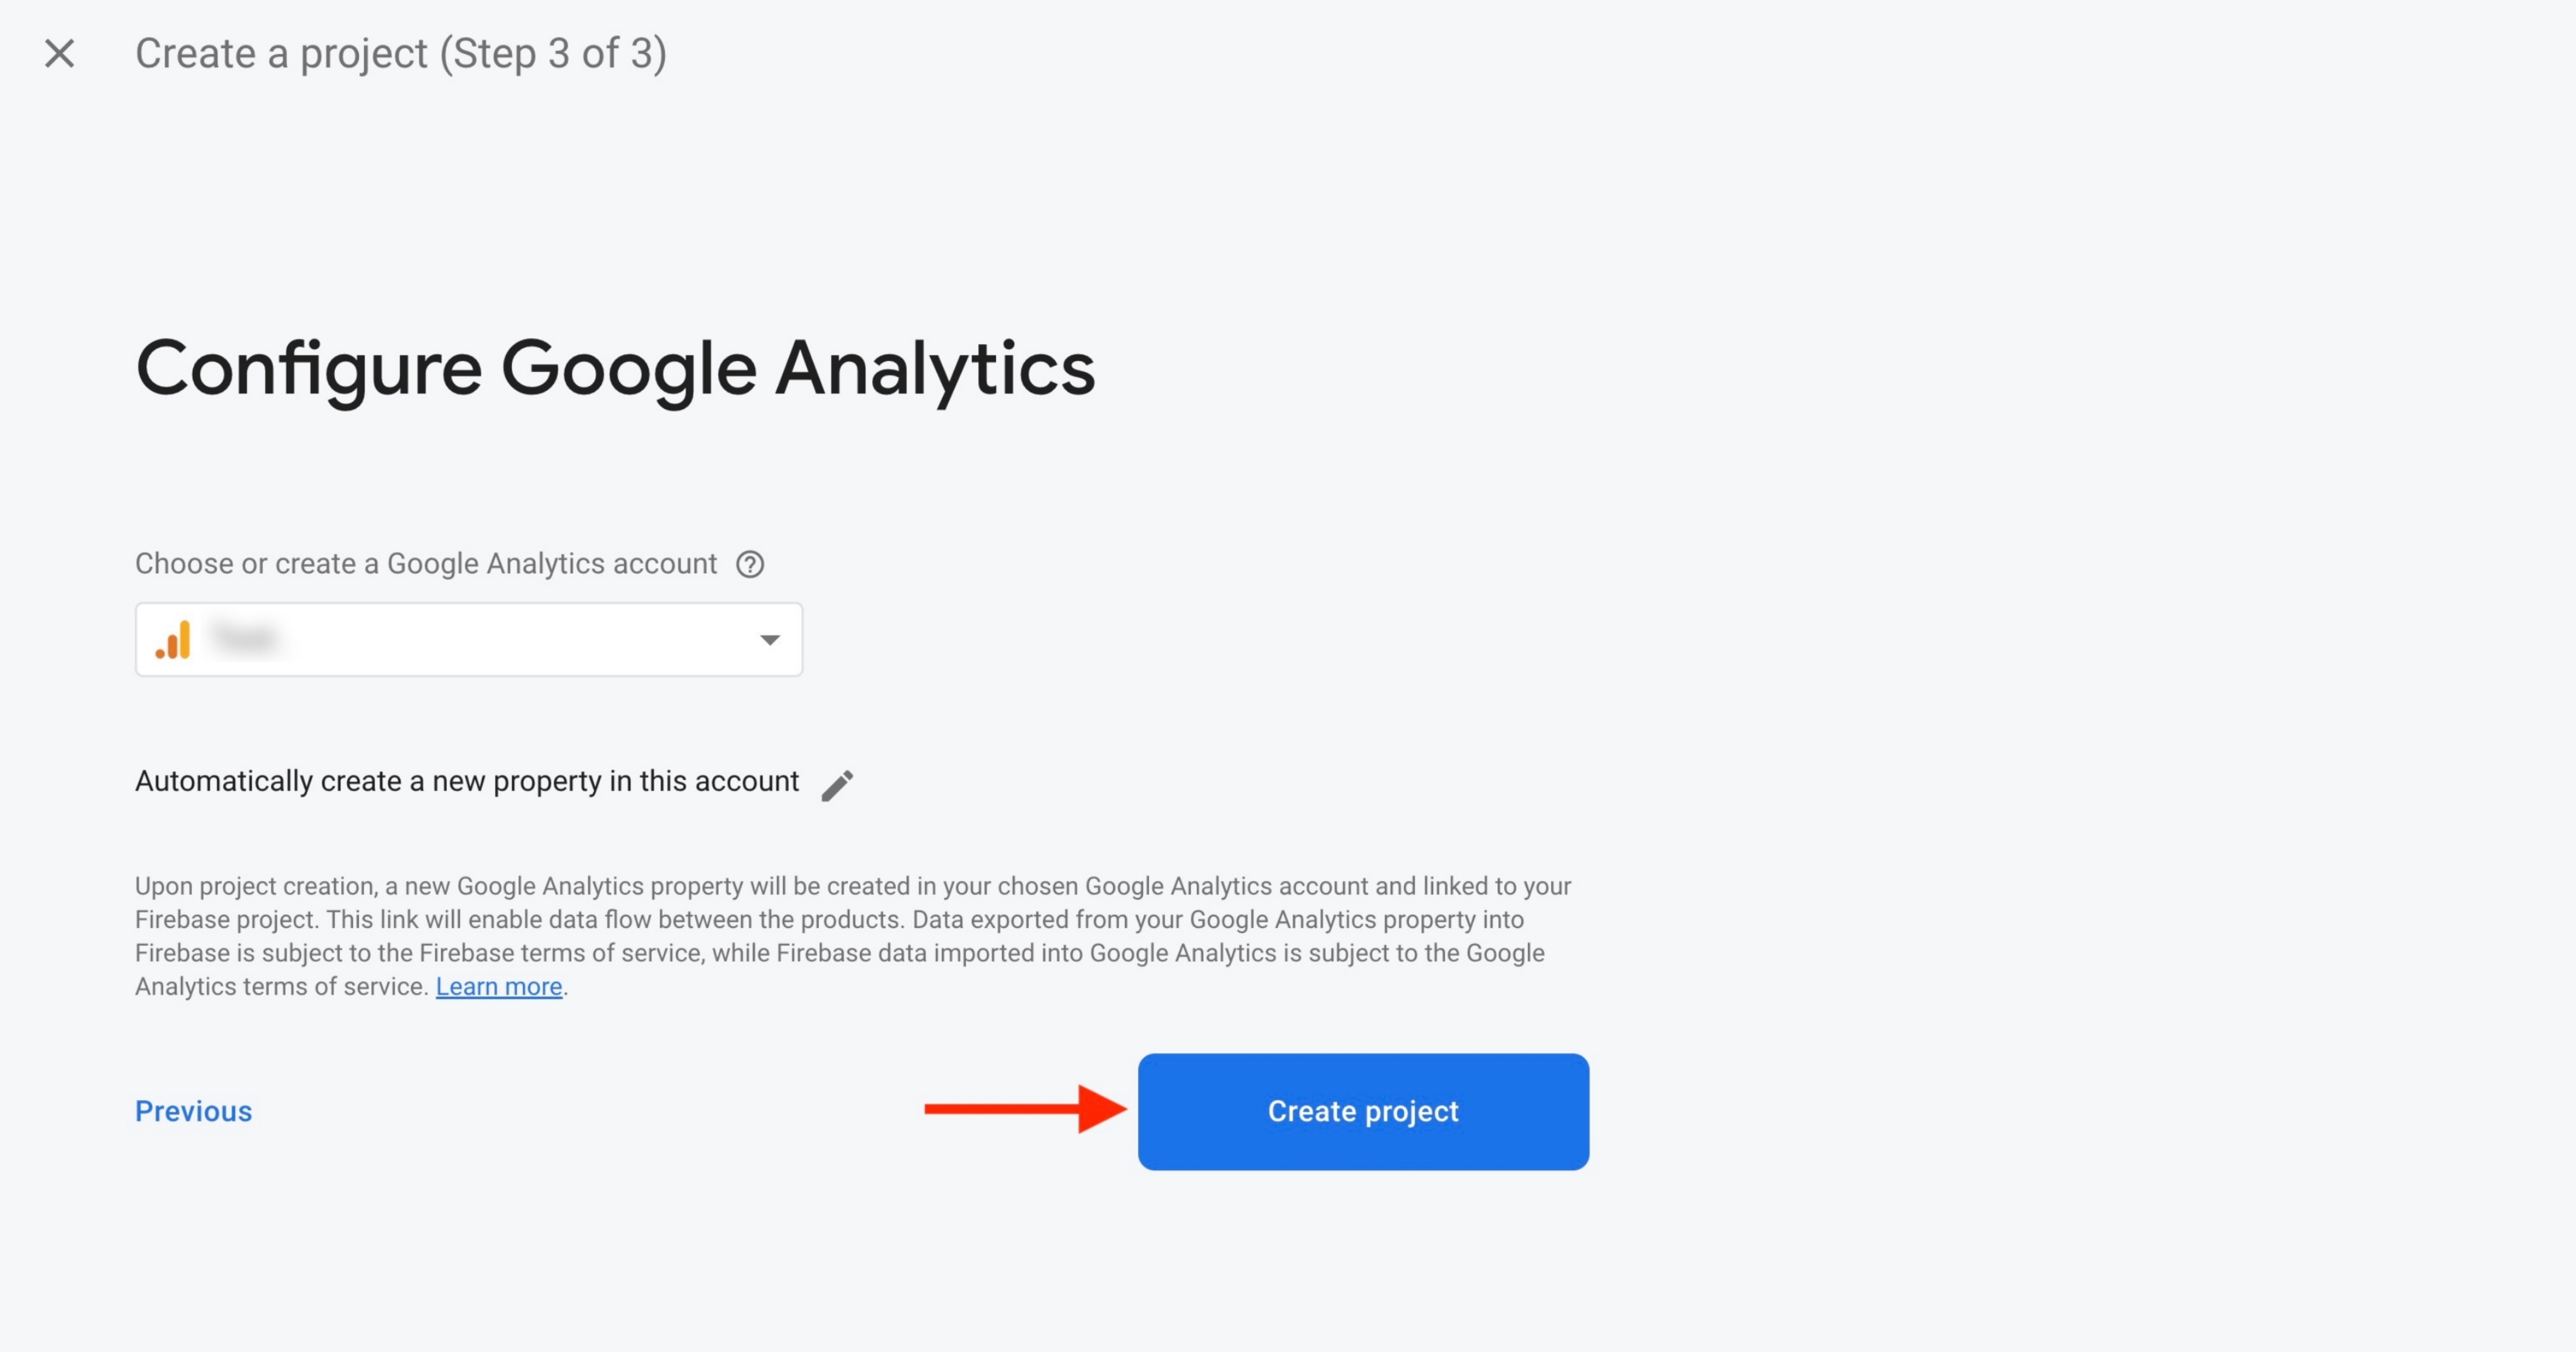
Step 11 : Click on Continue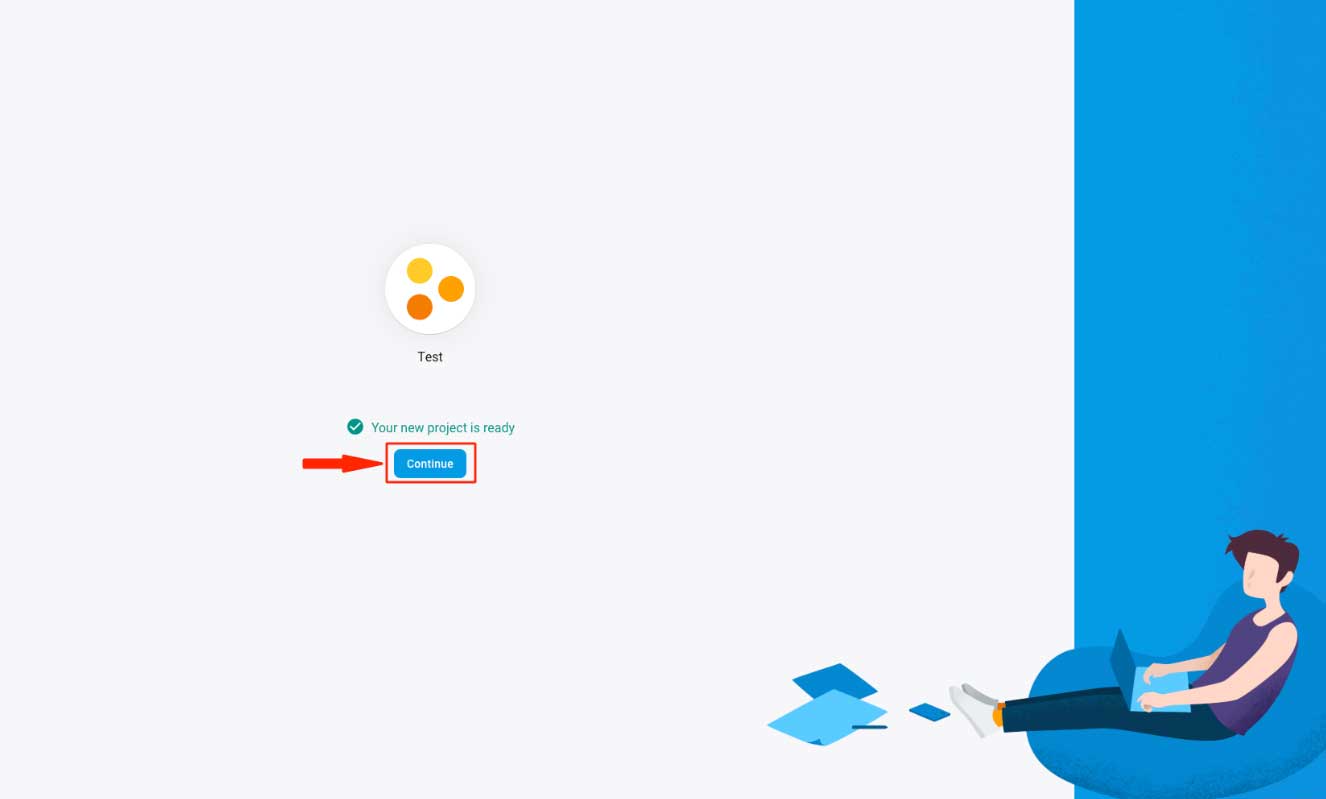 Step 12 : Click on Add Firebase to your web app
 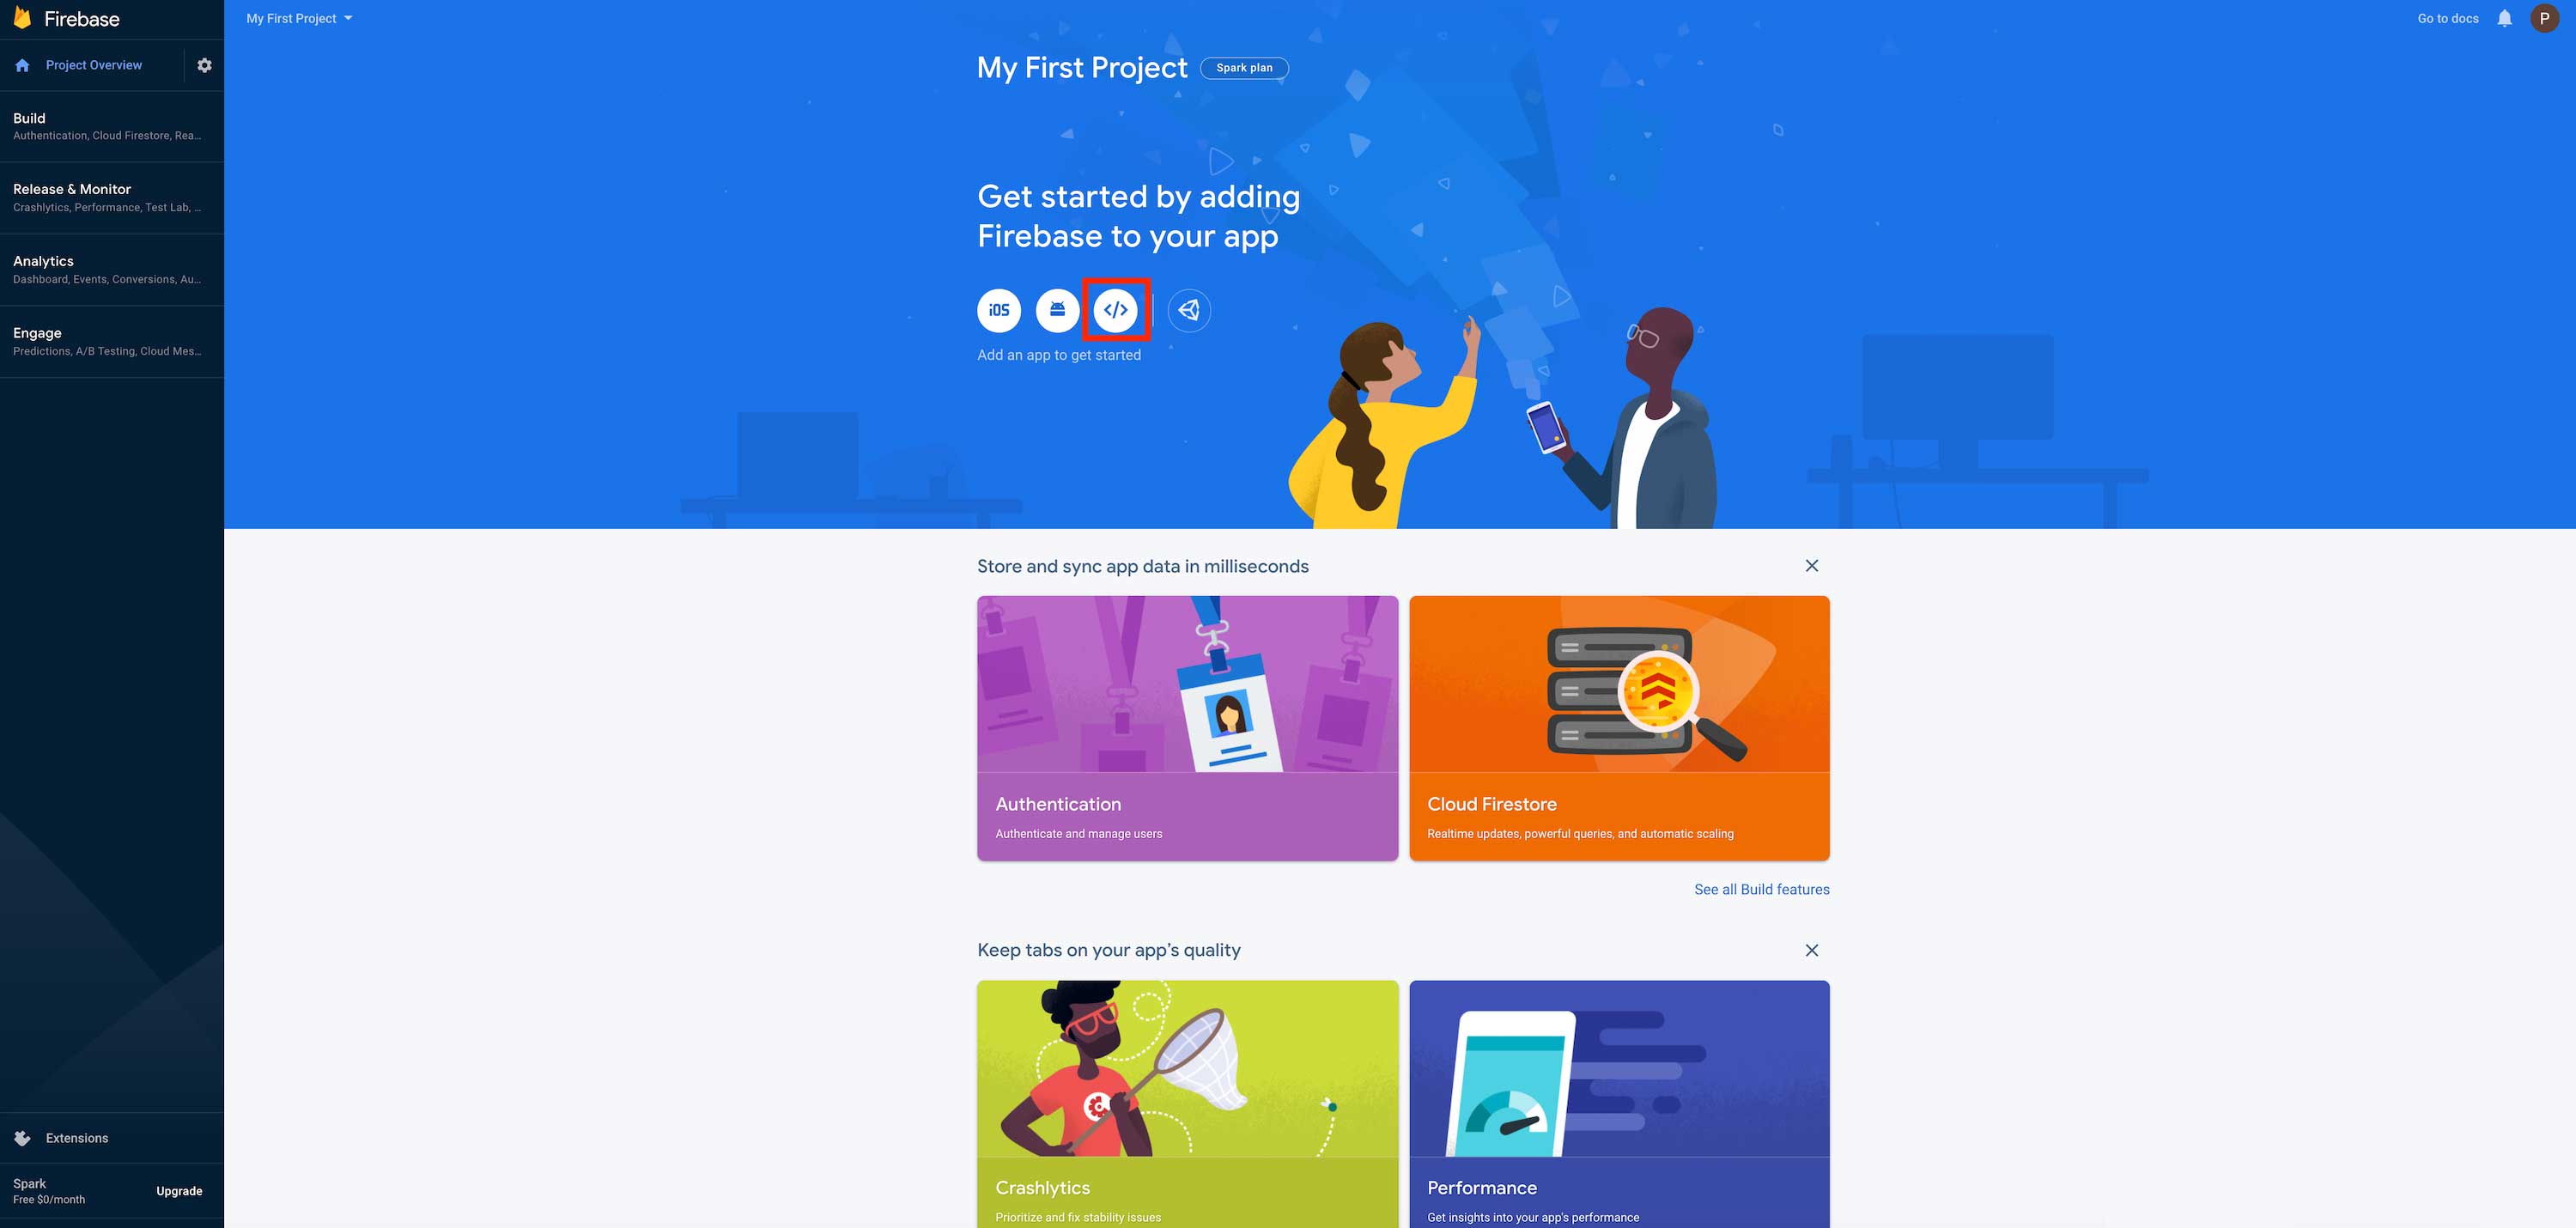 Step 13 : Enter App nickname
 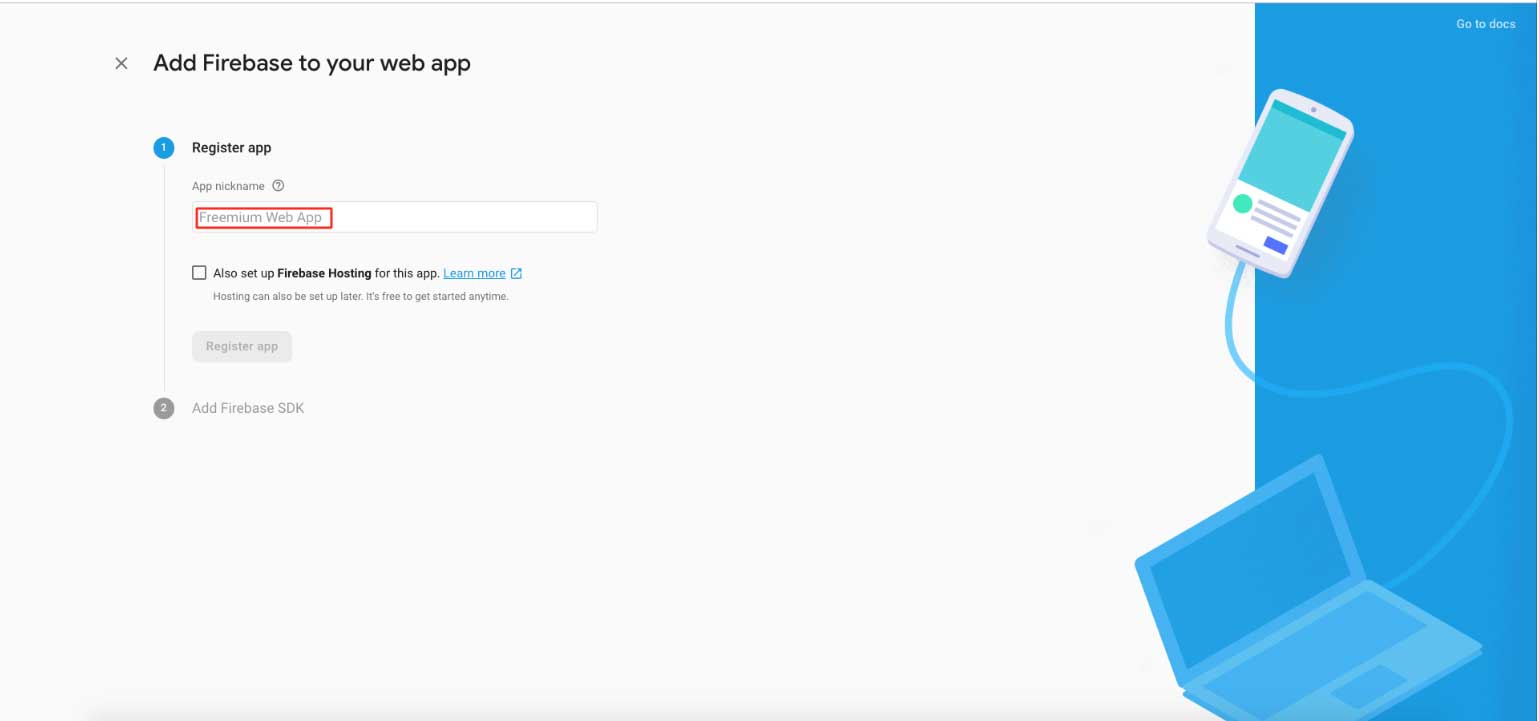 Step 14 : Click on Register app
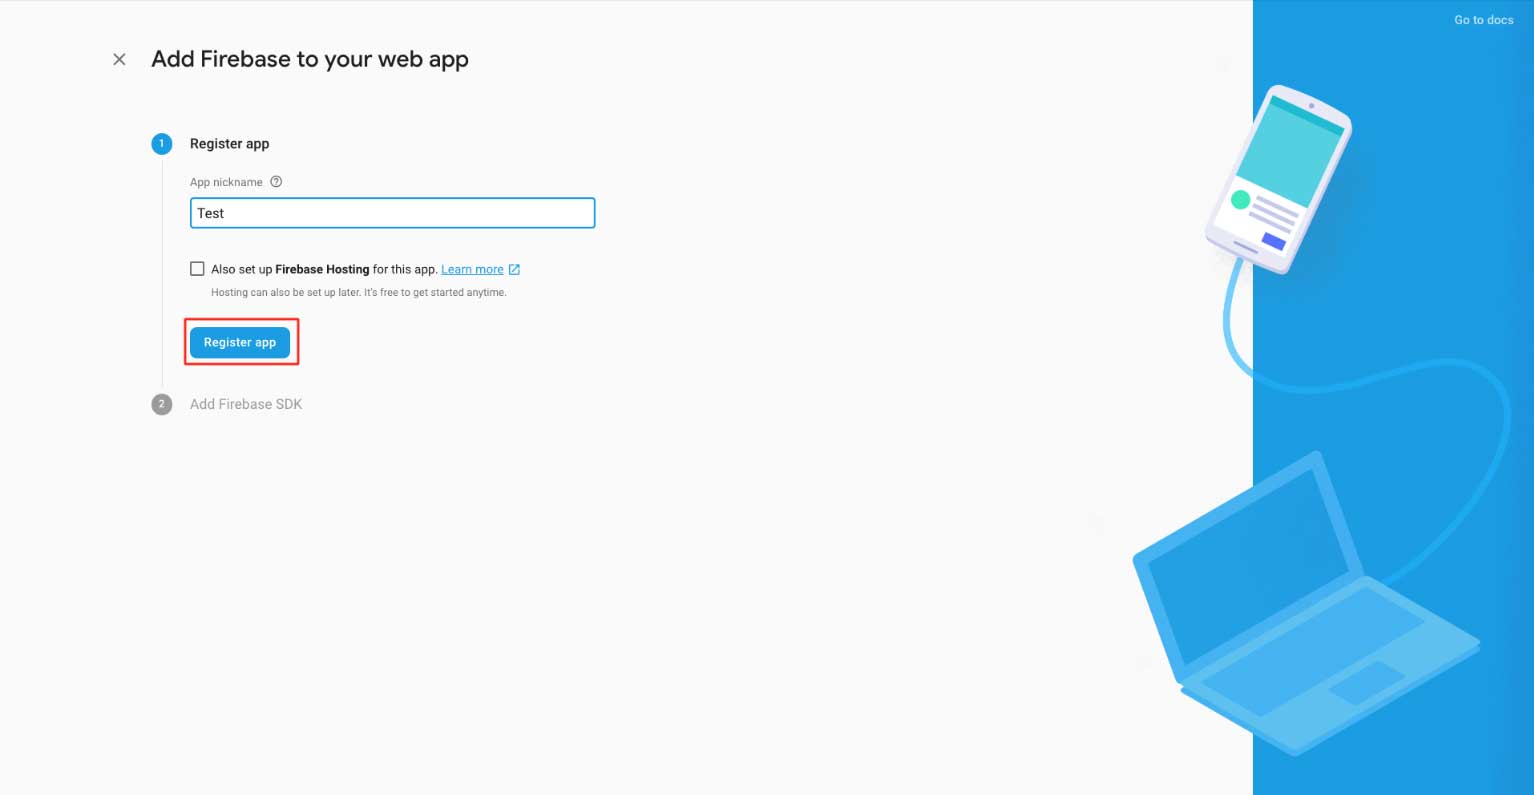 Step 15 : Click on Continue to Console
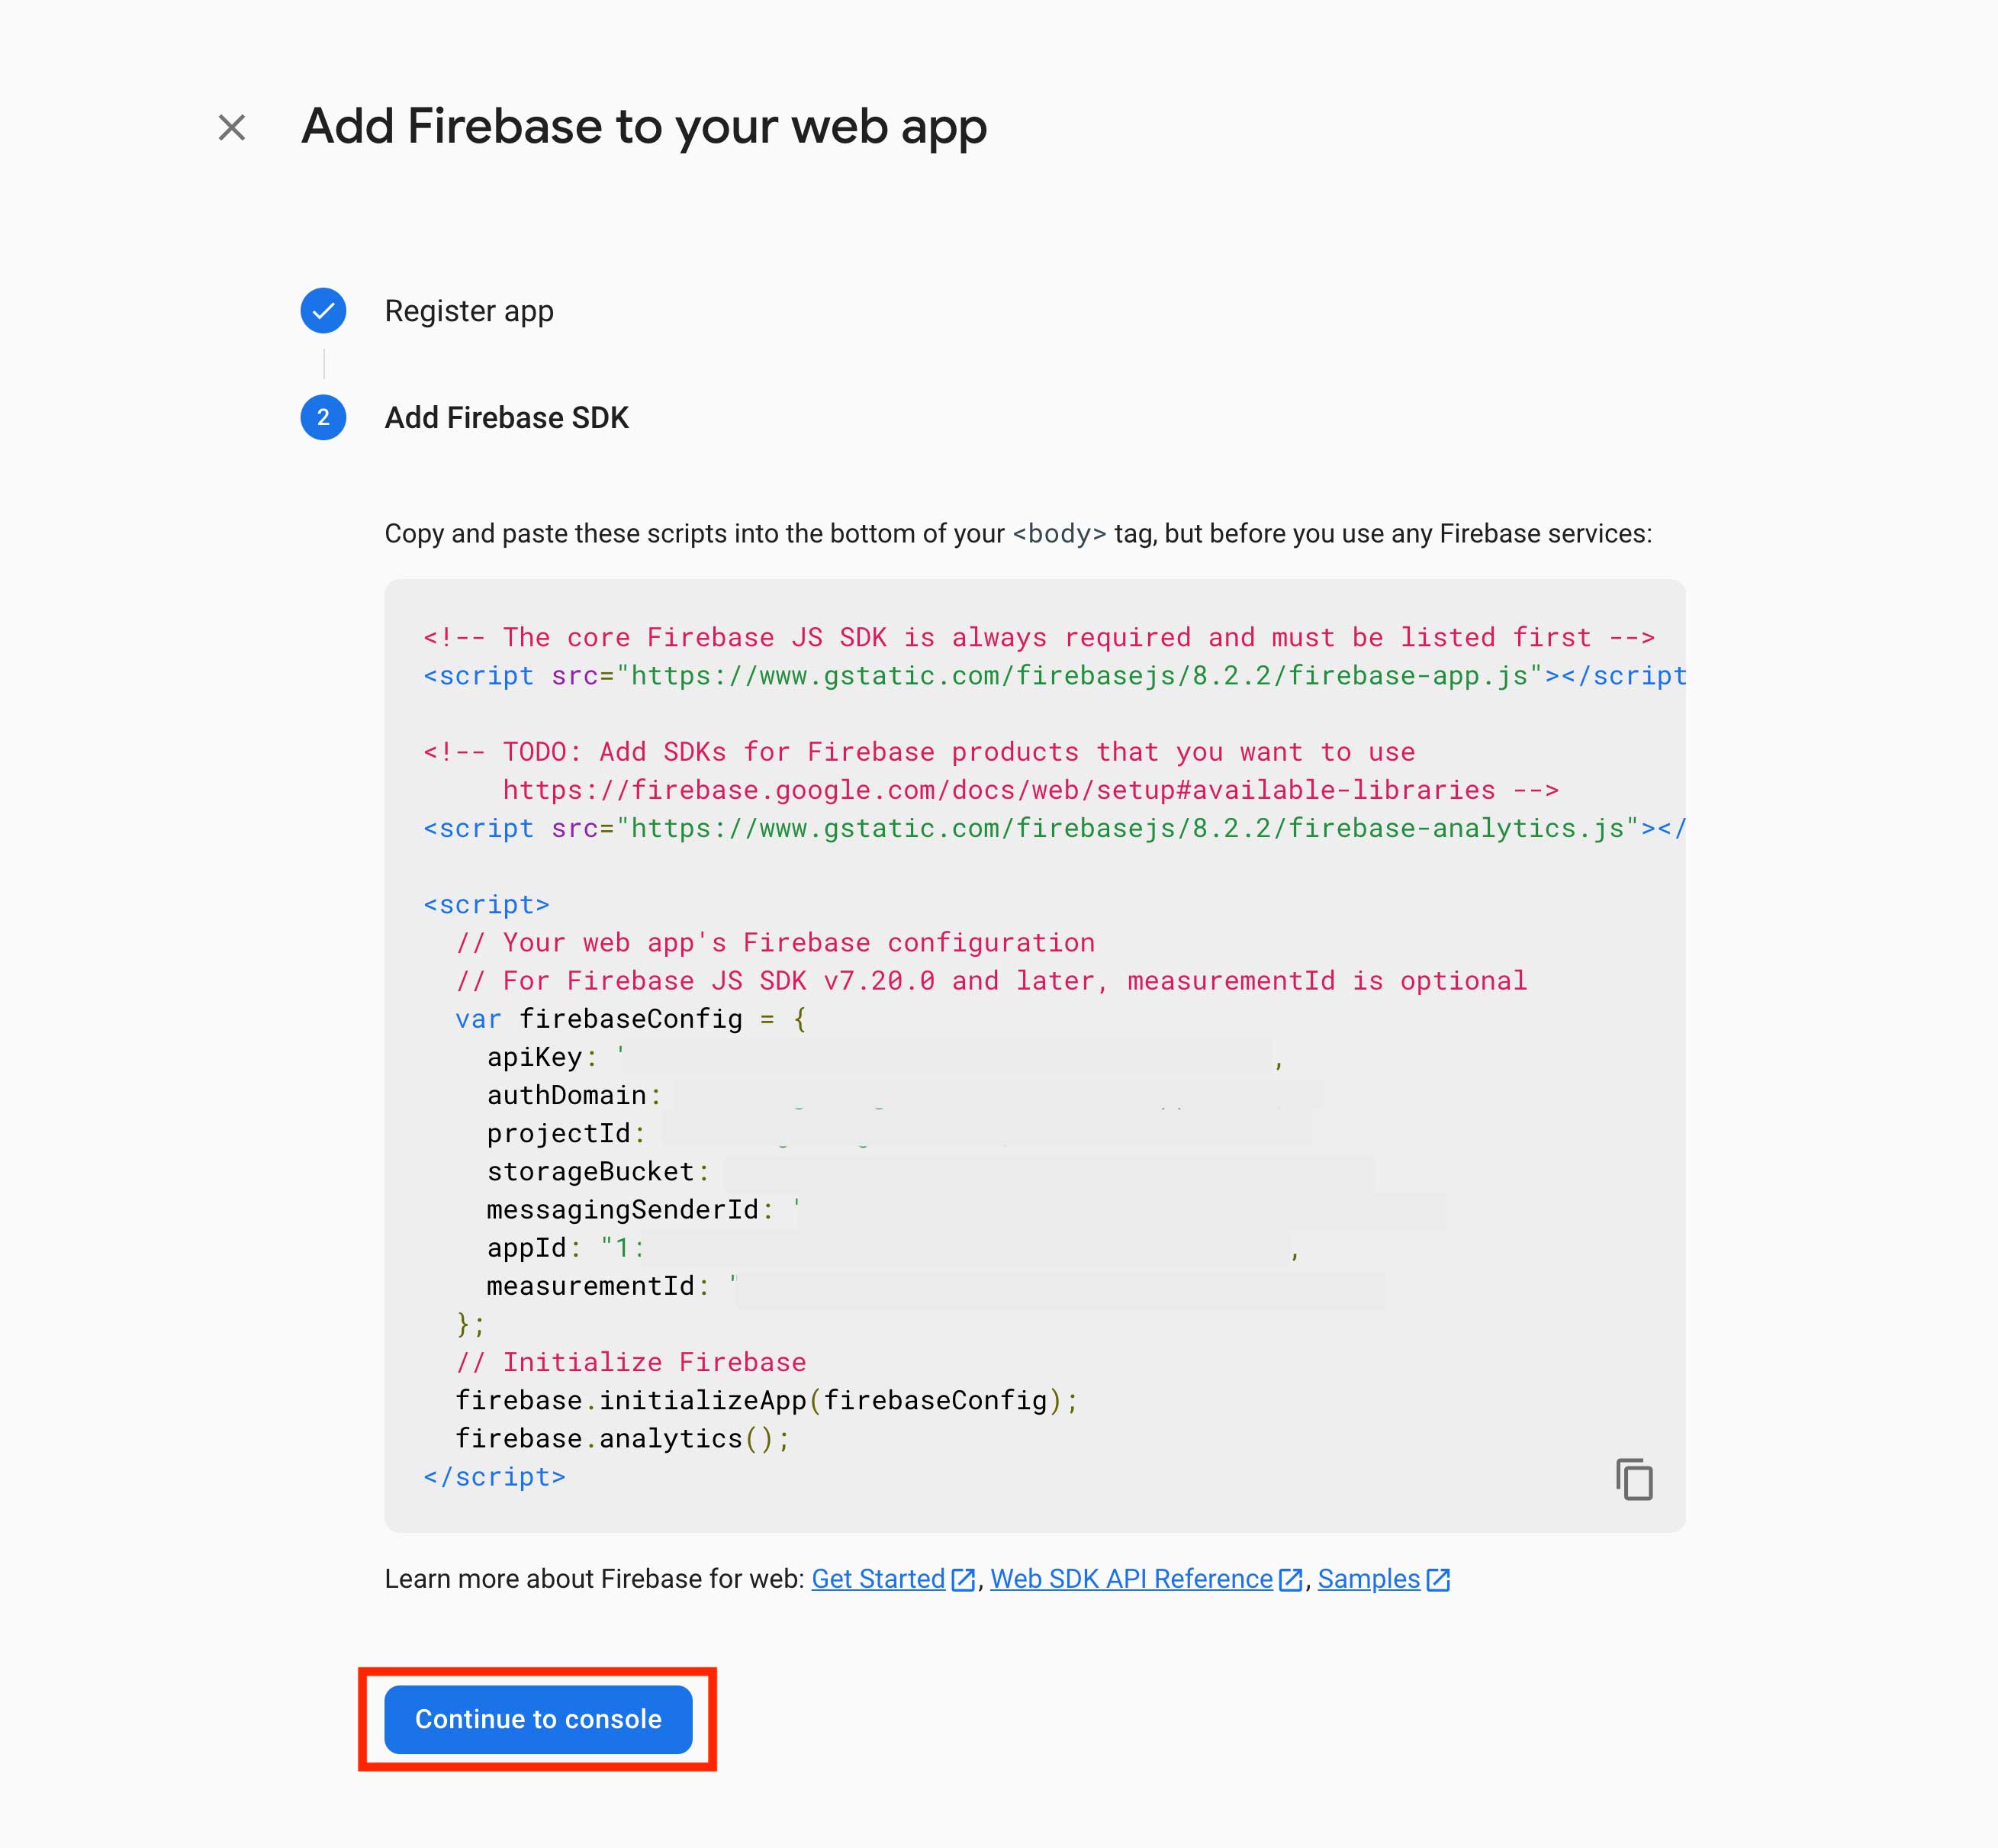 Step 16 : Click on Build menu
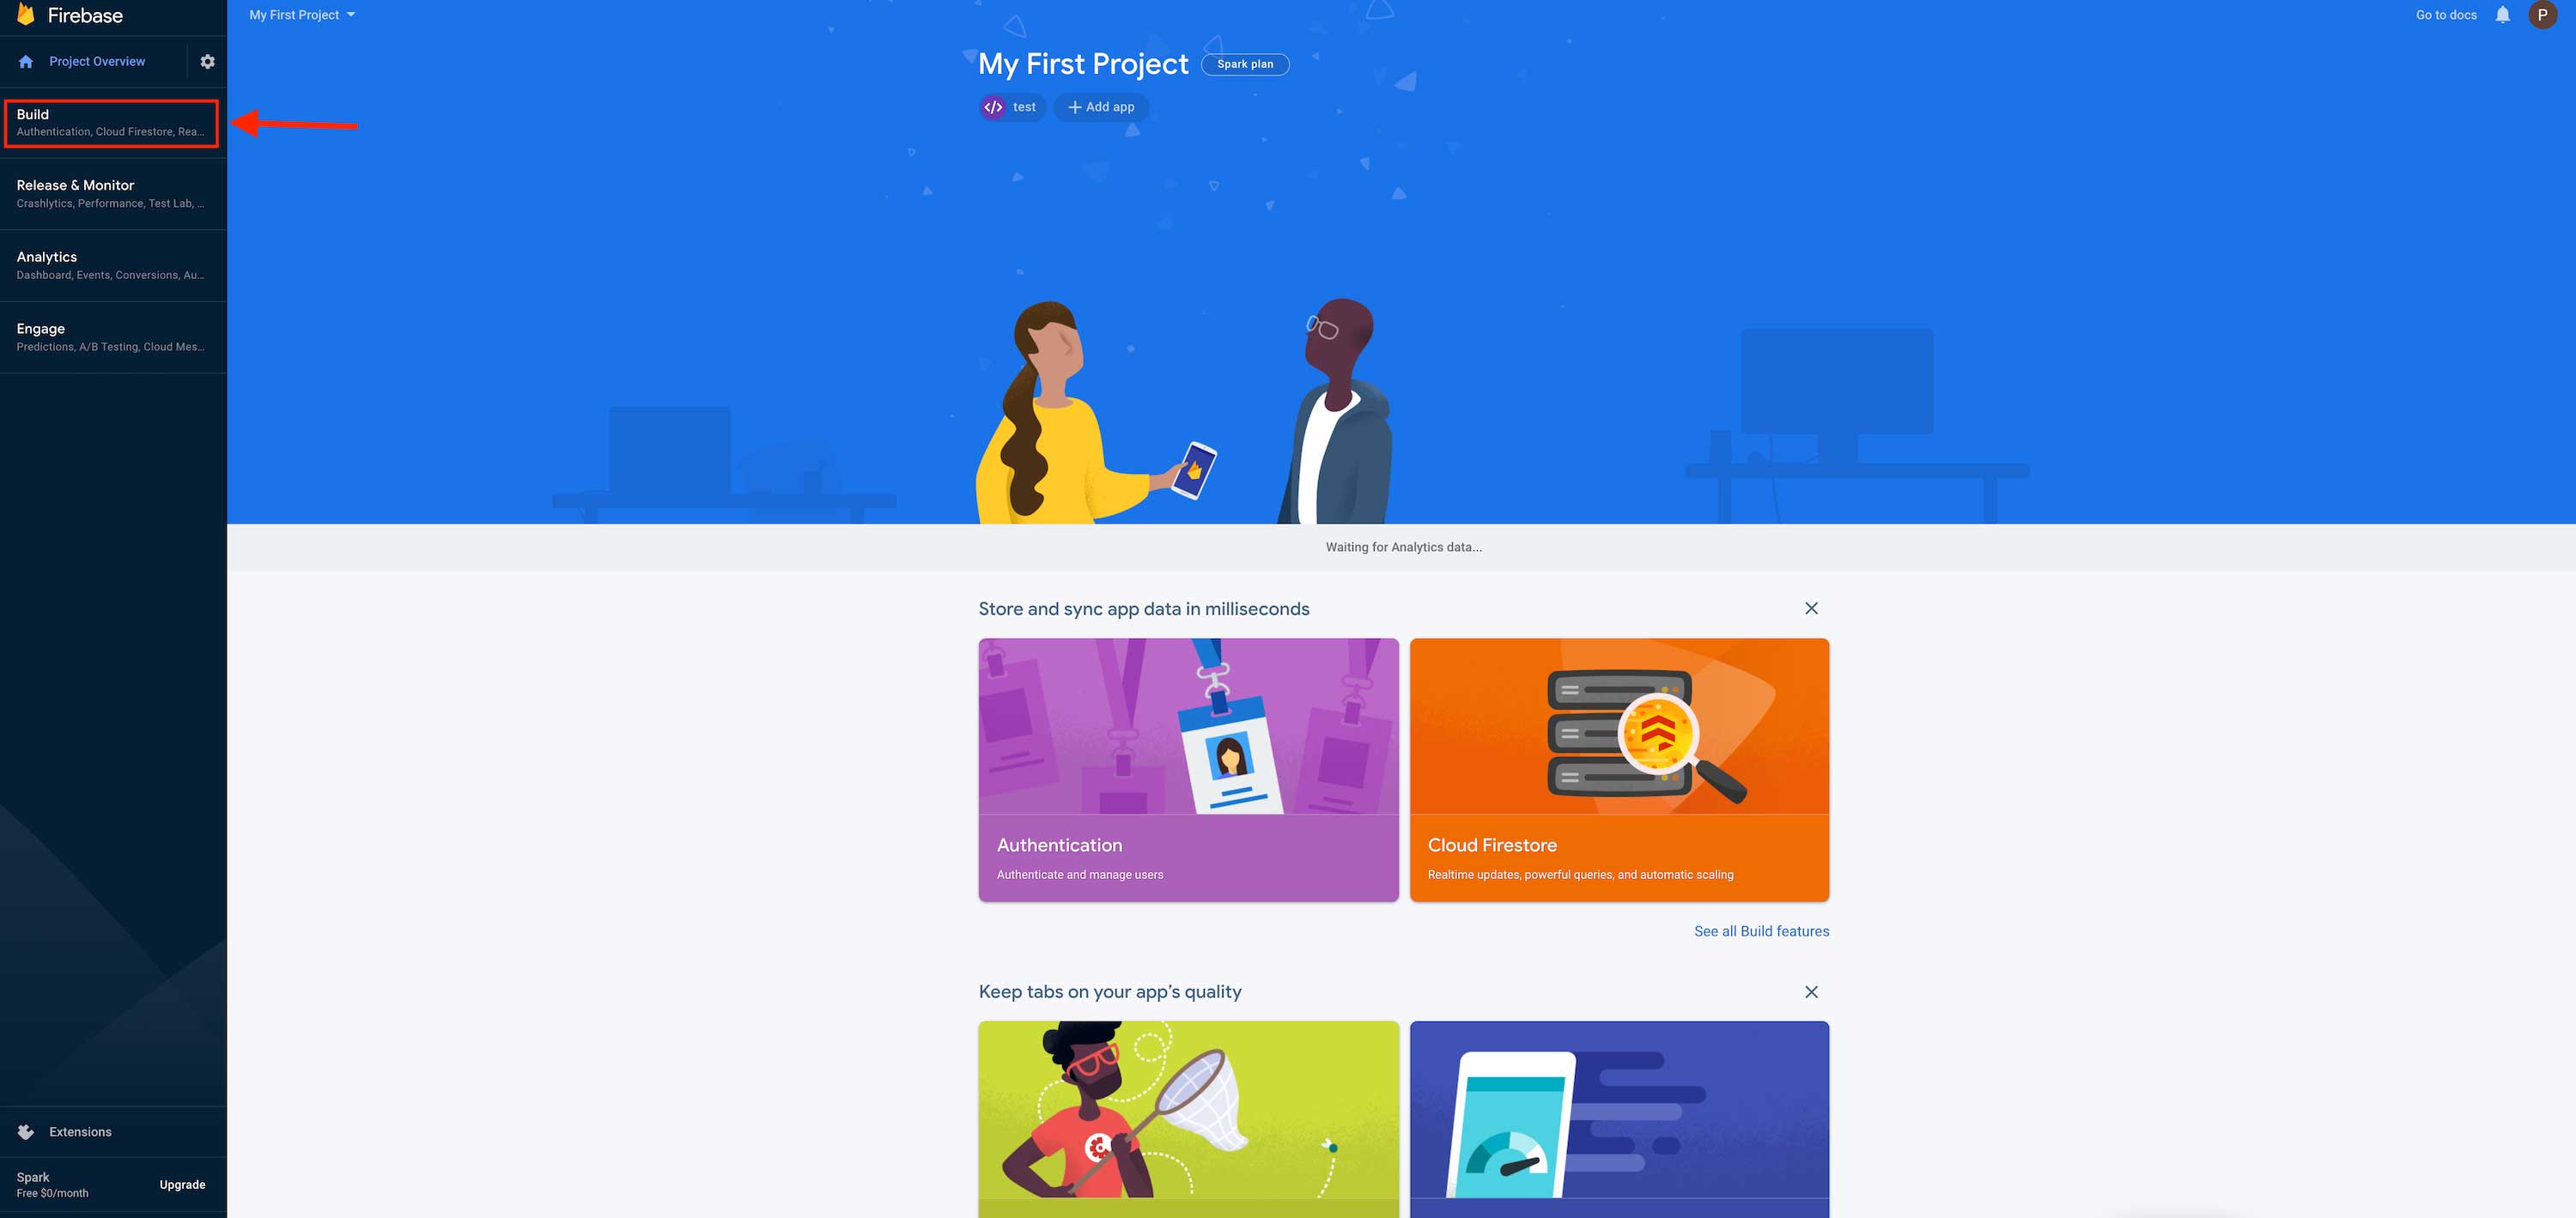 Step 17 : The Build dropdown menu will open on the left hand side panel, click on Authentication
 Step 18 : Click on Get Started
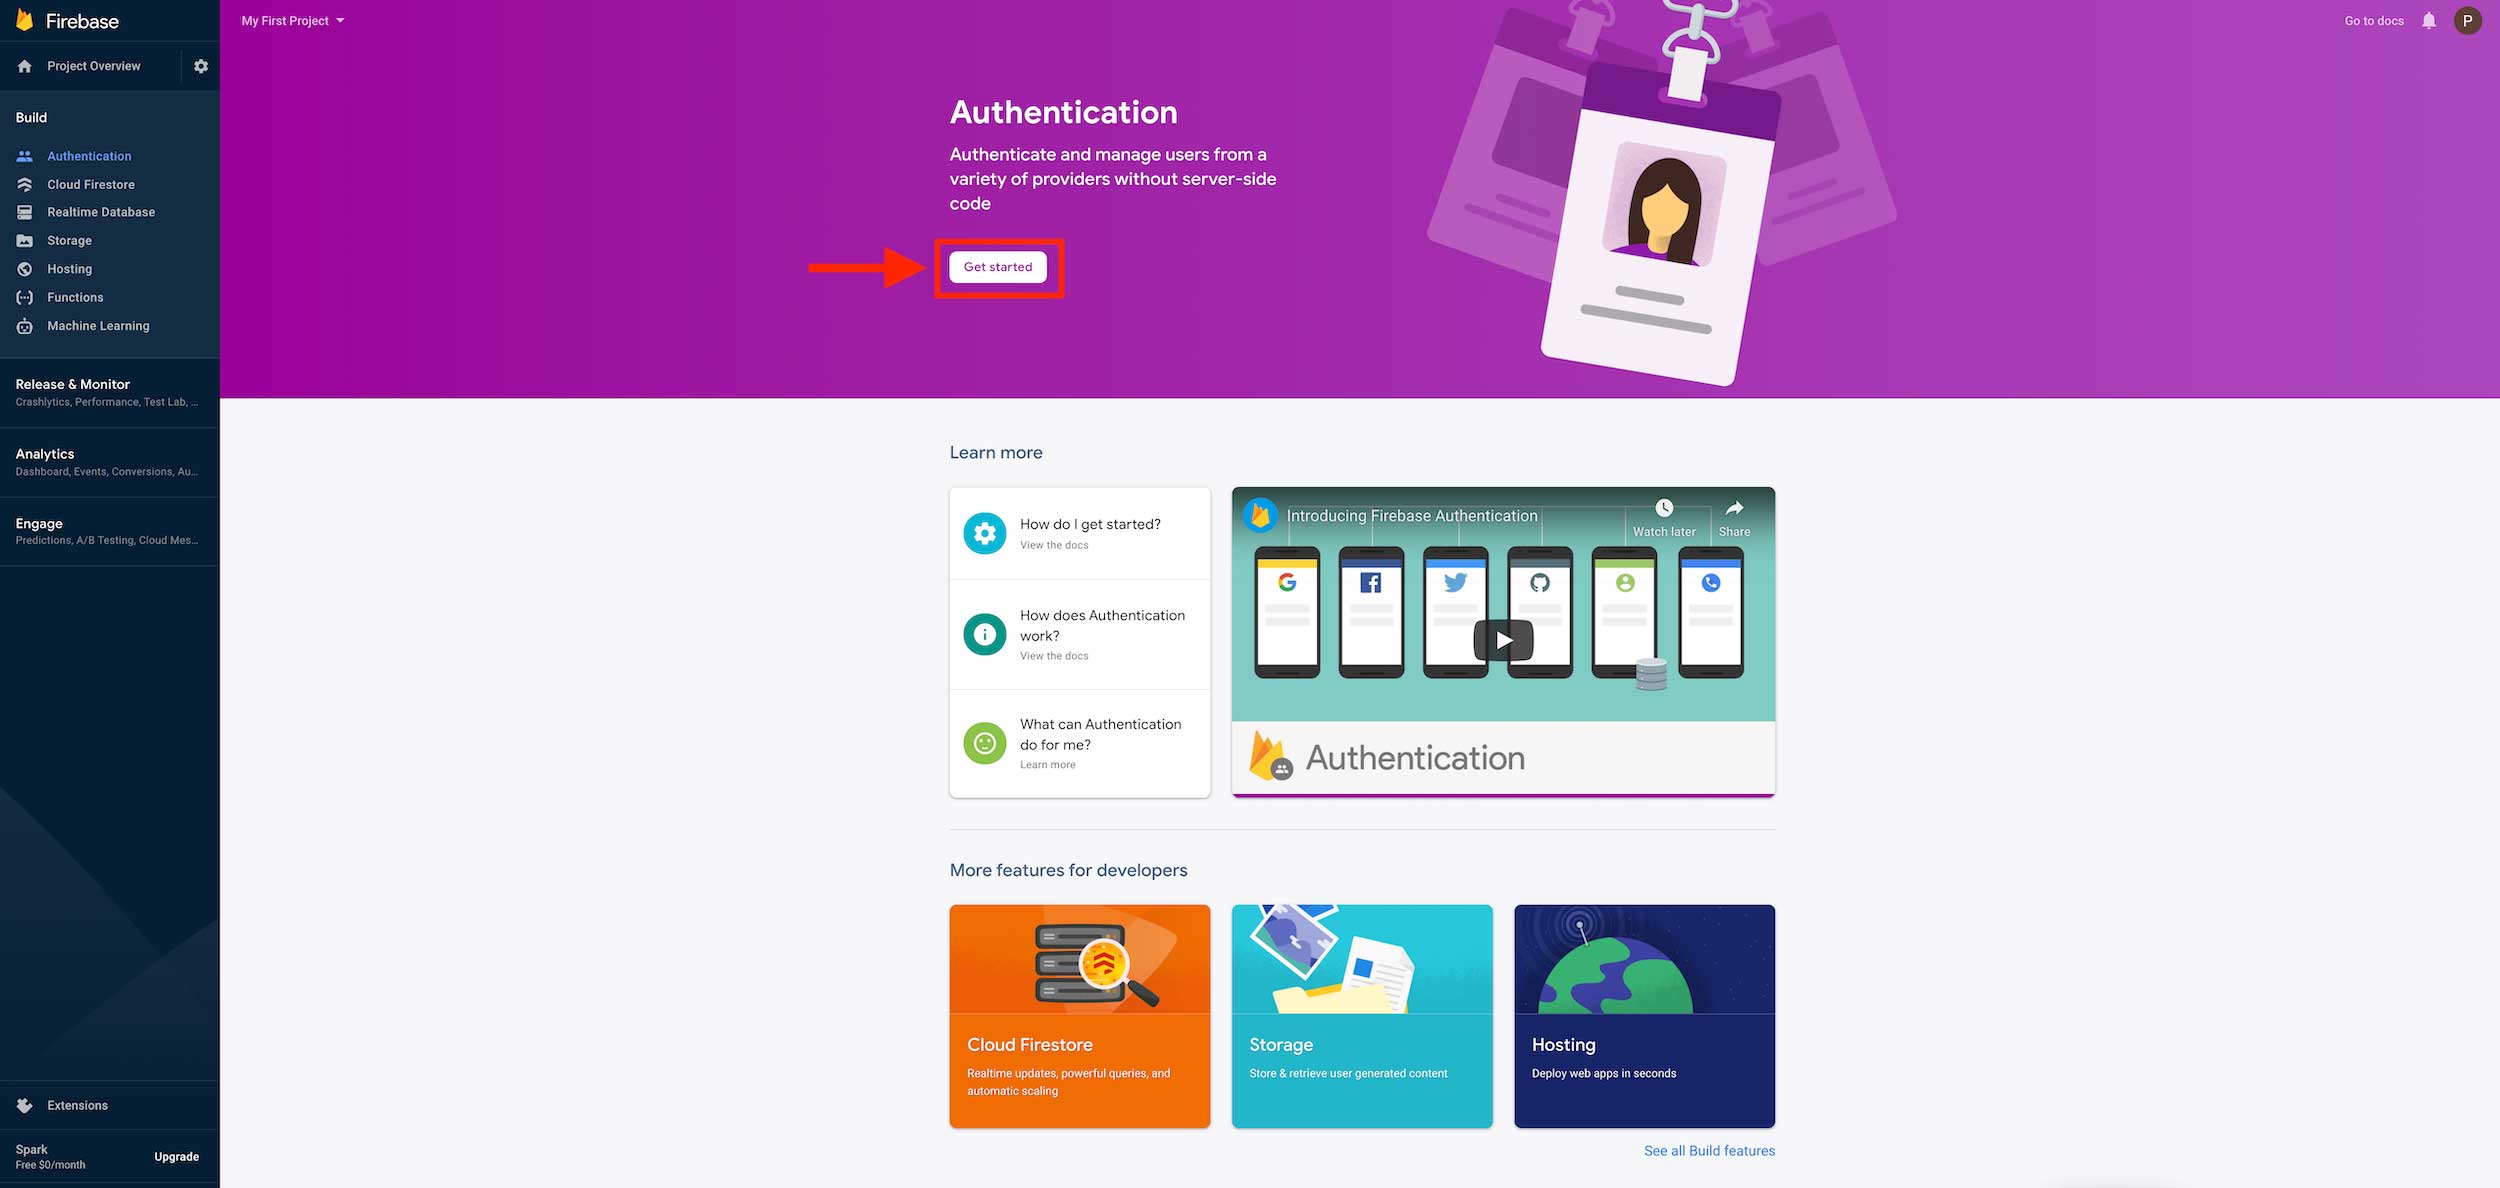 Step 19 : Click on Anonymous
 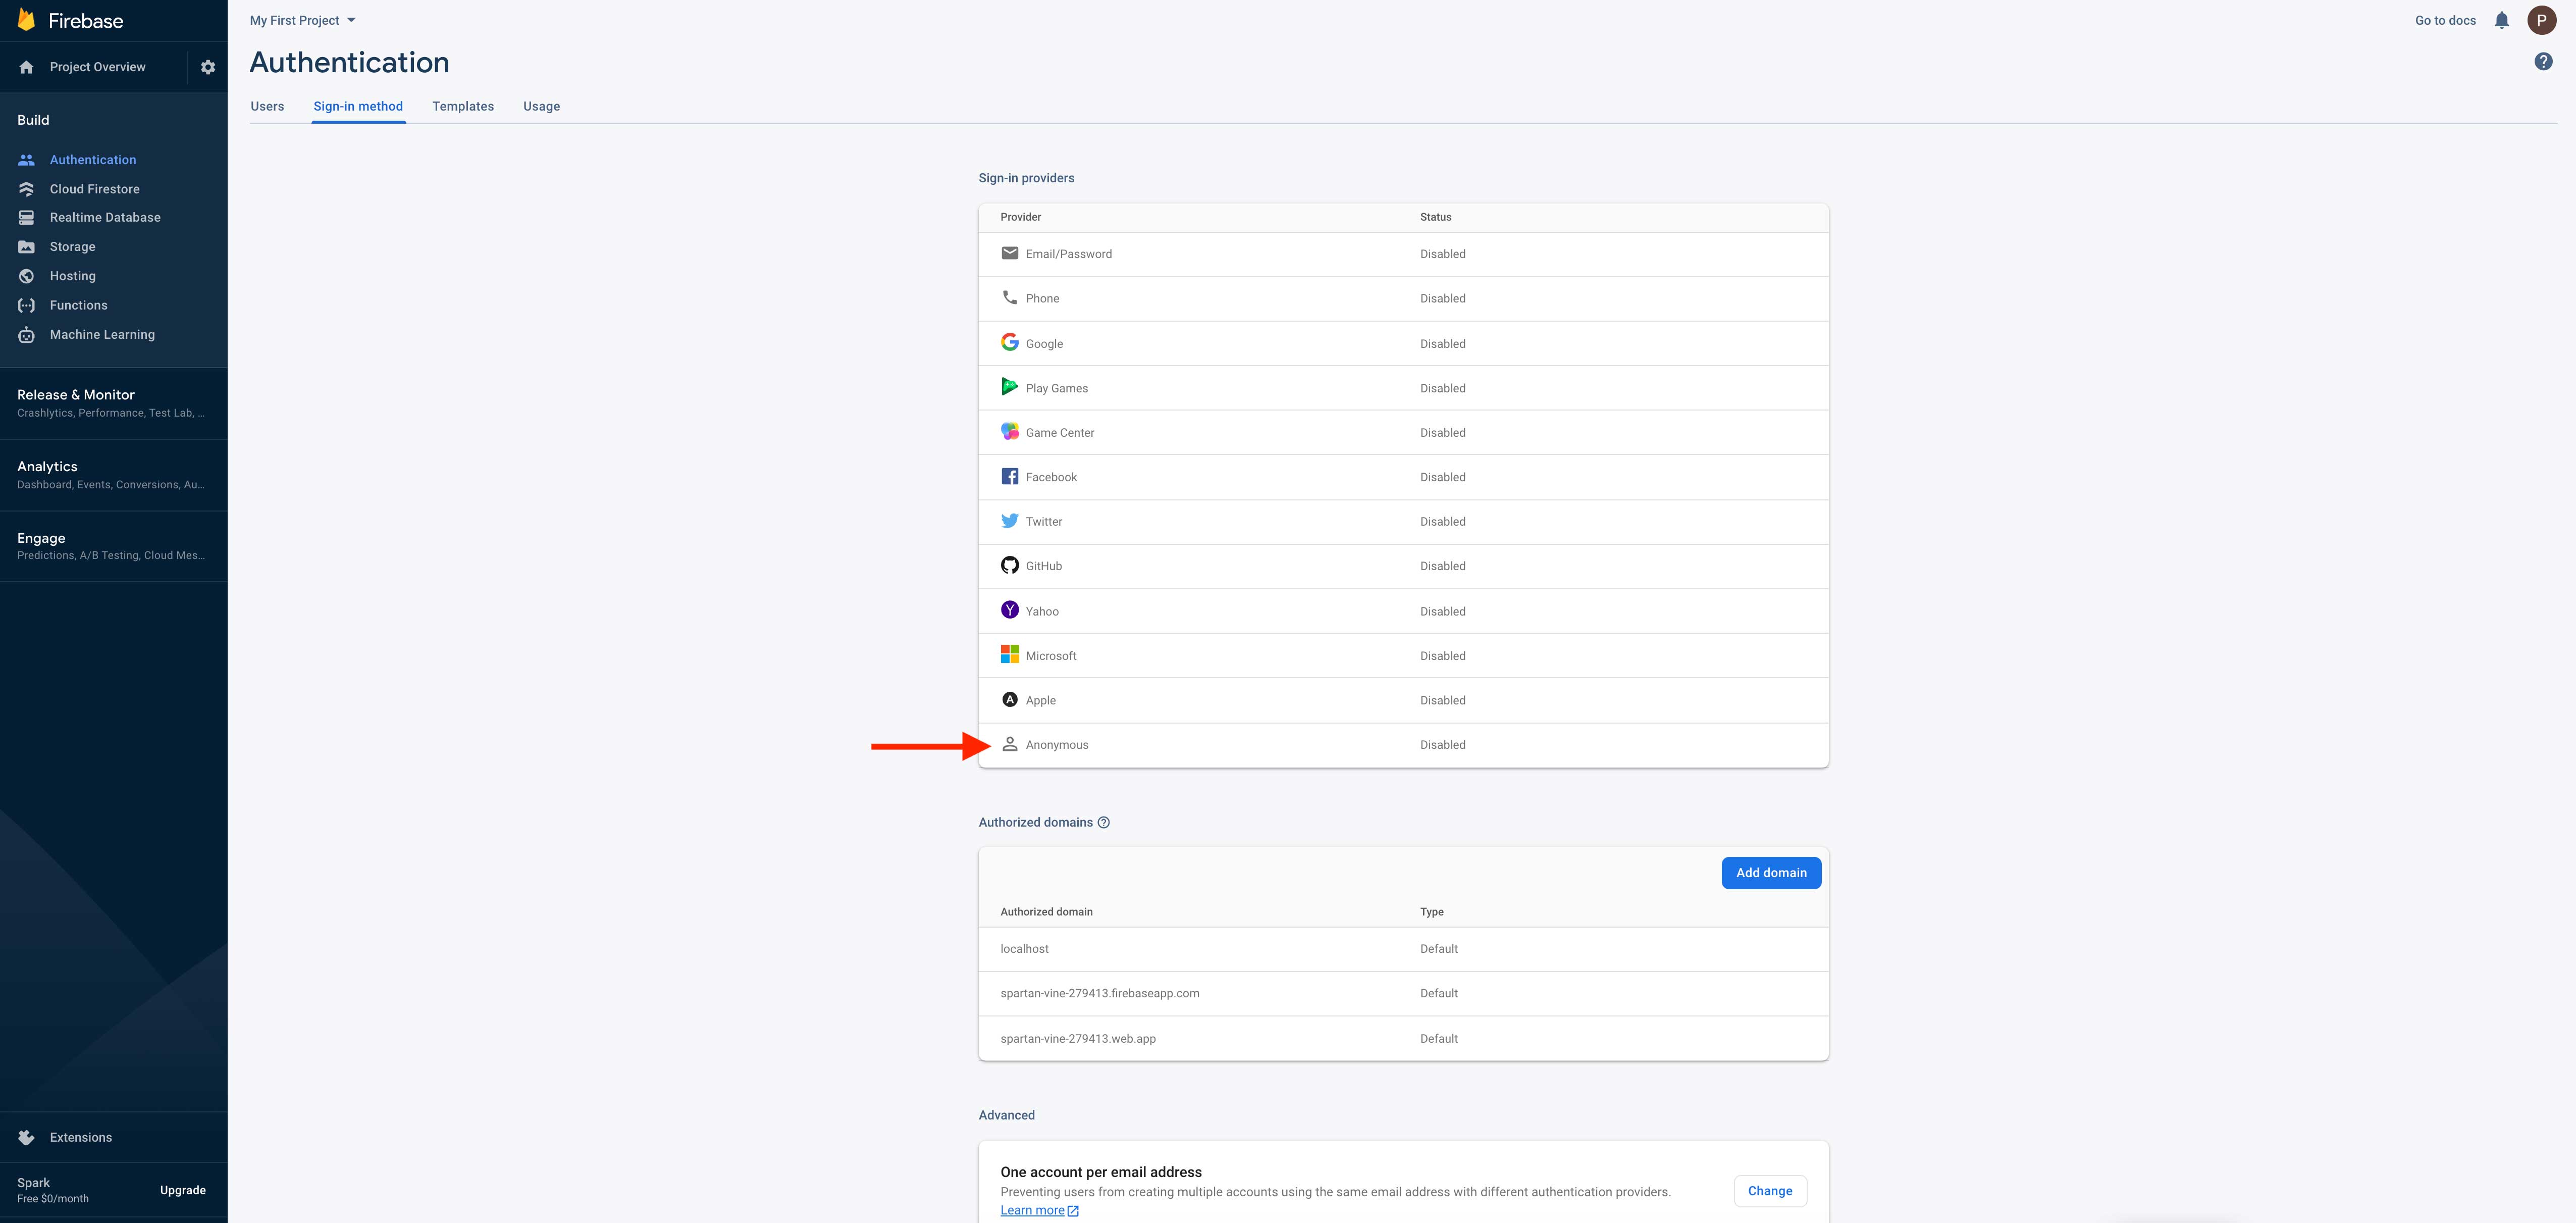 Step 20 : Enable Anonymous
 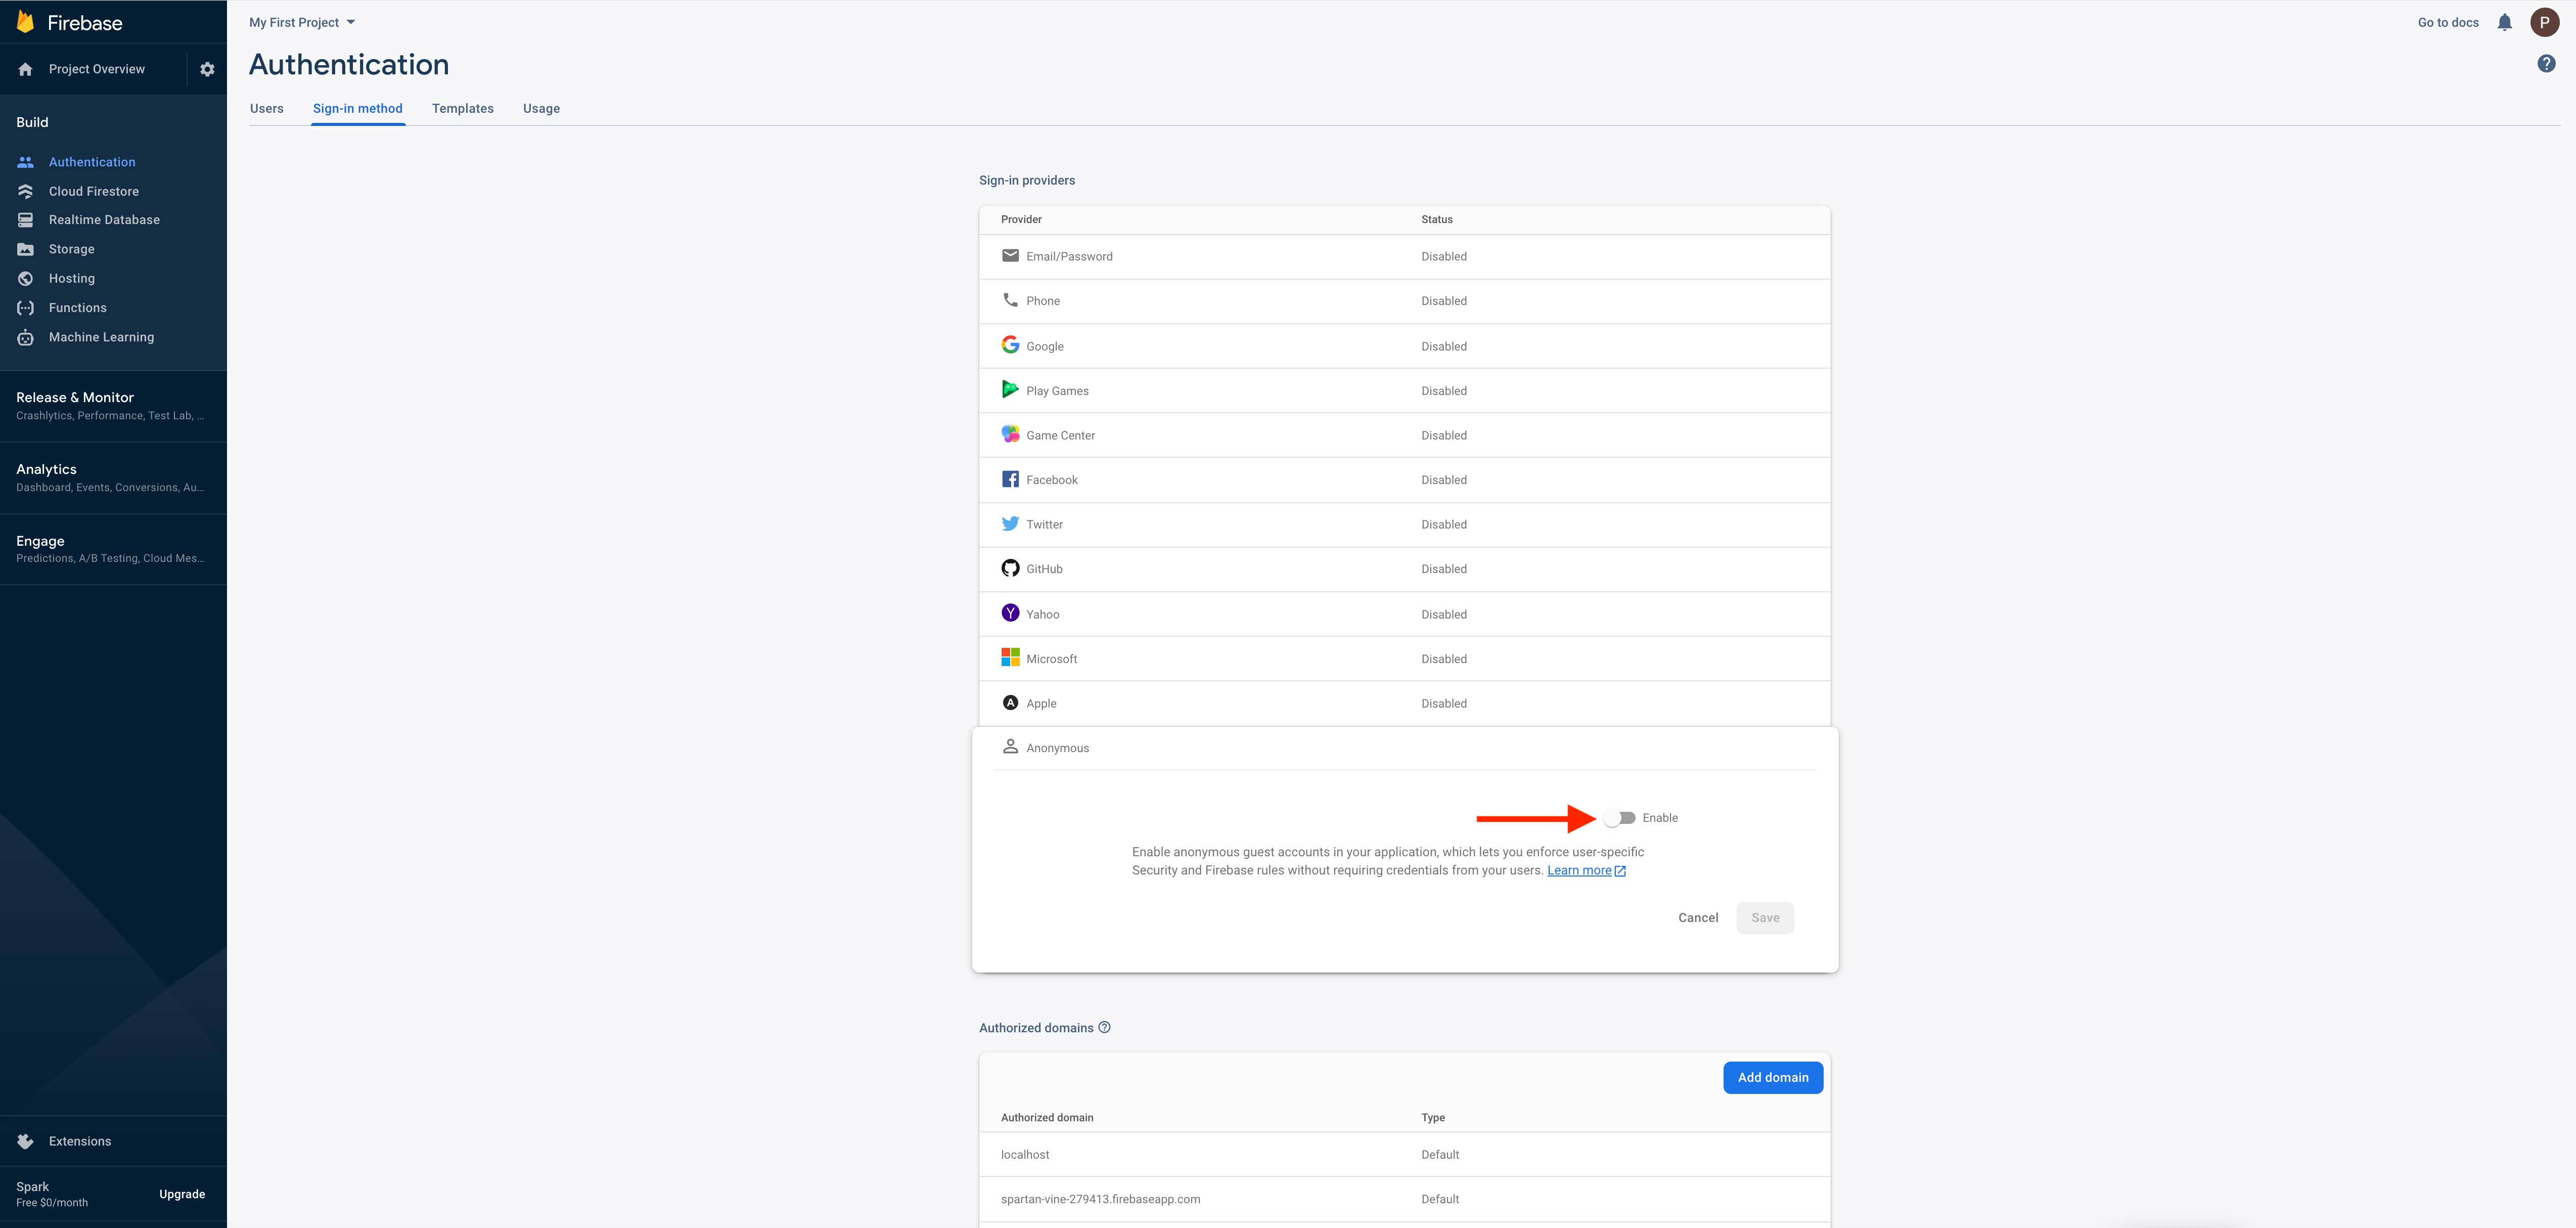 Step 21 : Once done, click on Save button
 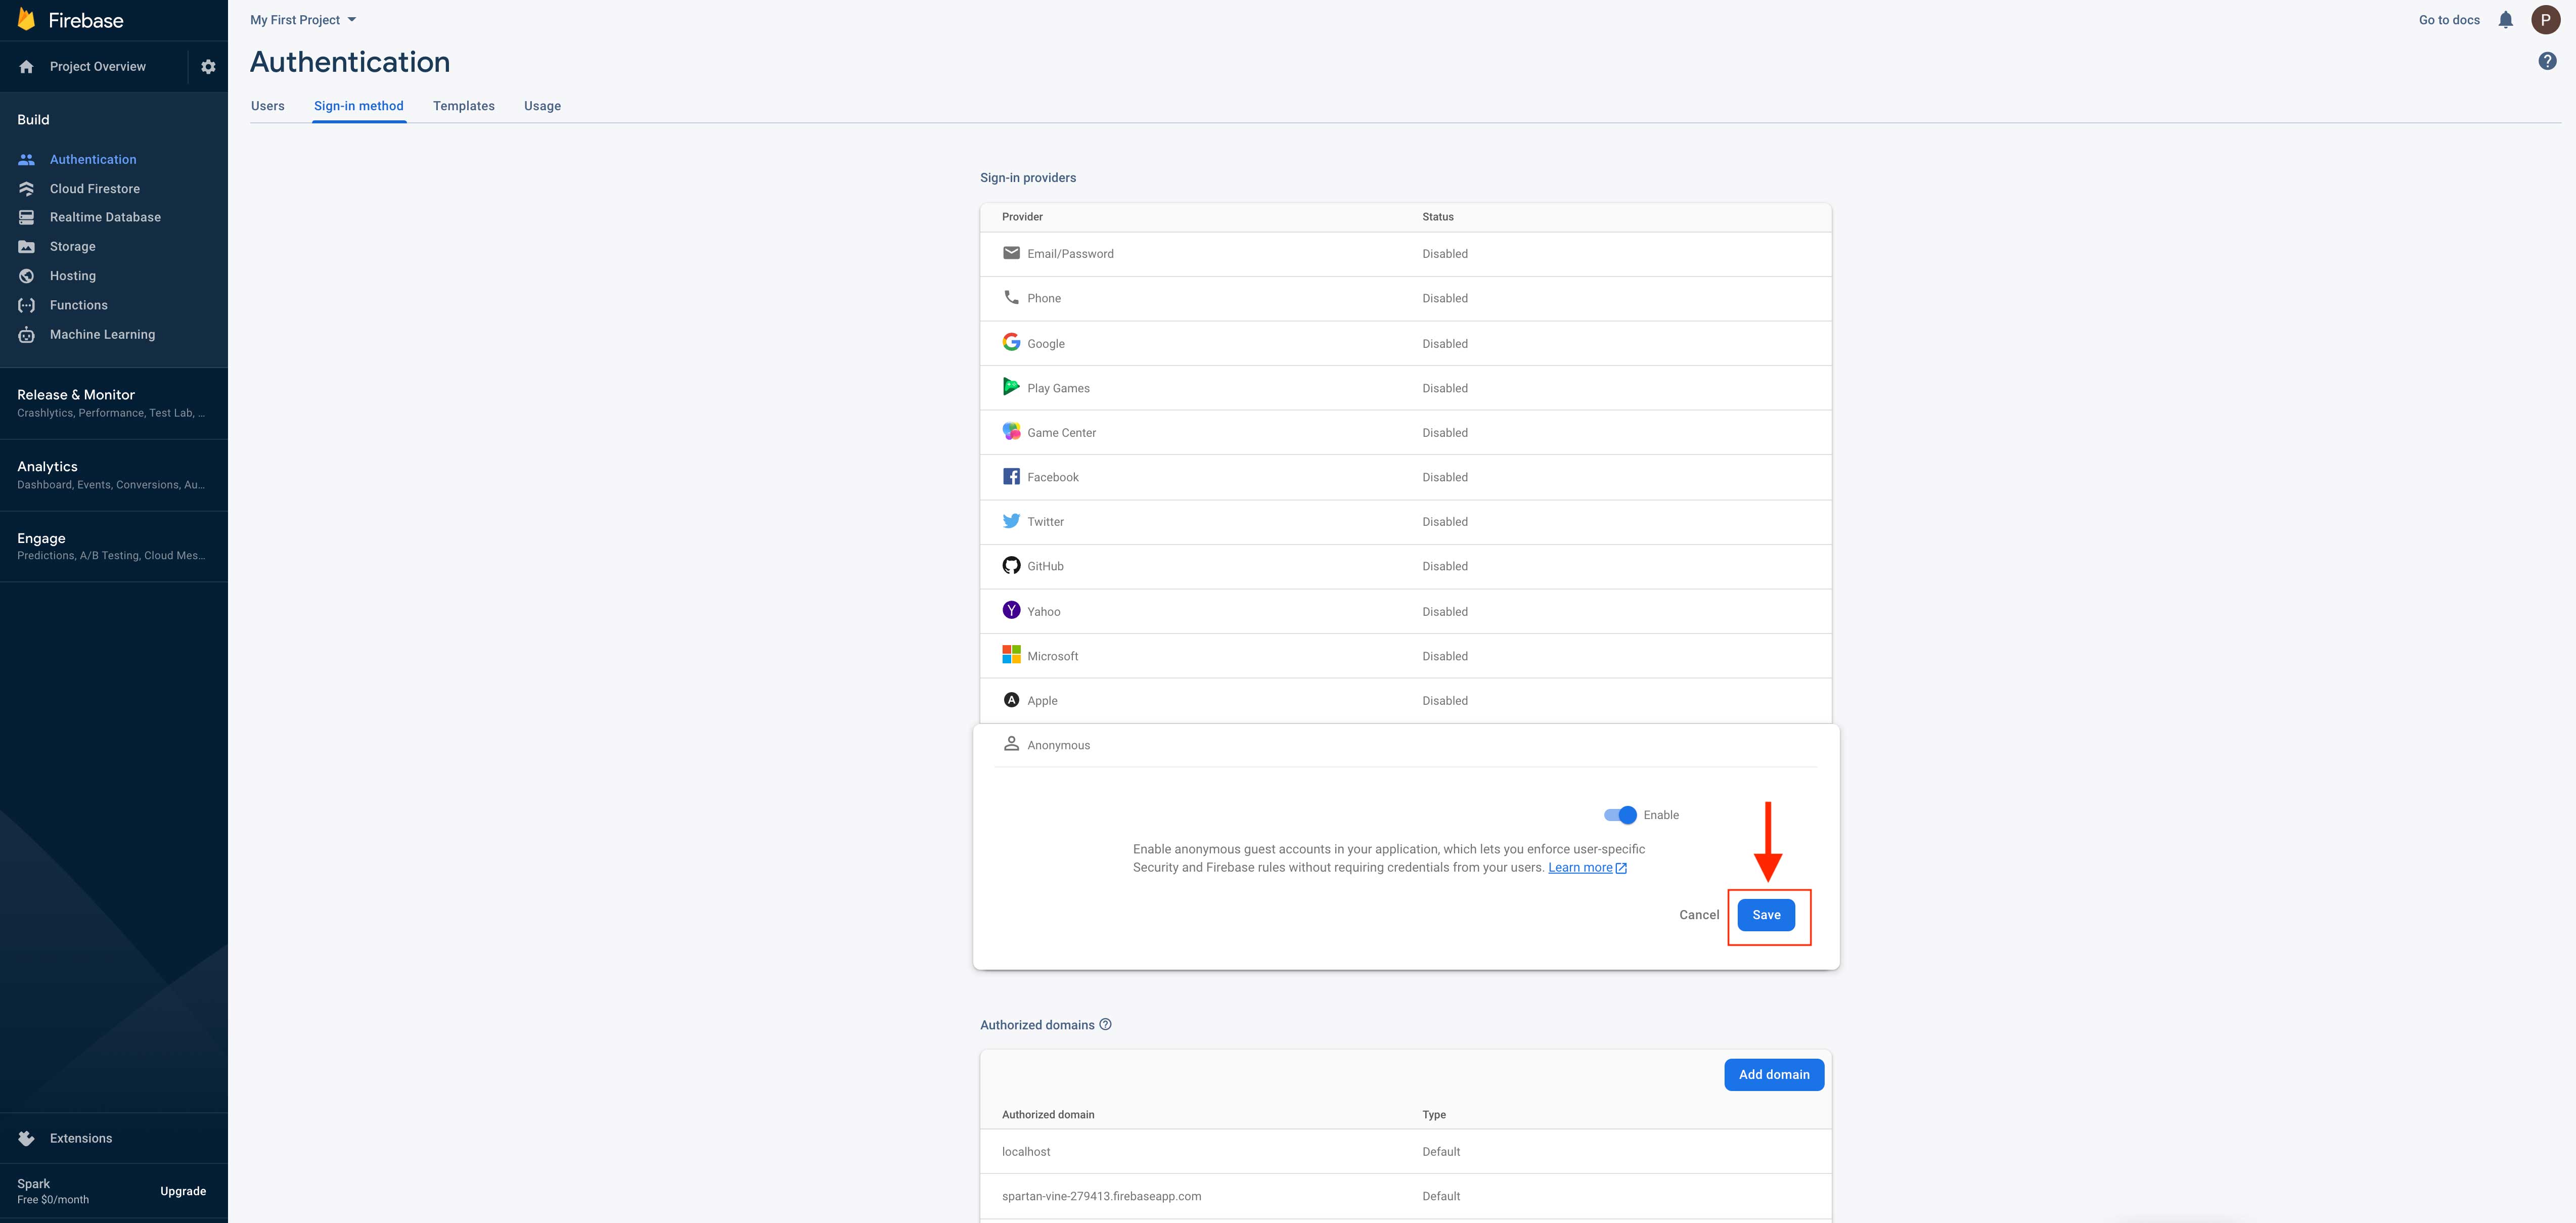 Step 22 : In build menu on the left hand side panel, click on Realtime database
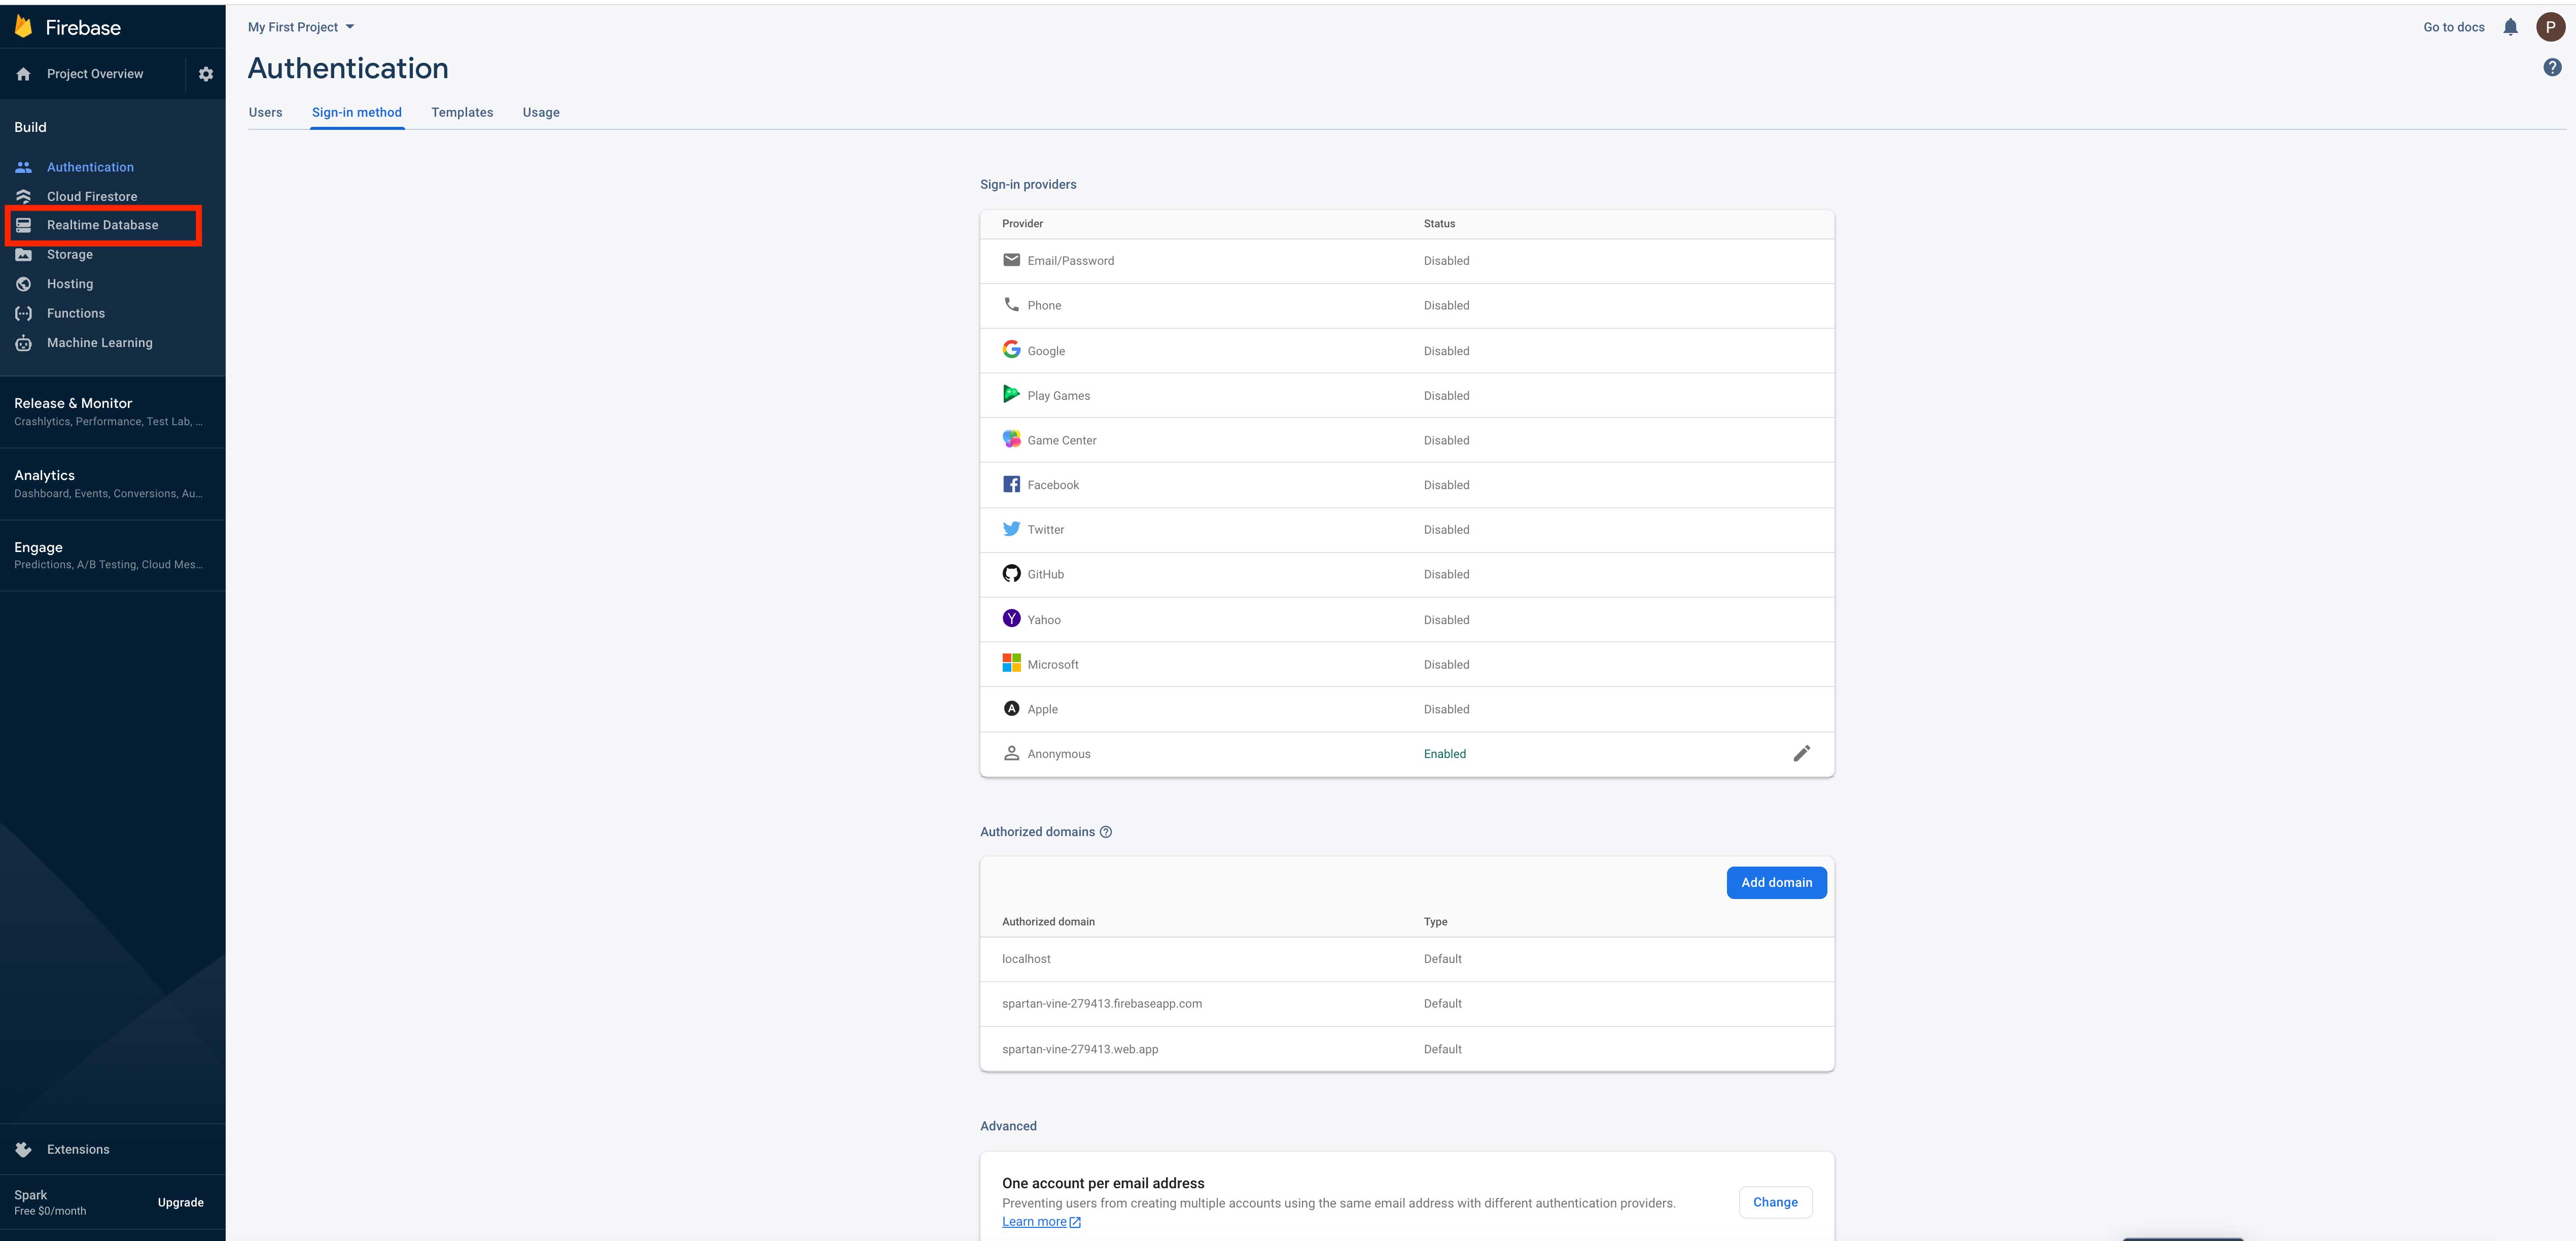 Step 23 : Click on Create database
 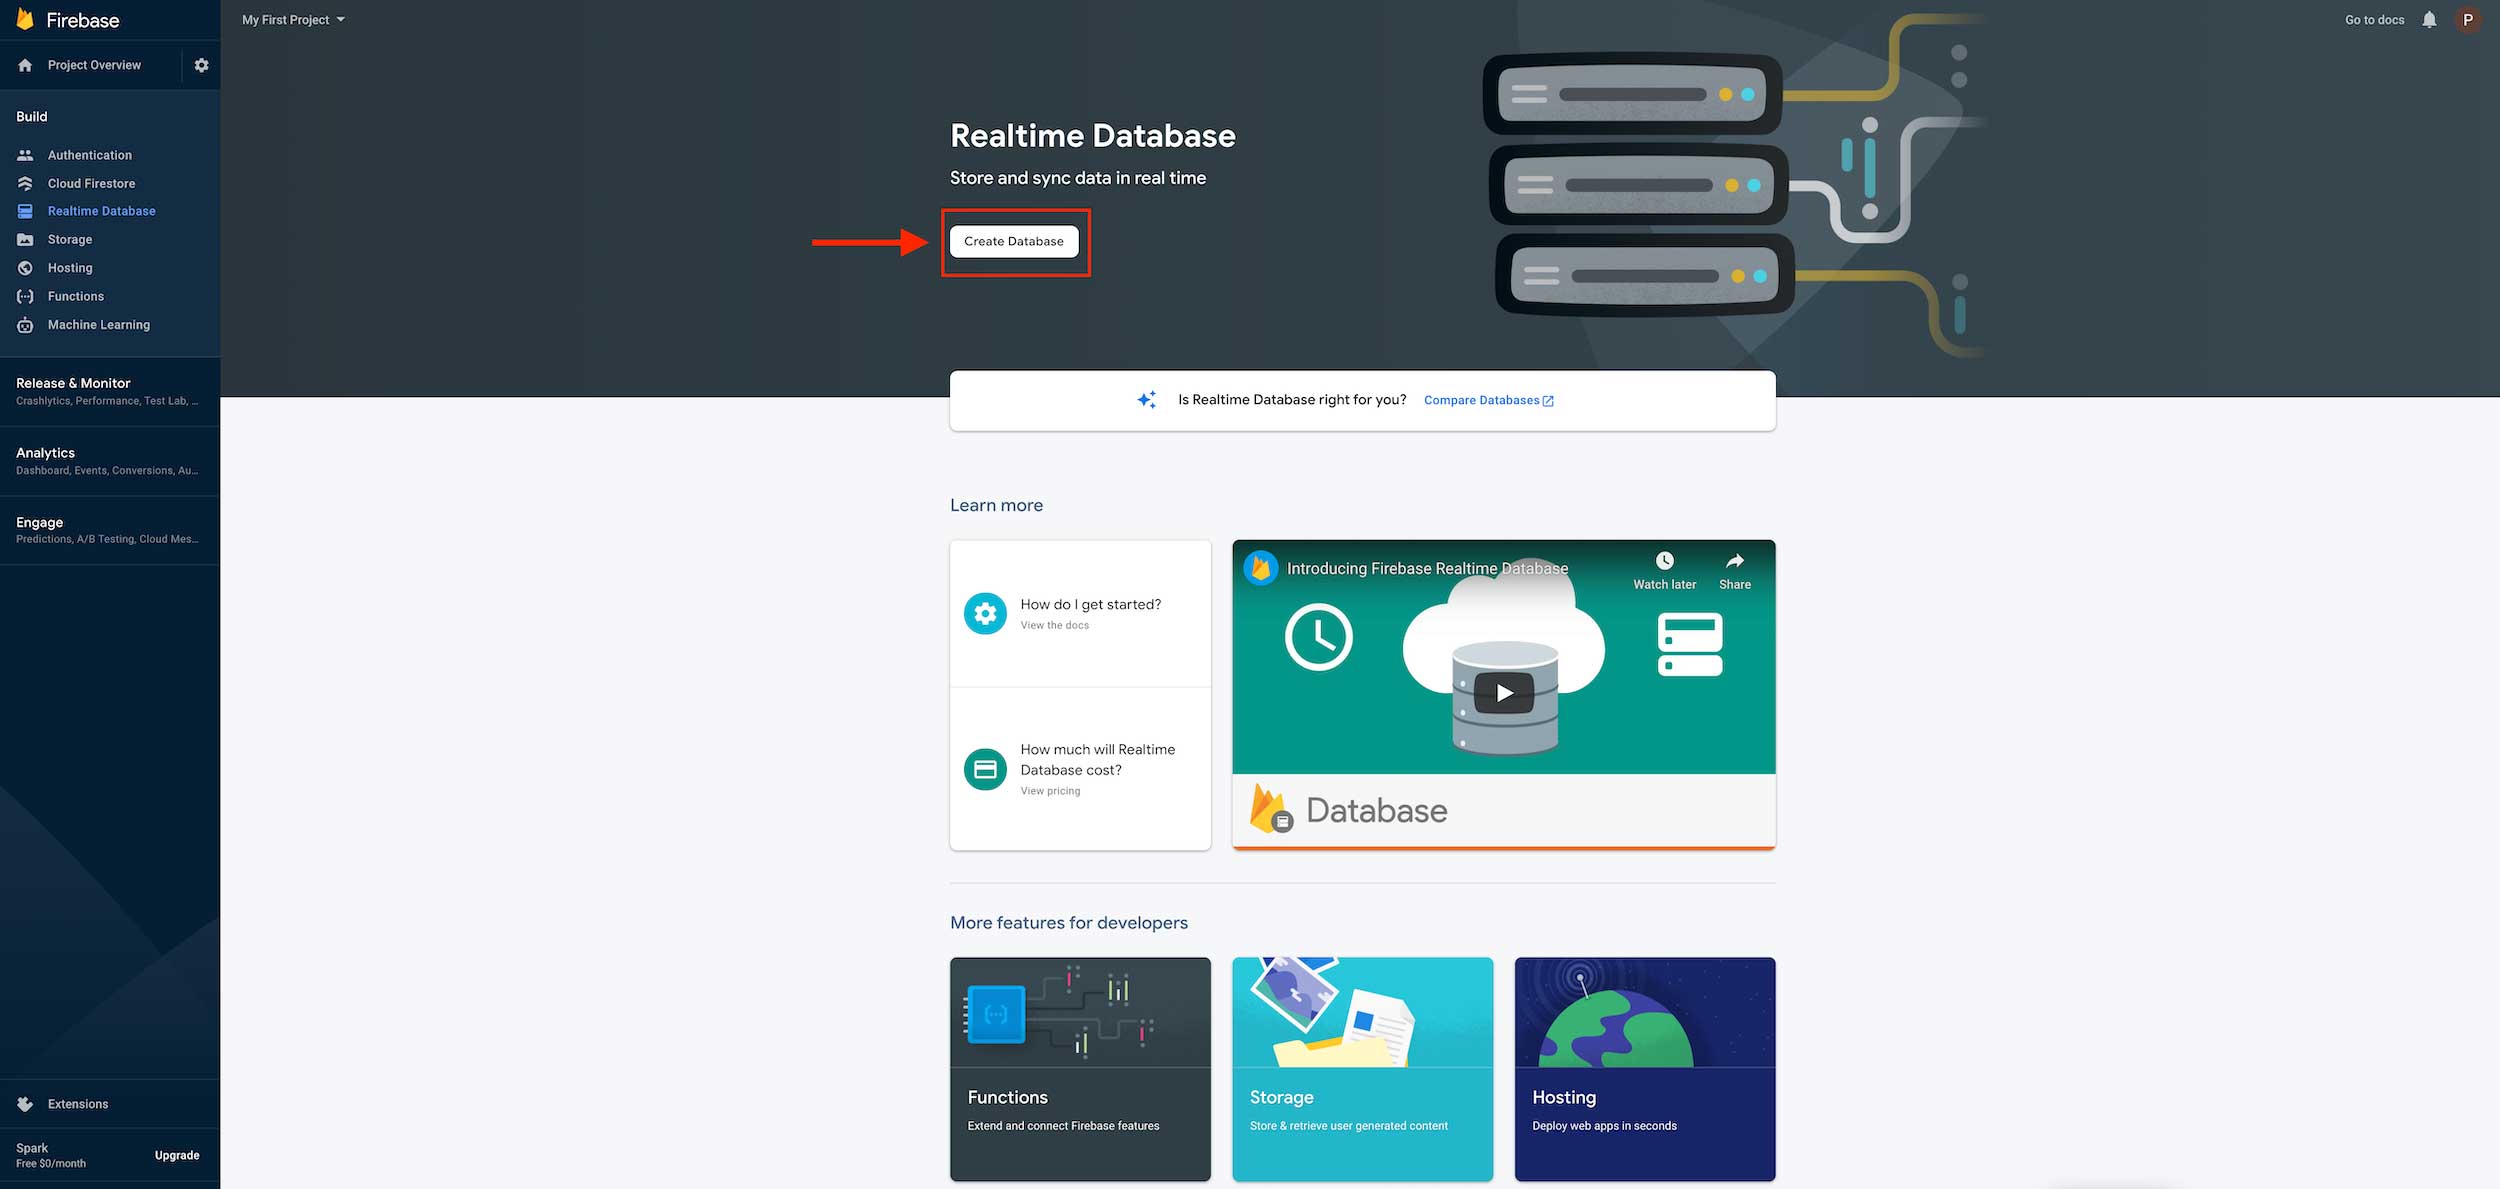 Step 24 : Select Realtime database location by click on dropdown menu and after select click on next
 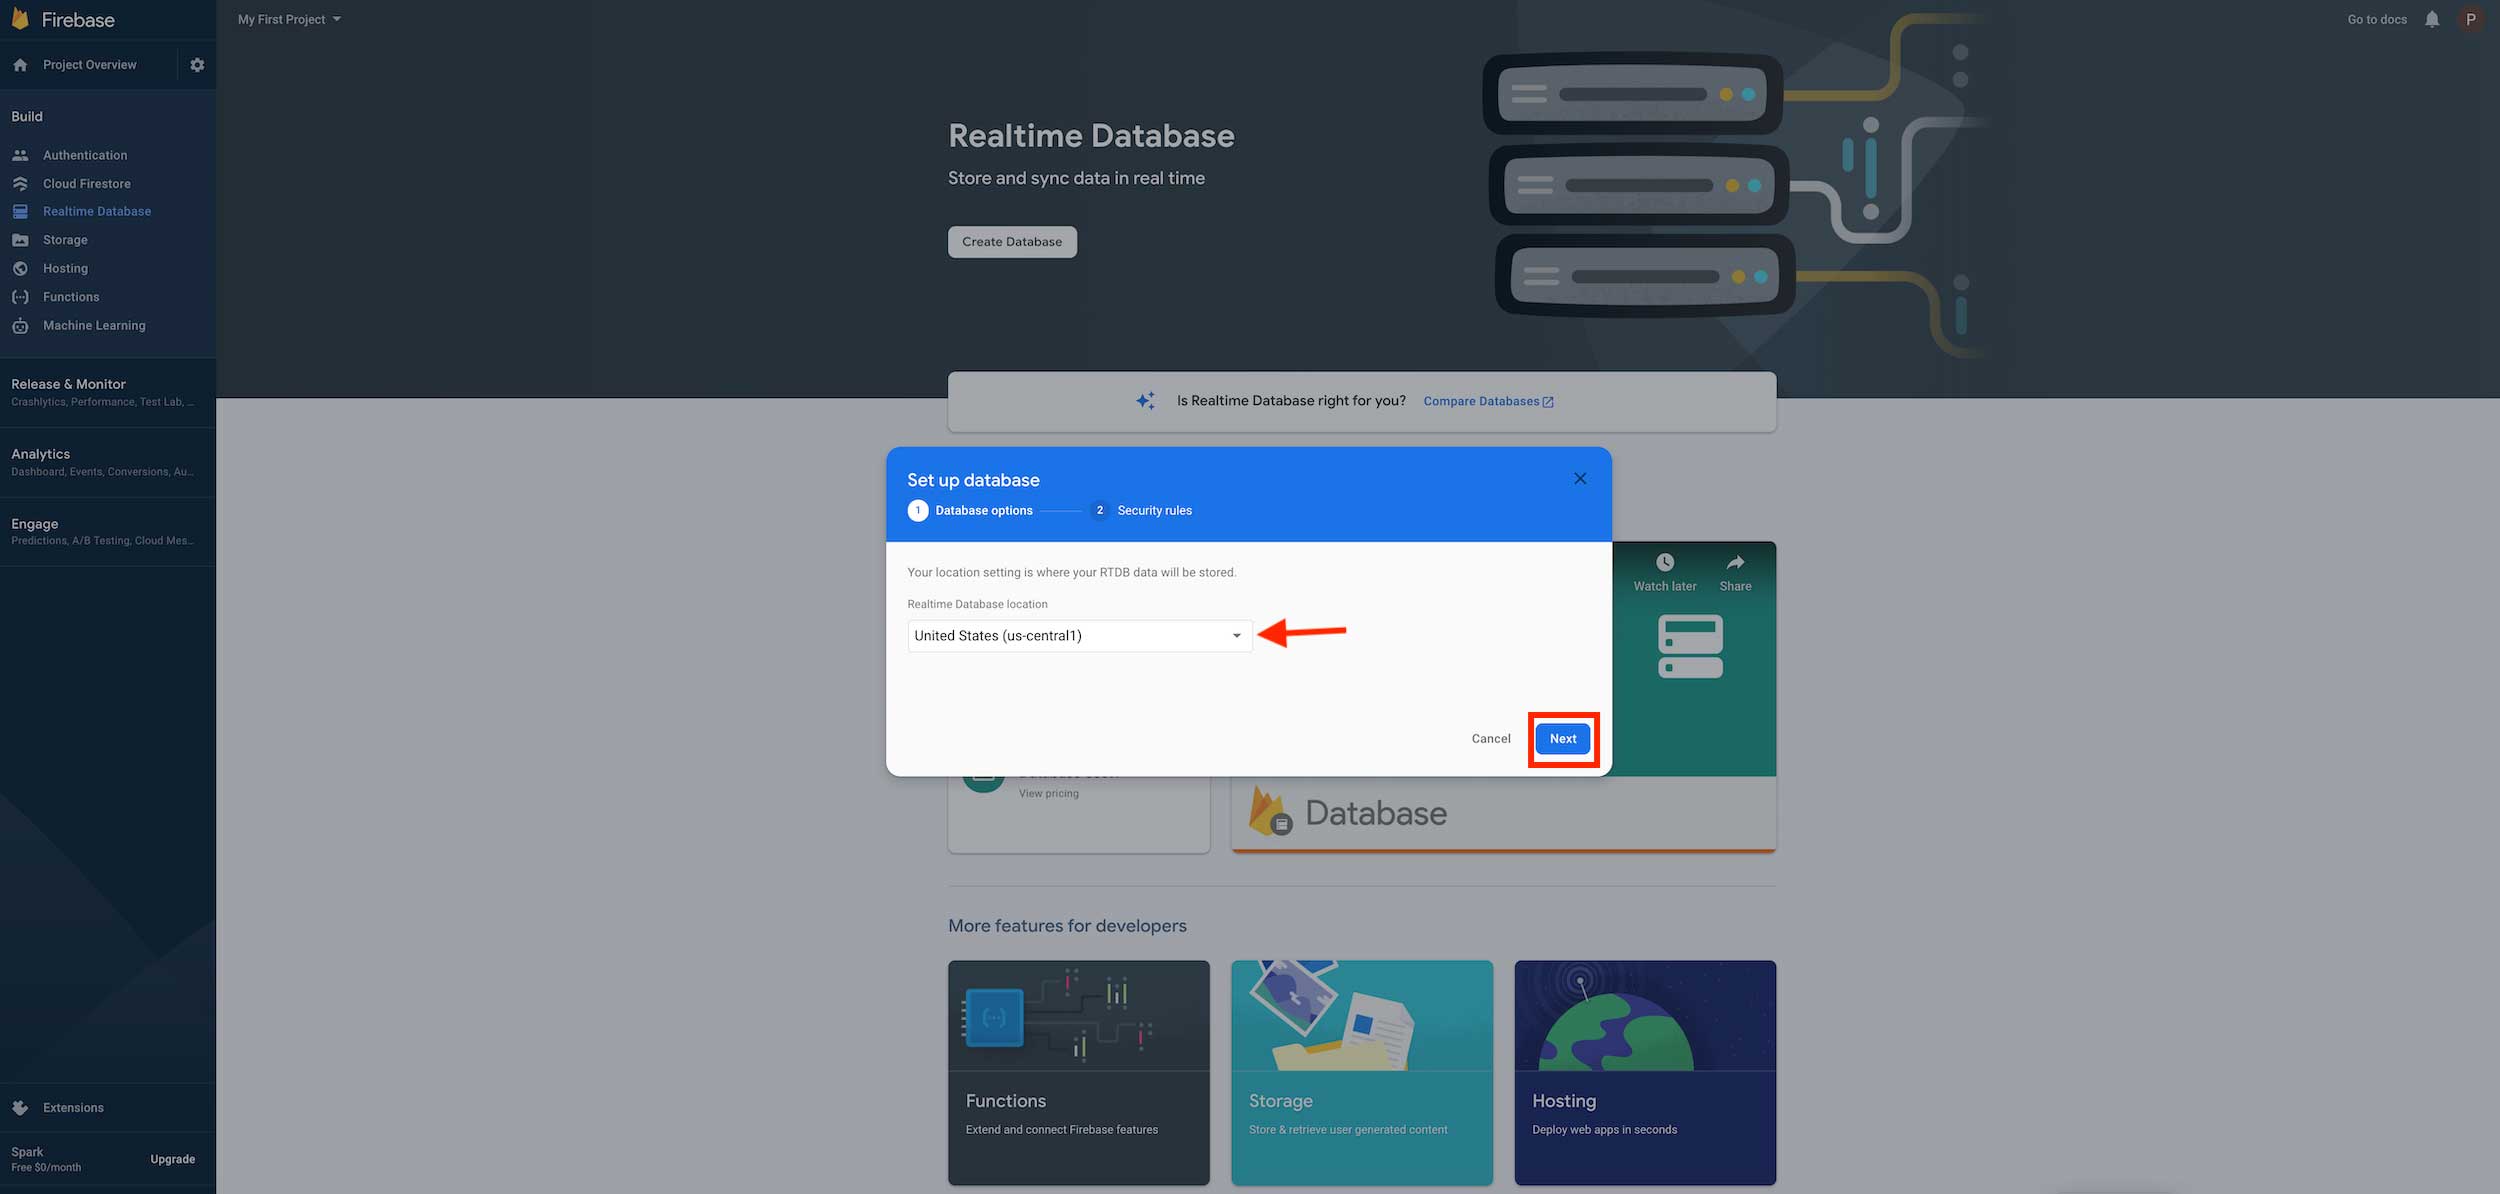 Step 25 : Click on Enable
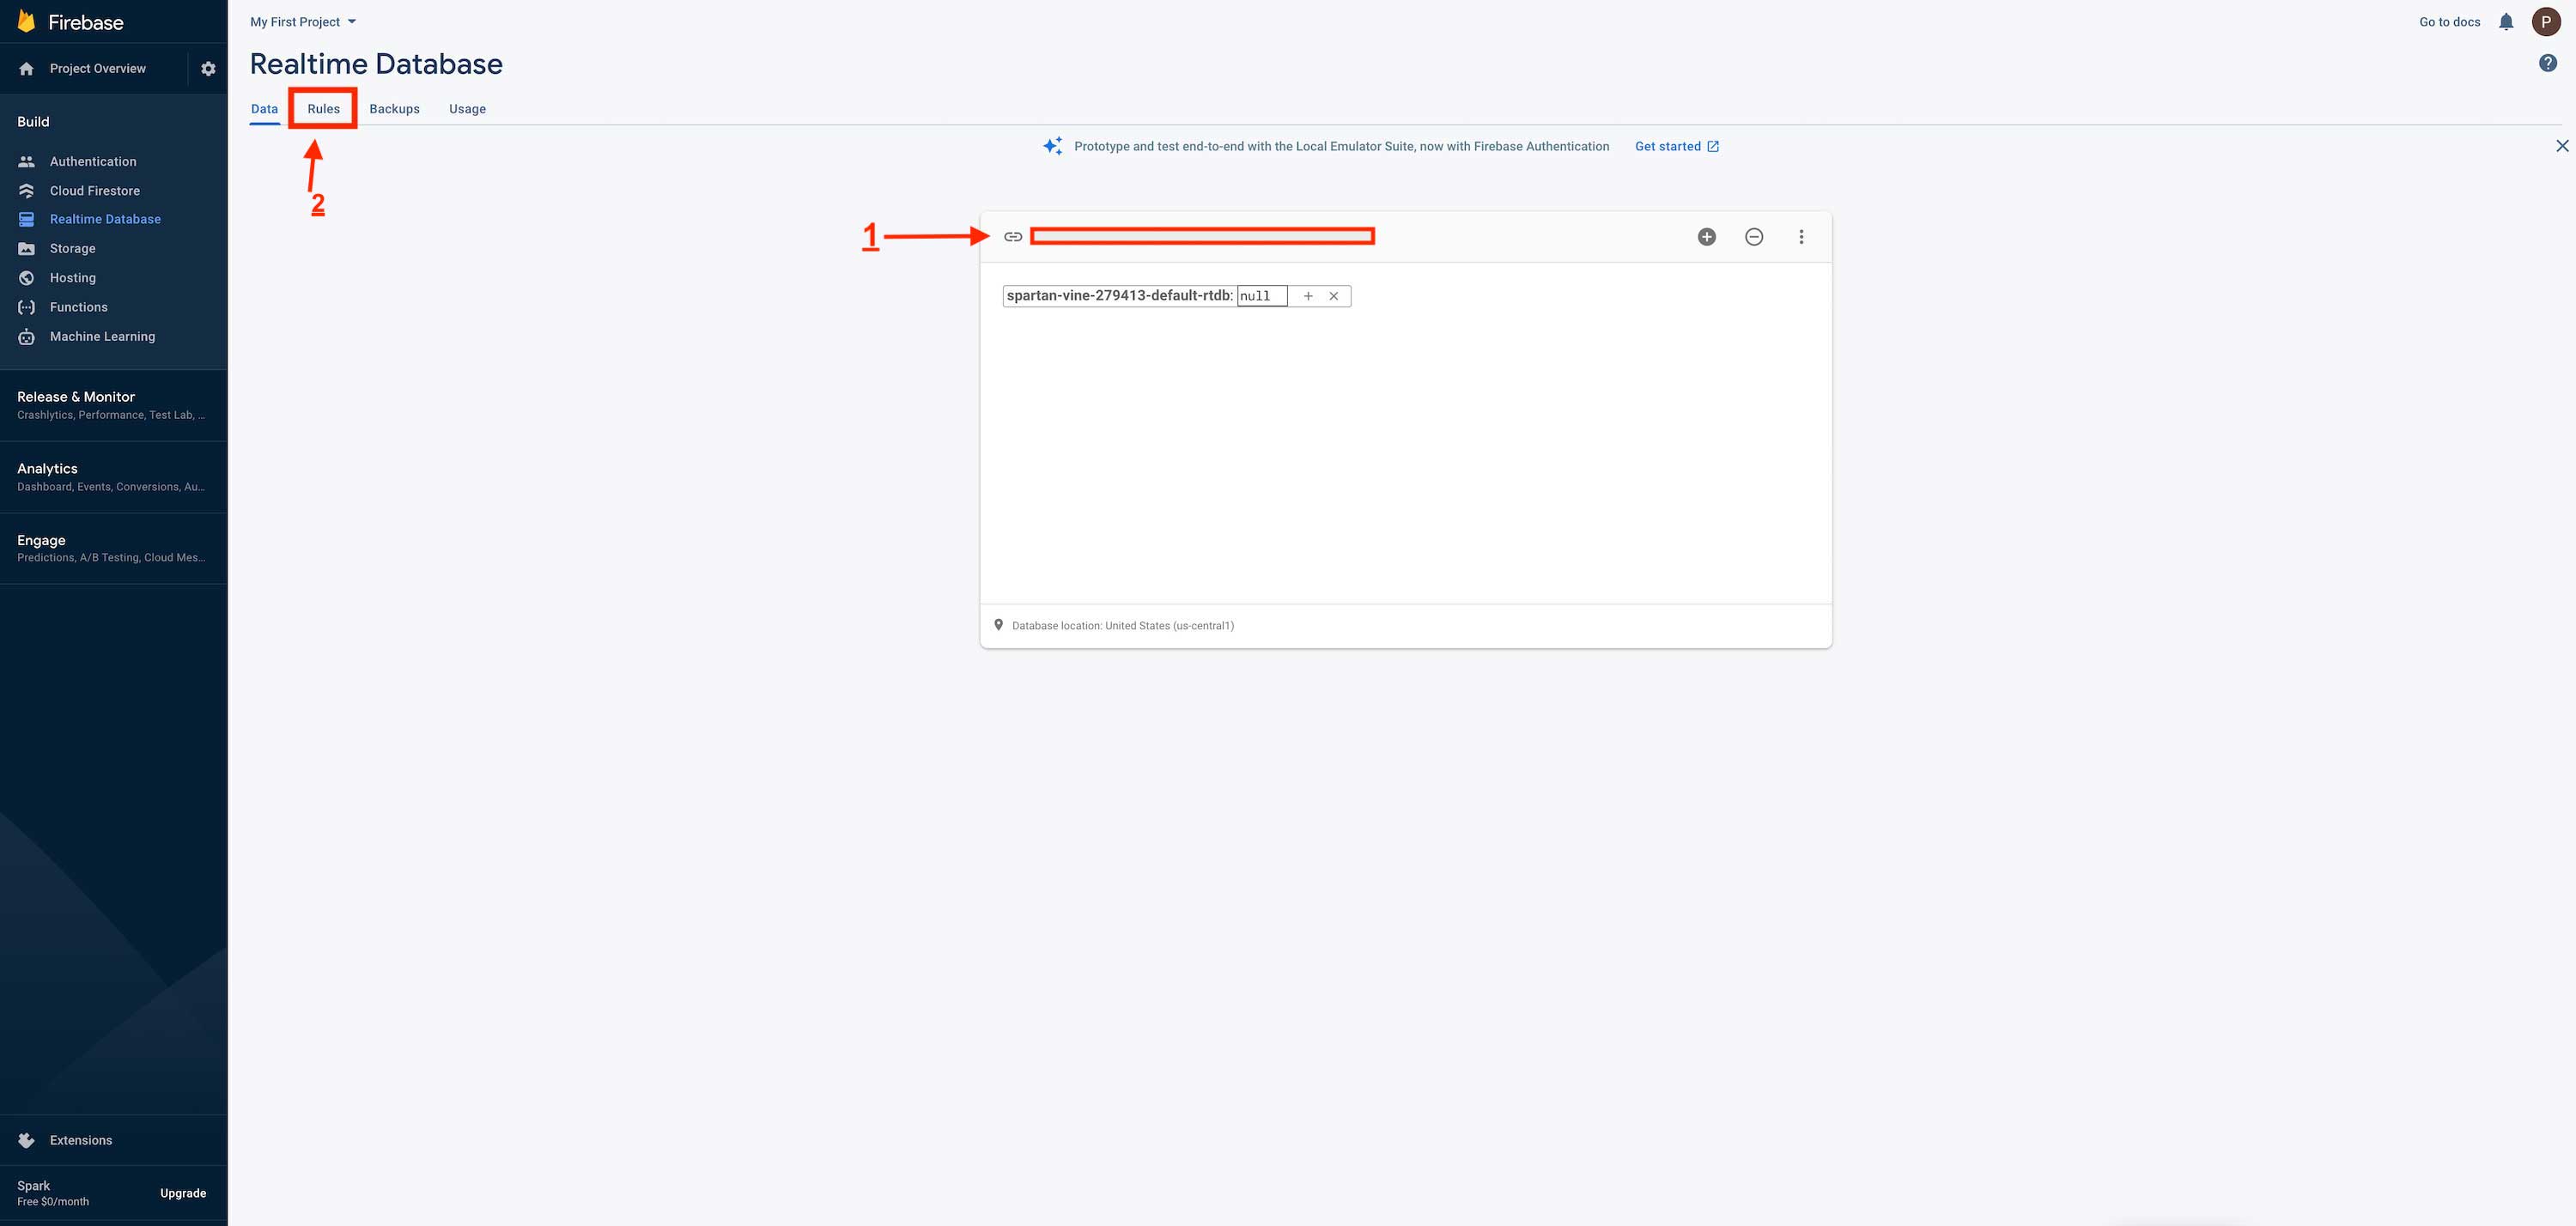
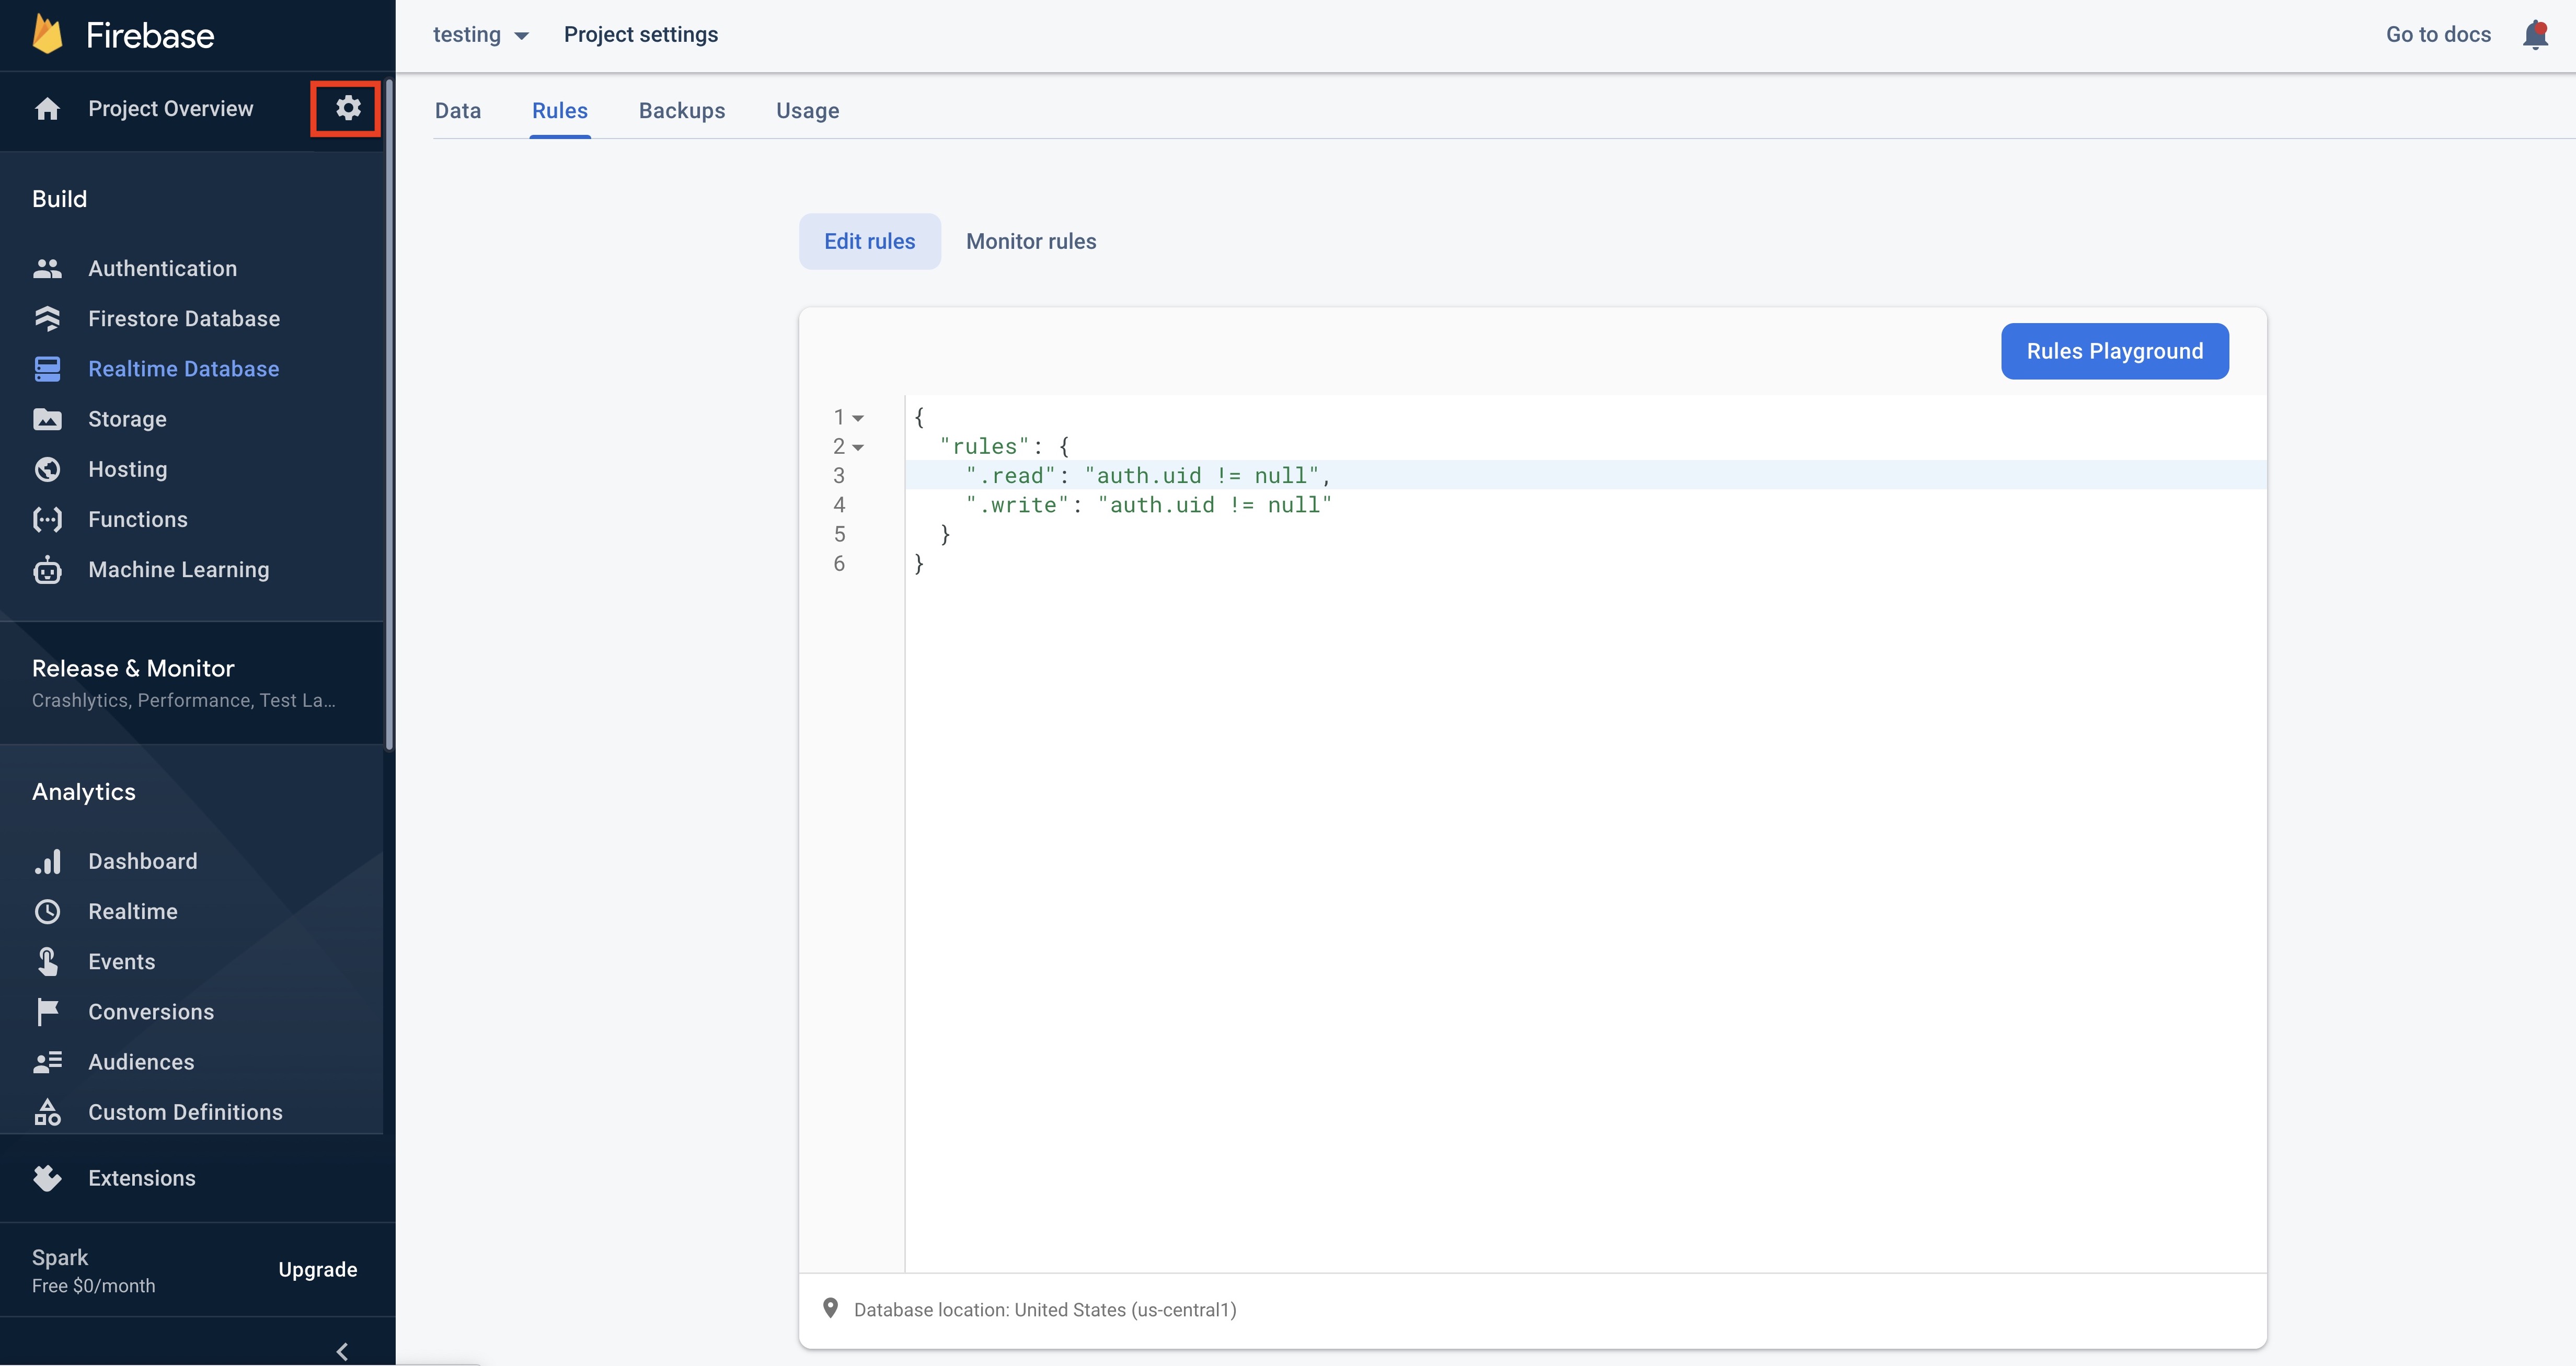
 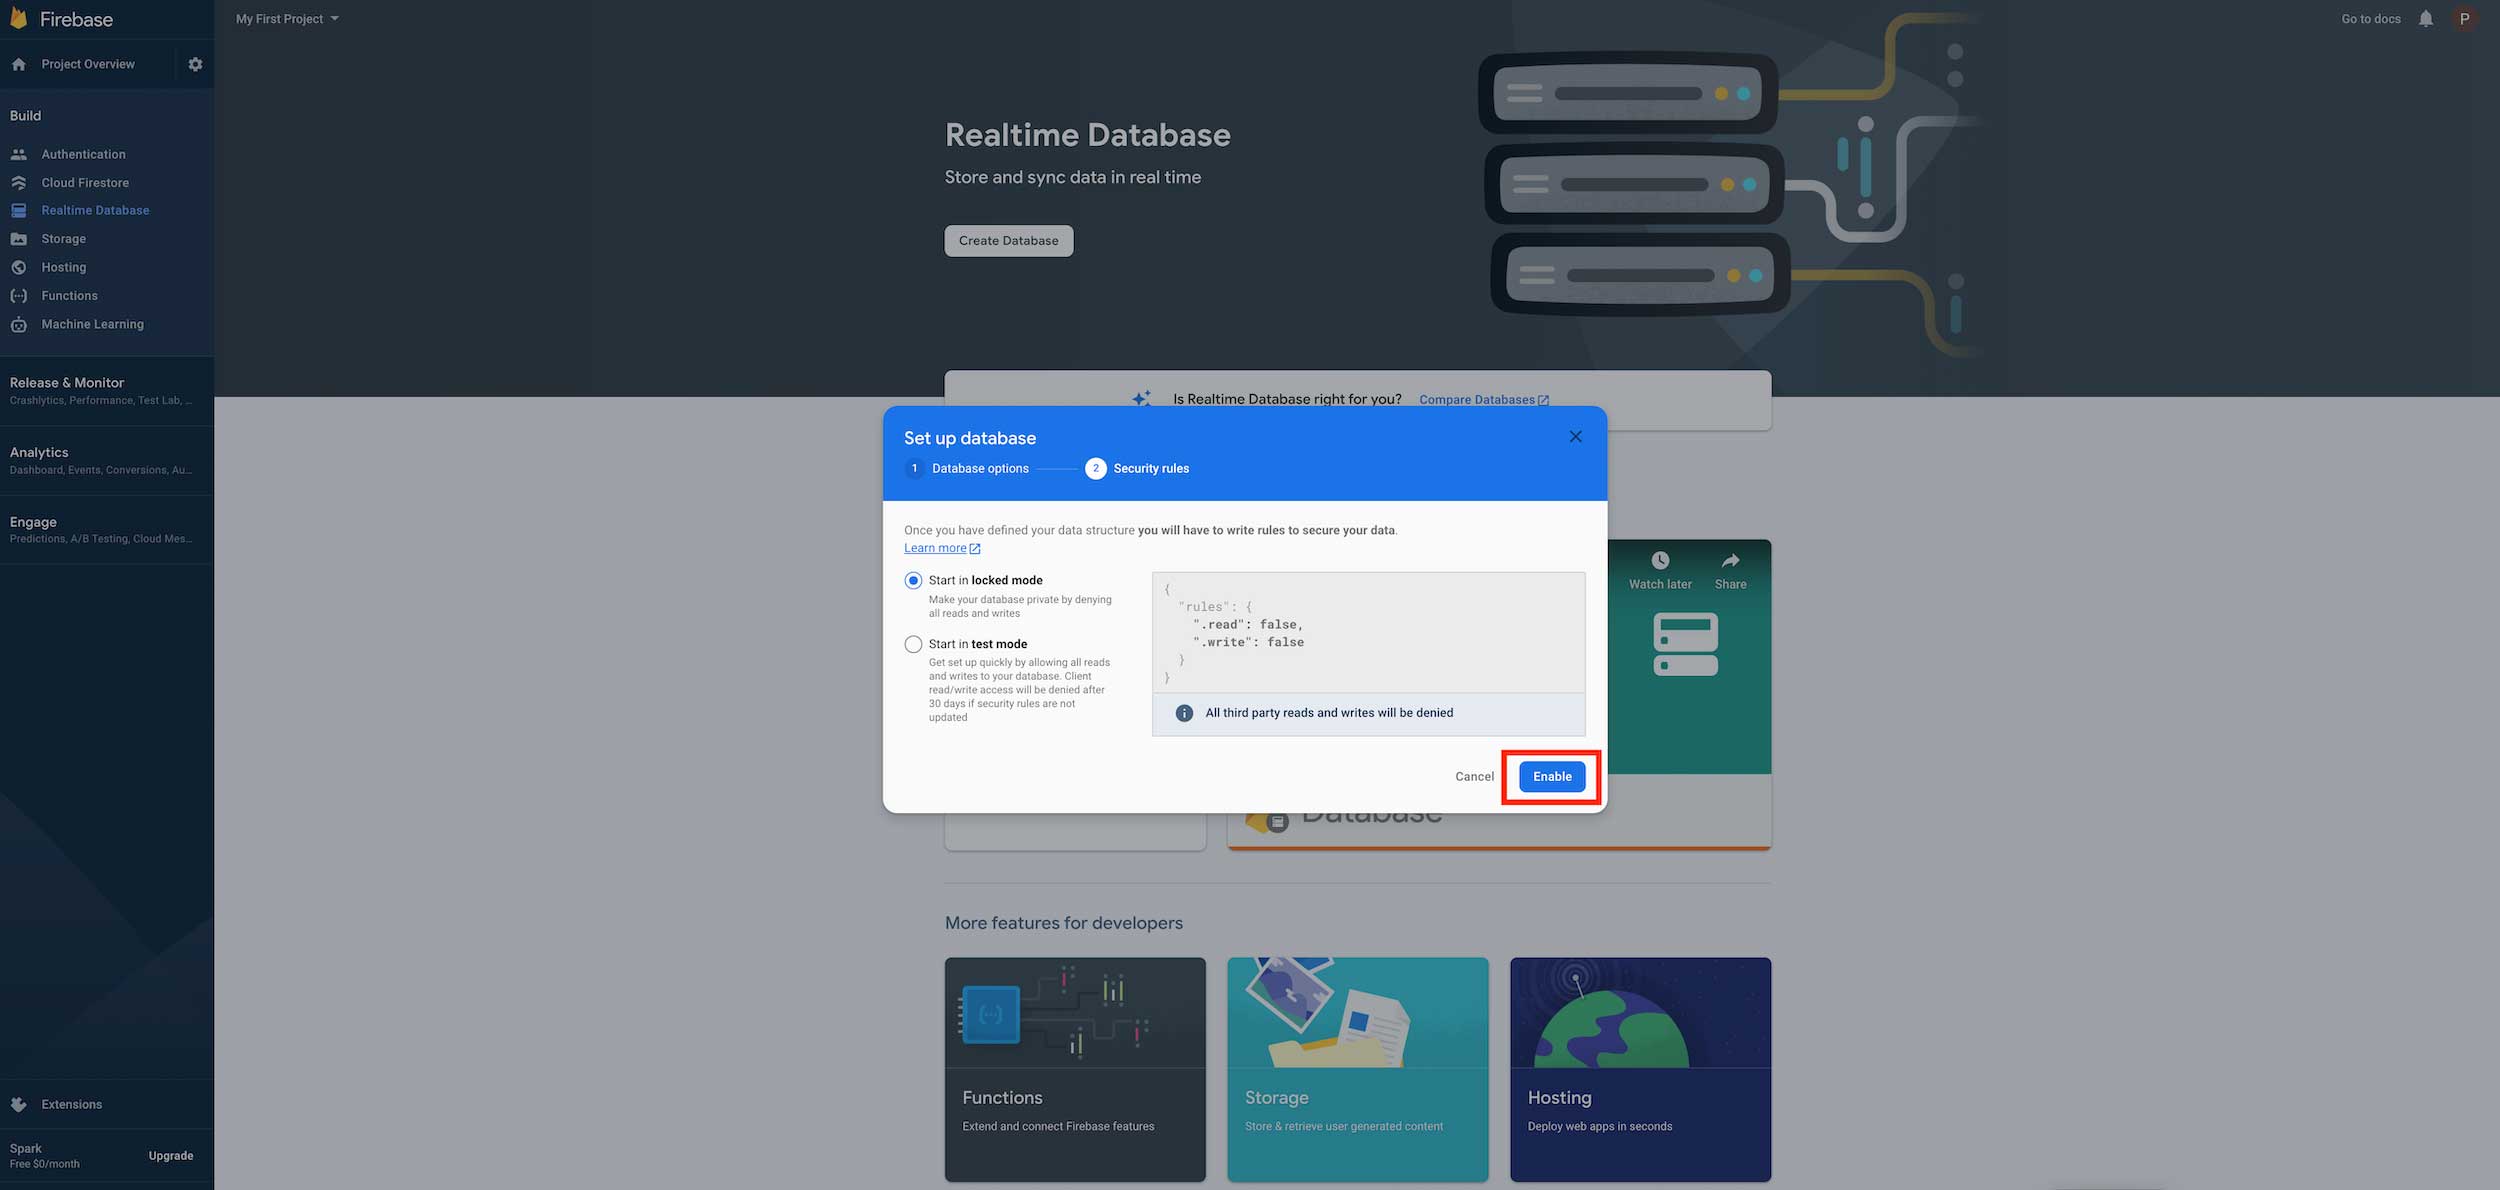 Step 26 : Here is your Firebase(Data) url copy it.And Click on Rules
Note: You can also find the Firebase(Data) URL in step 30. Copy the URL from here if you do not find the URL in step 30.
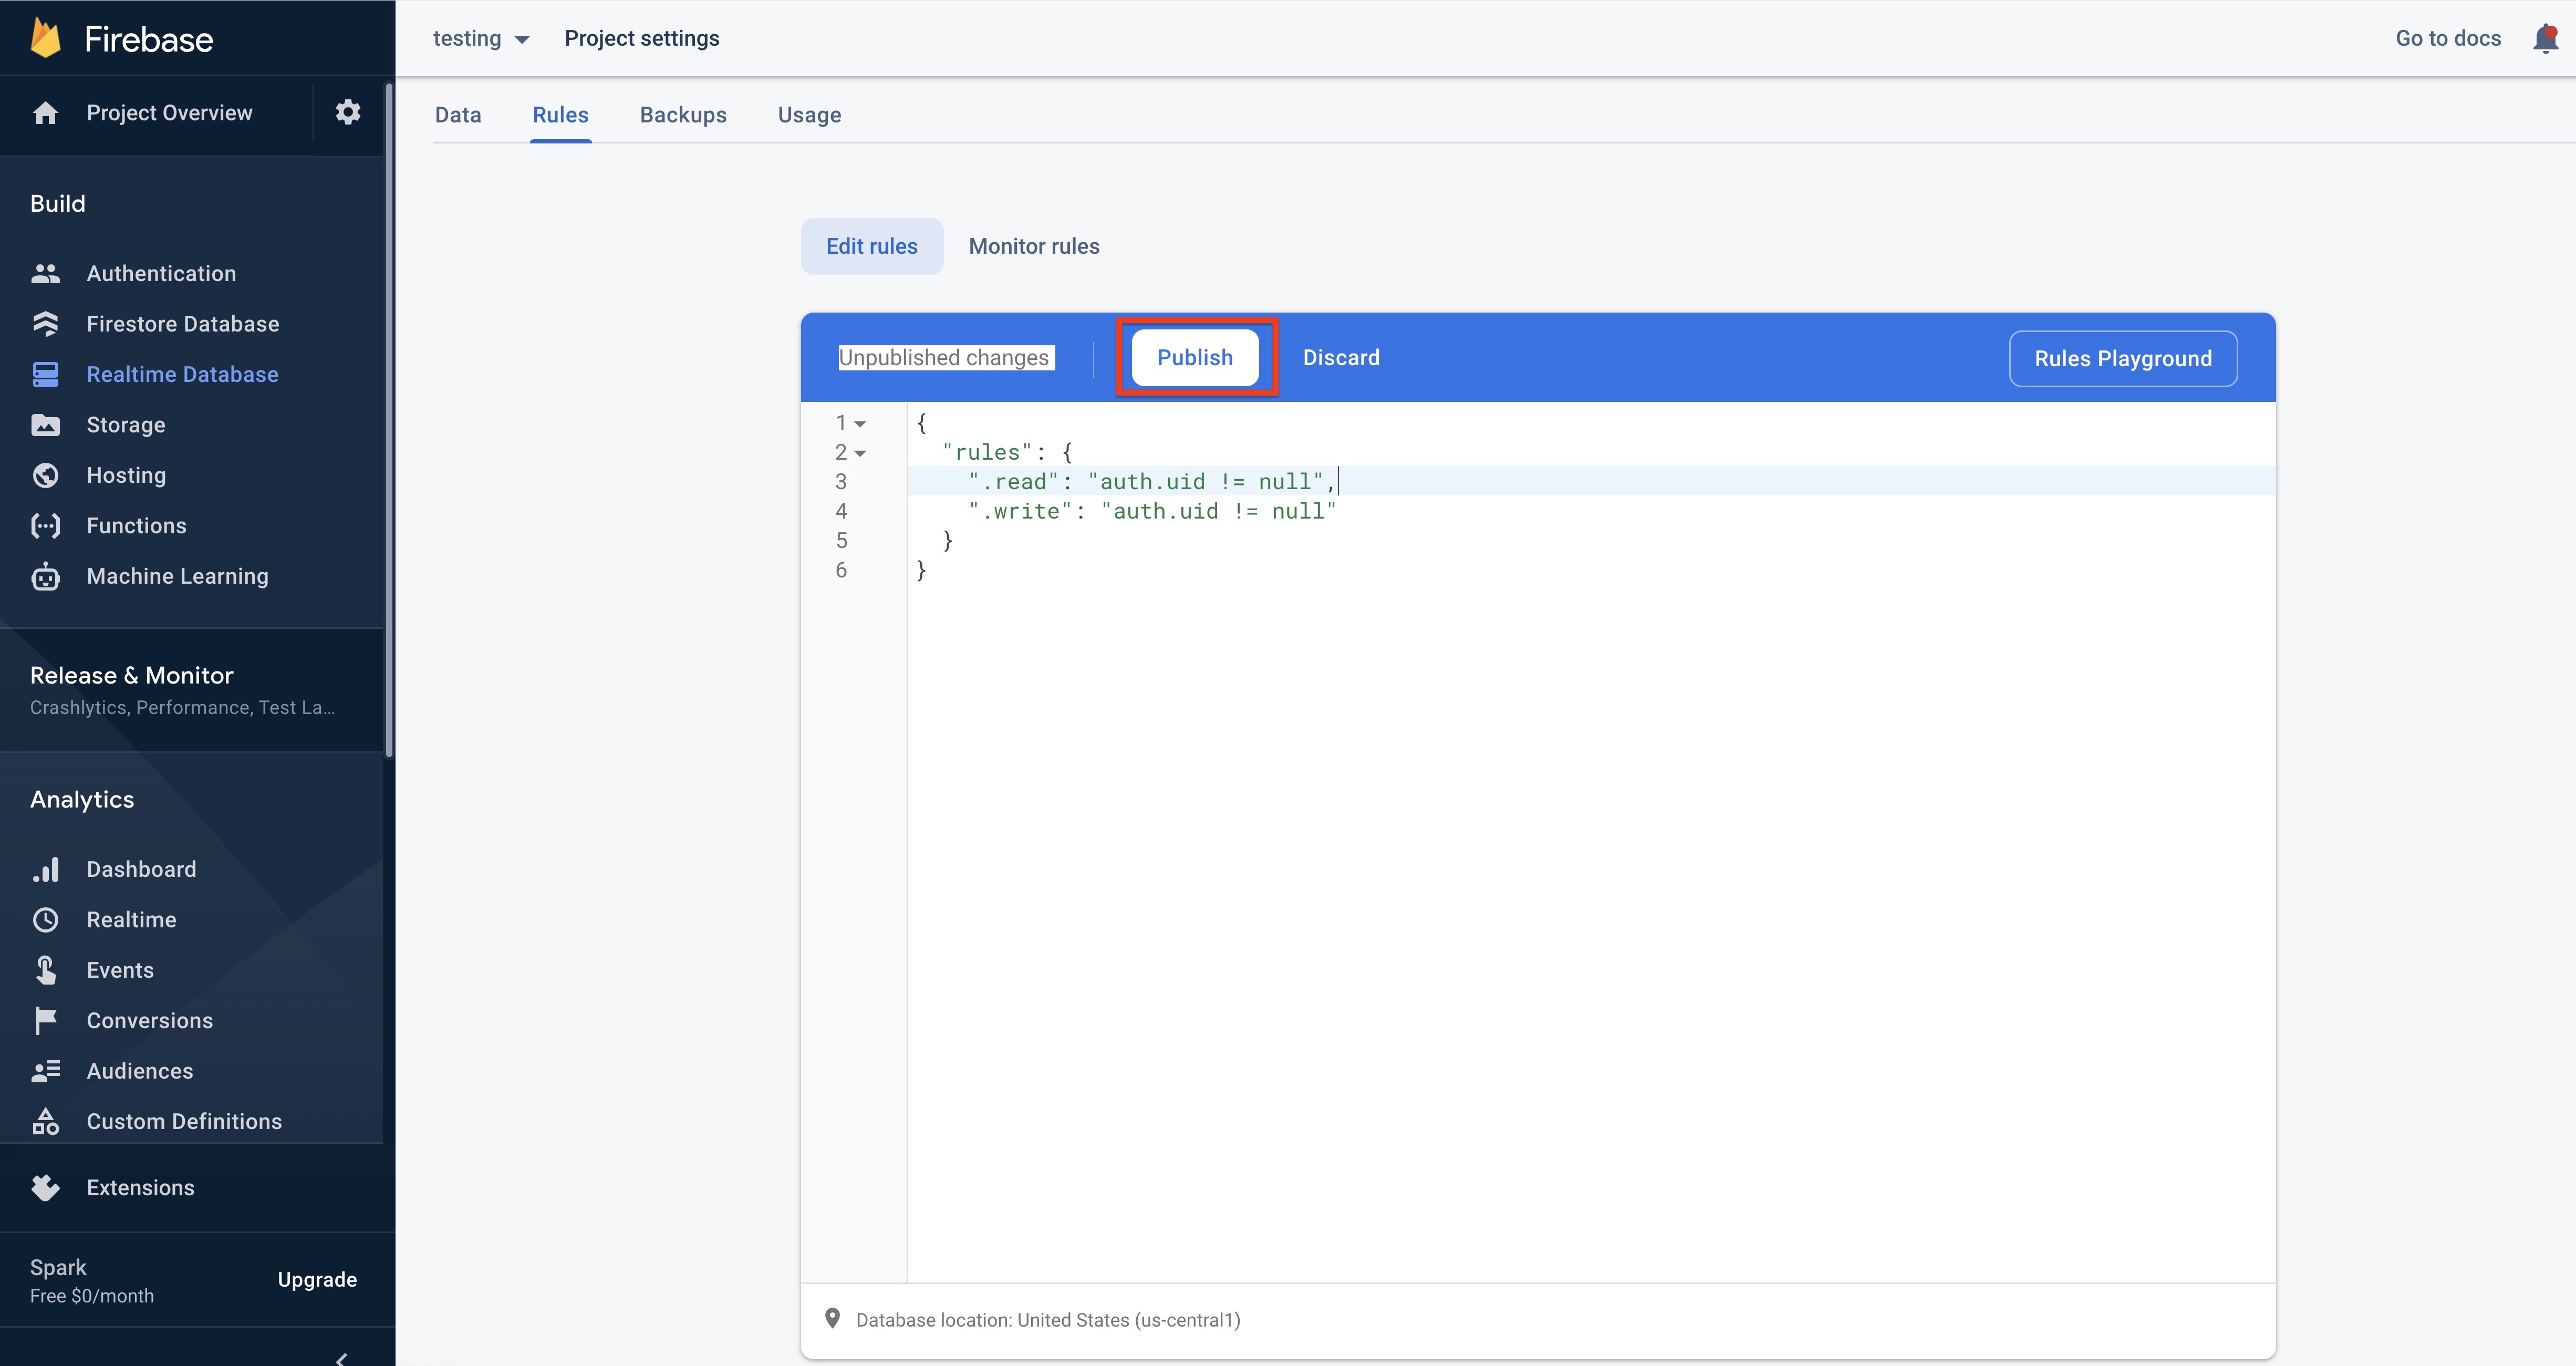
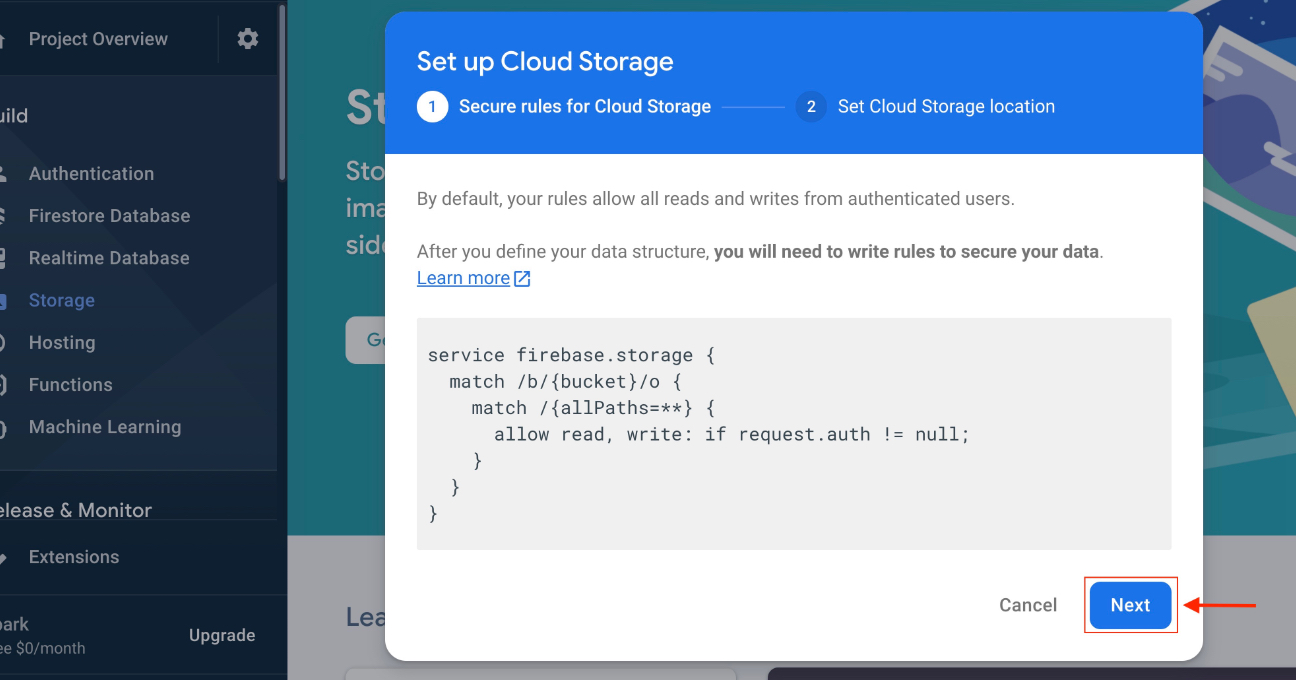
Step 27 : Delete the entire code 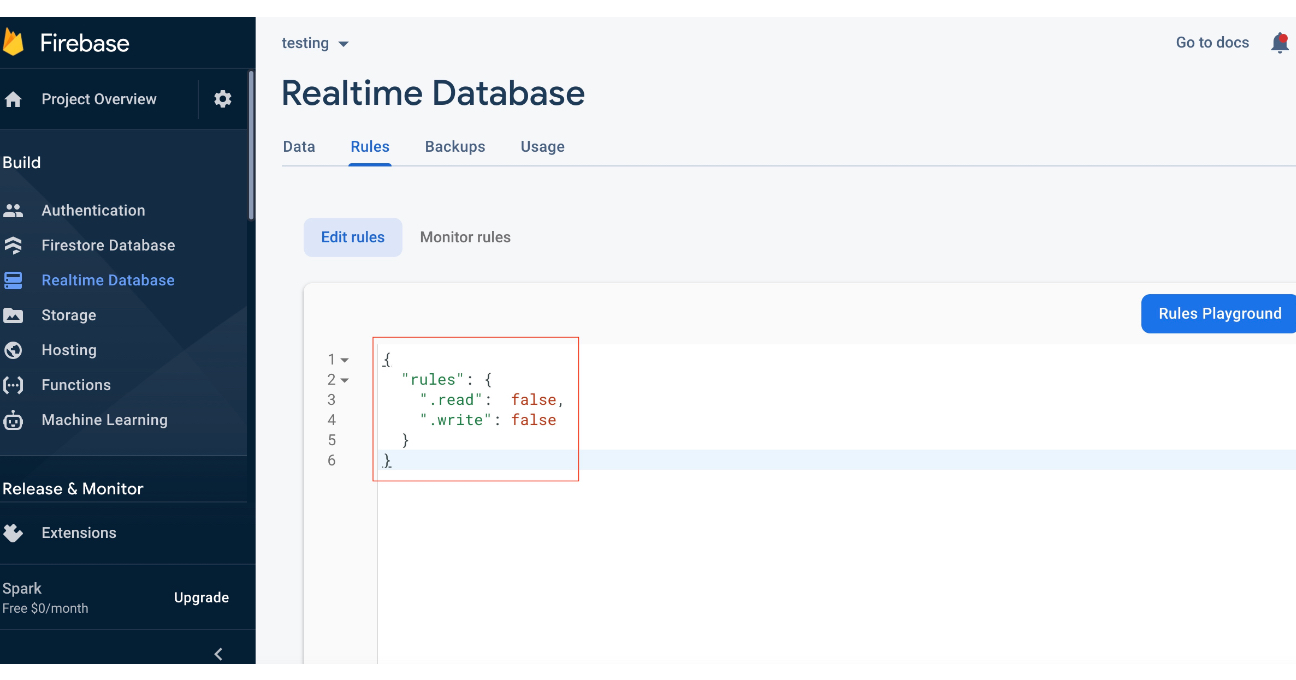
Step 28 : Now enter the following code, and click on Publish
{
"rules": {
".read": "auth.uid != null",
".write": "auth.uid != null"
}
}
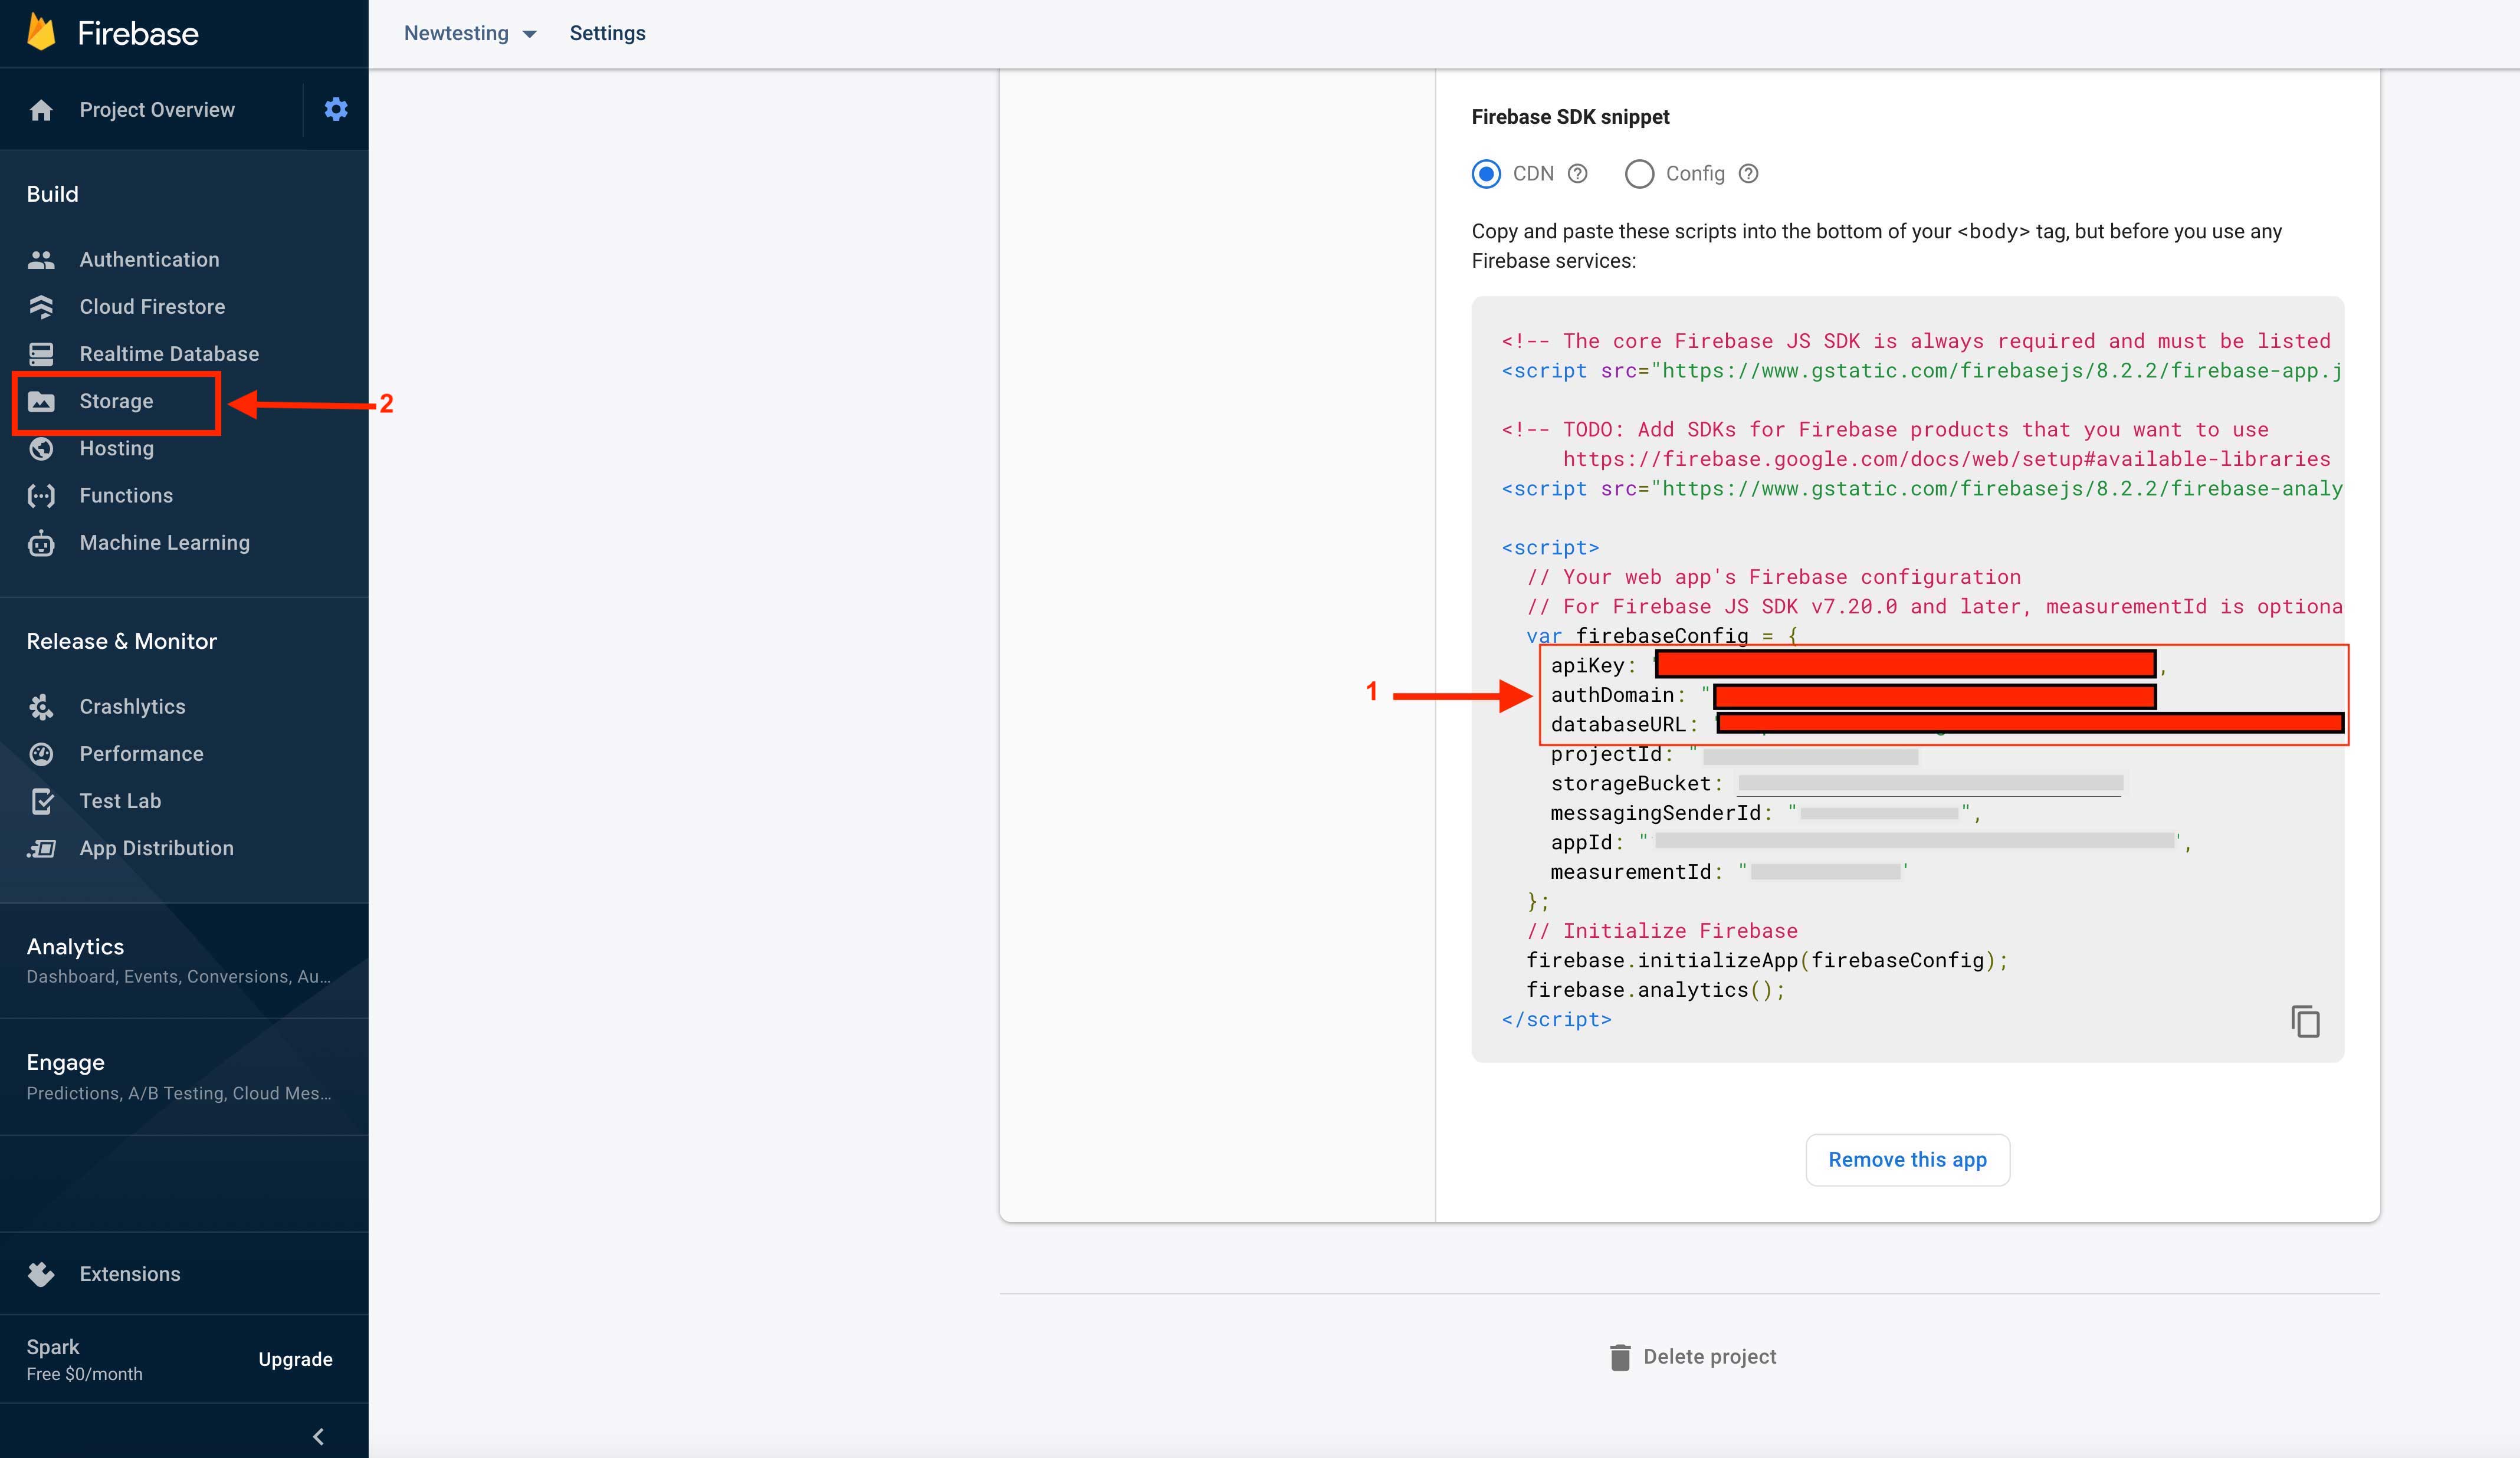
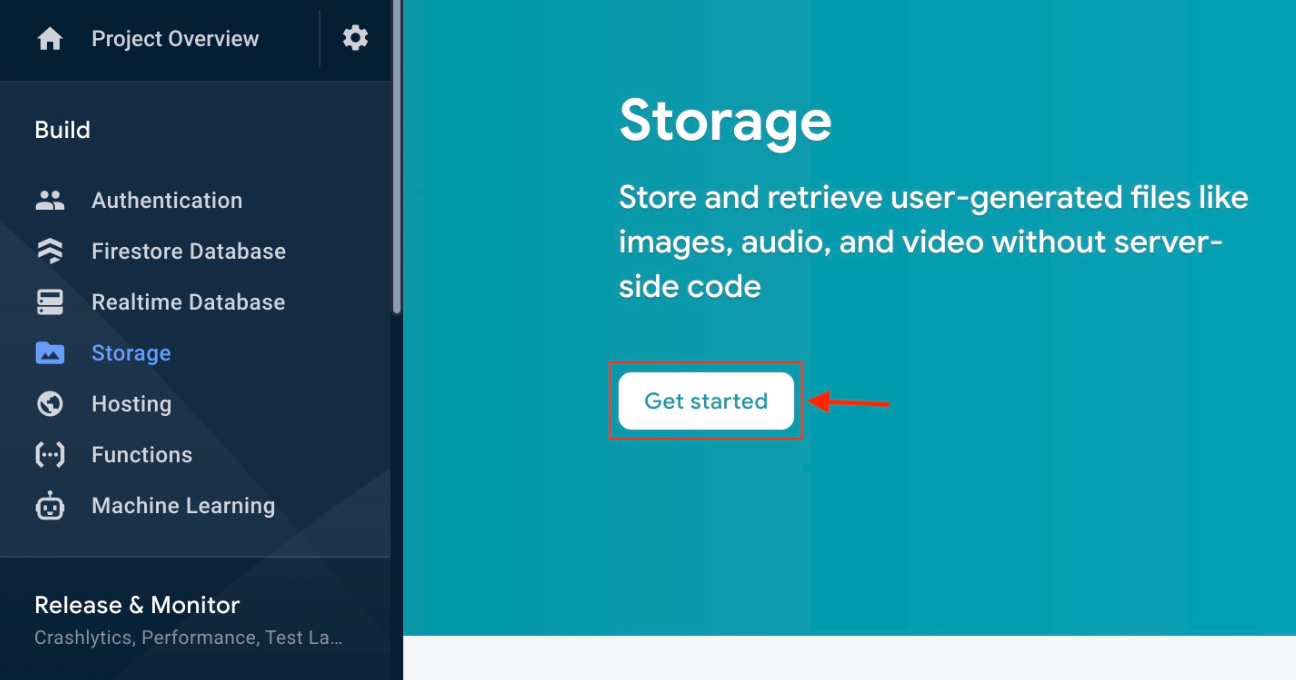
Step 35 : Here is your Storage Bucket URL. Exclude gs:// and copy the remaining part of the URL, and click on Rule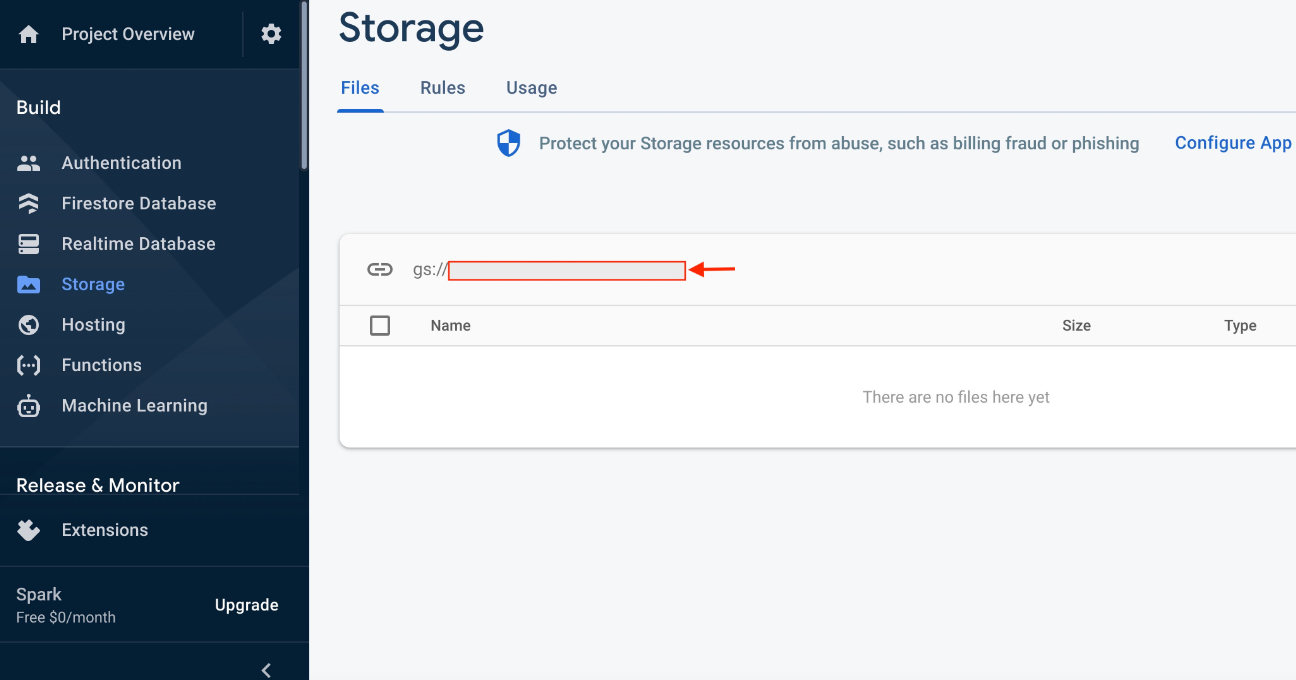
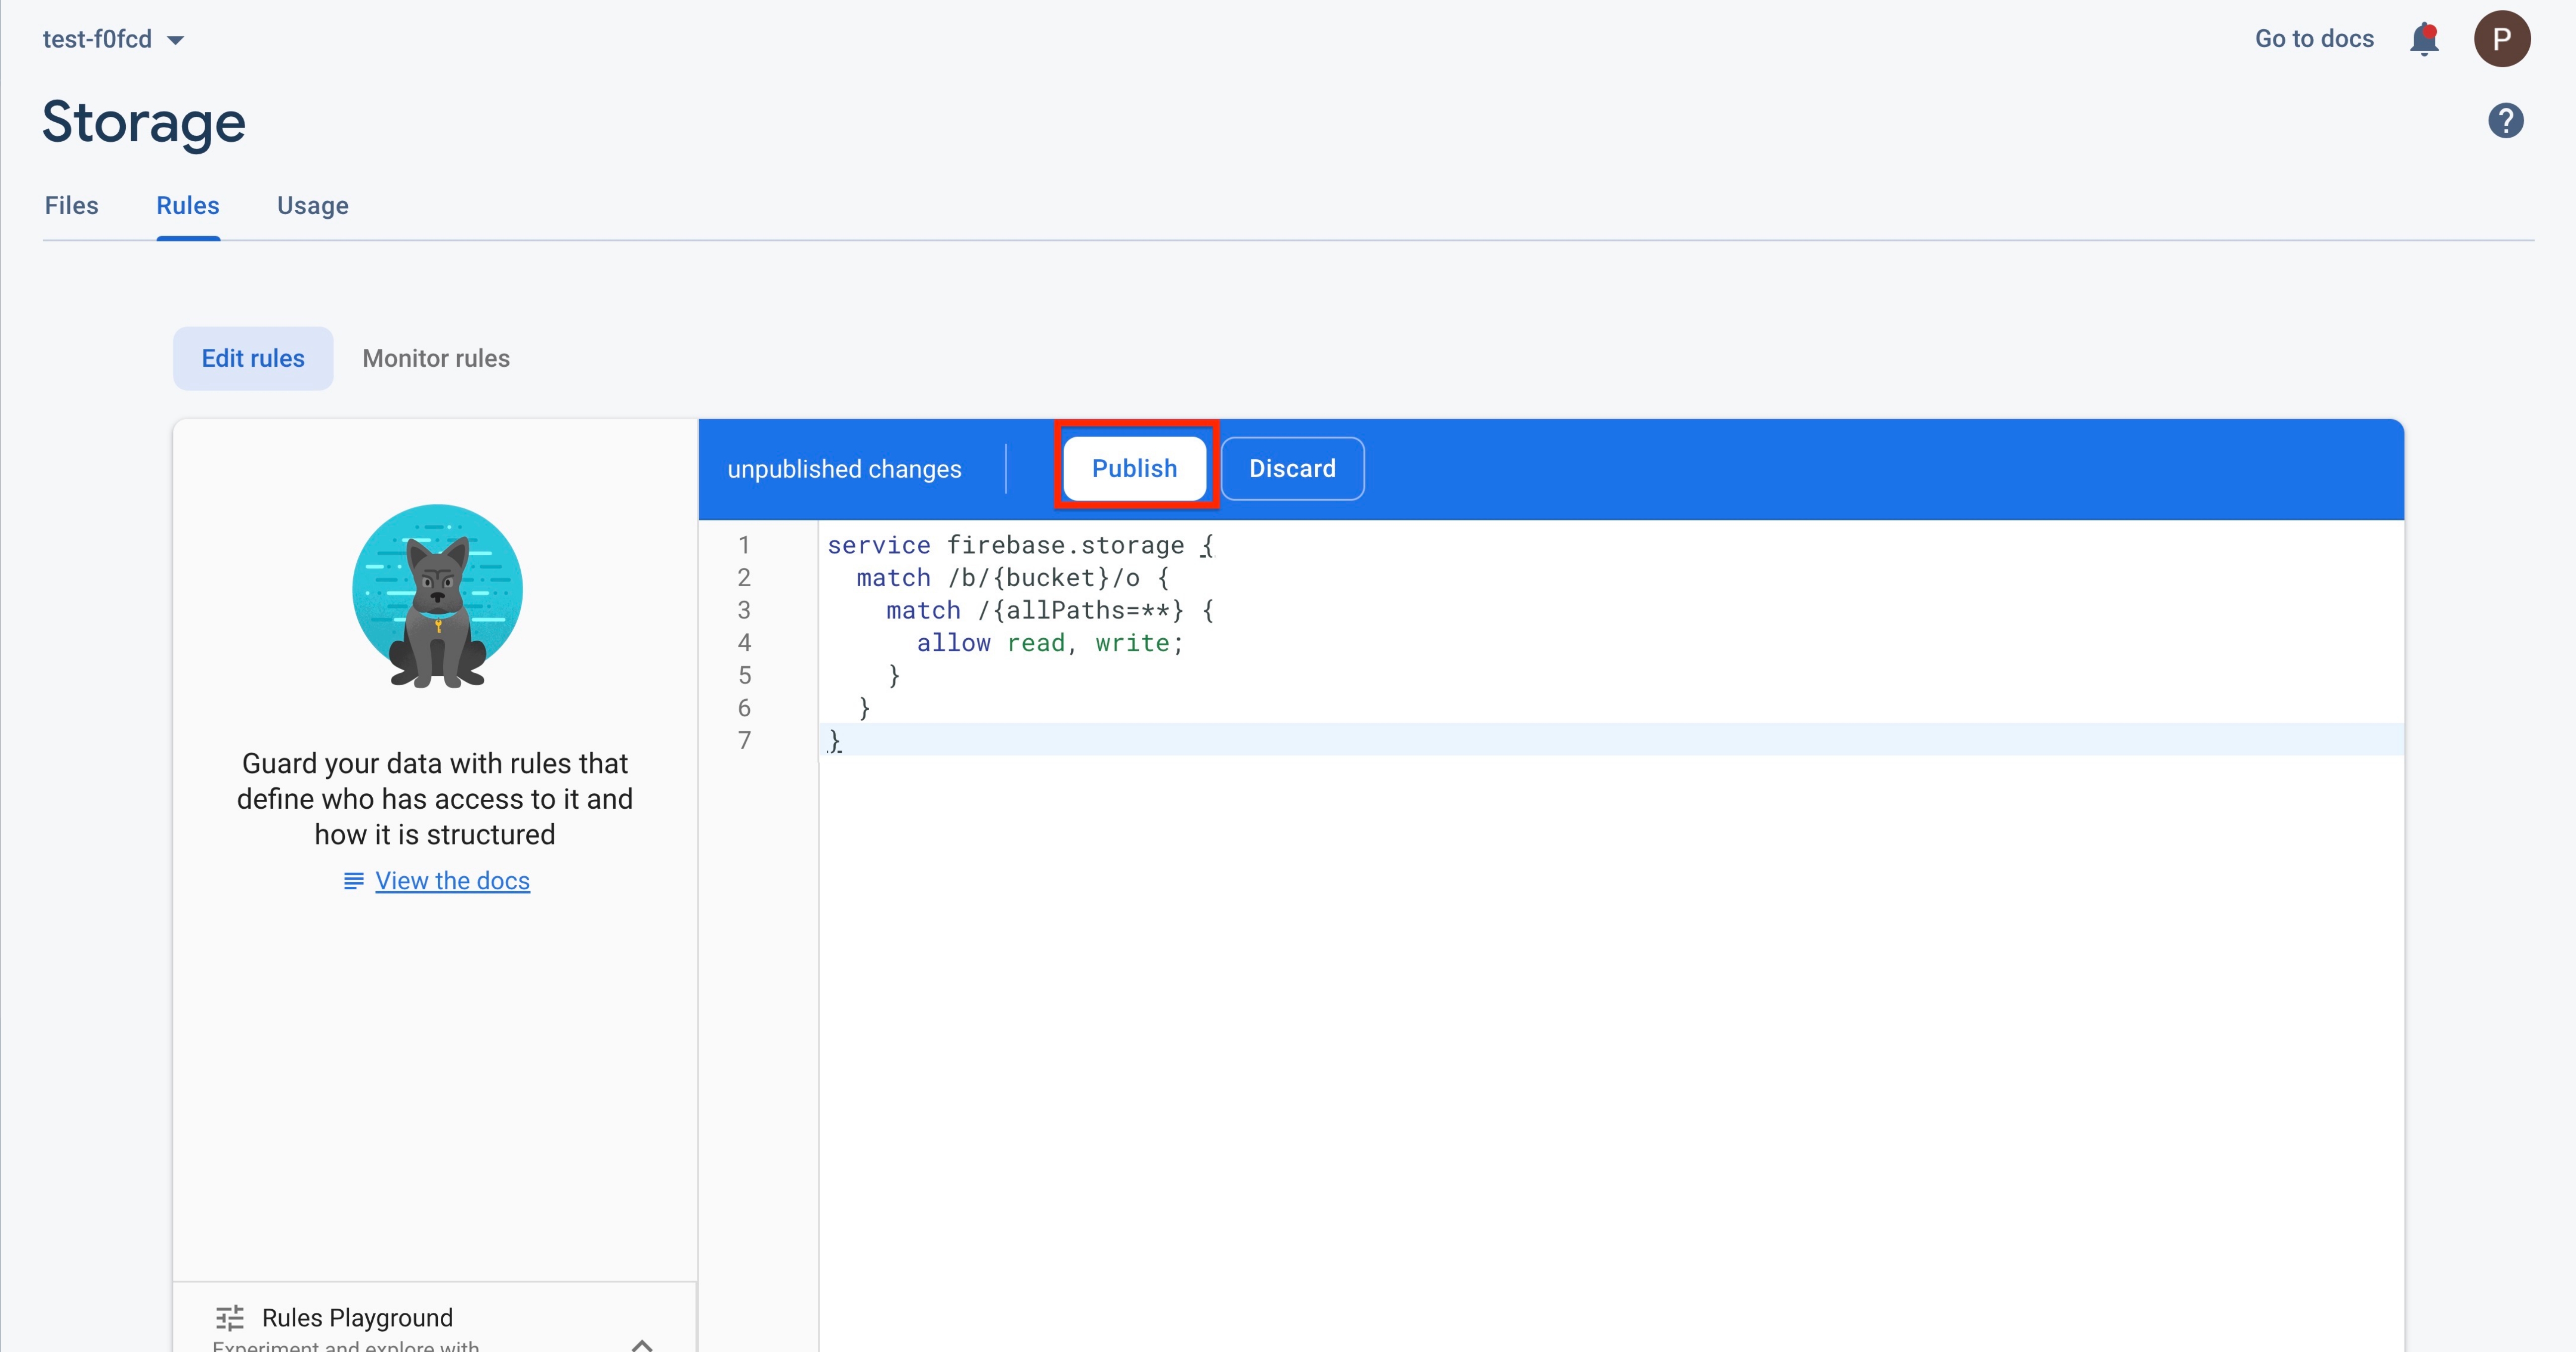
Step 36 : Delete the entire code 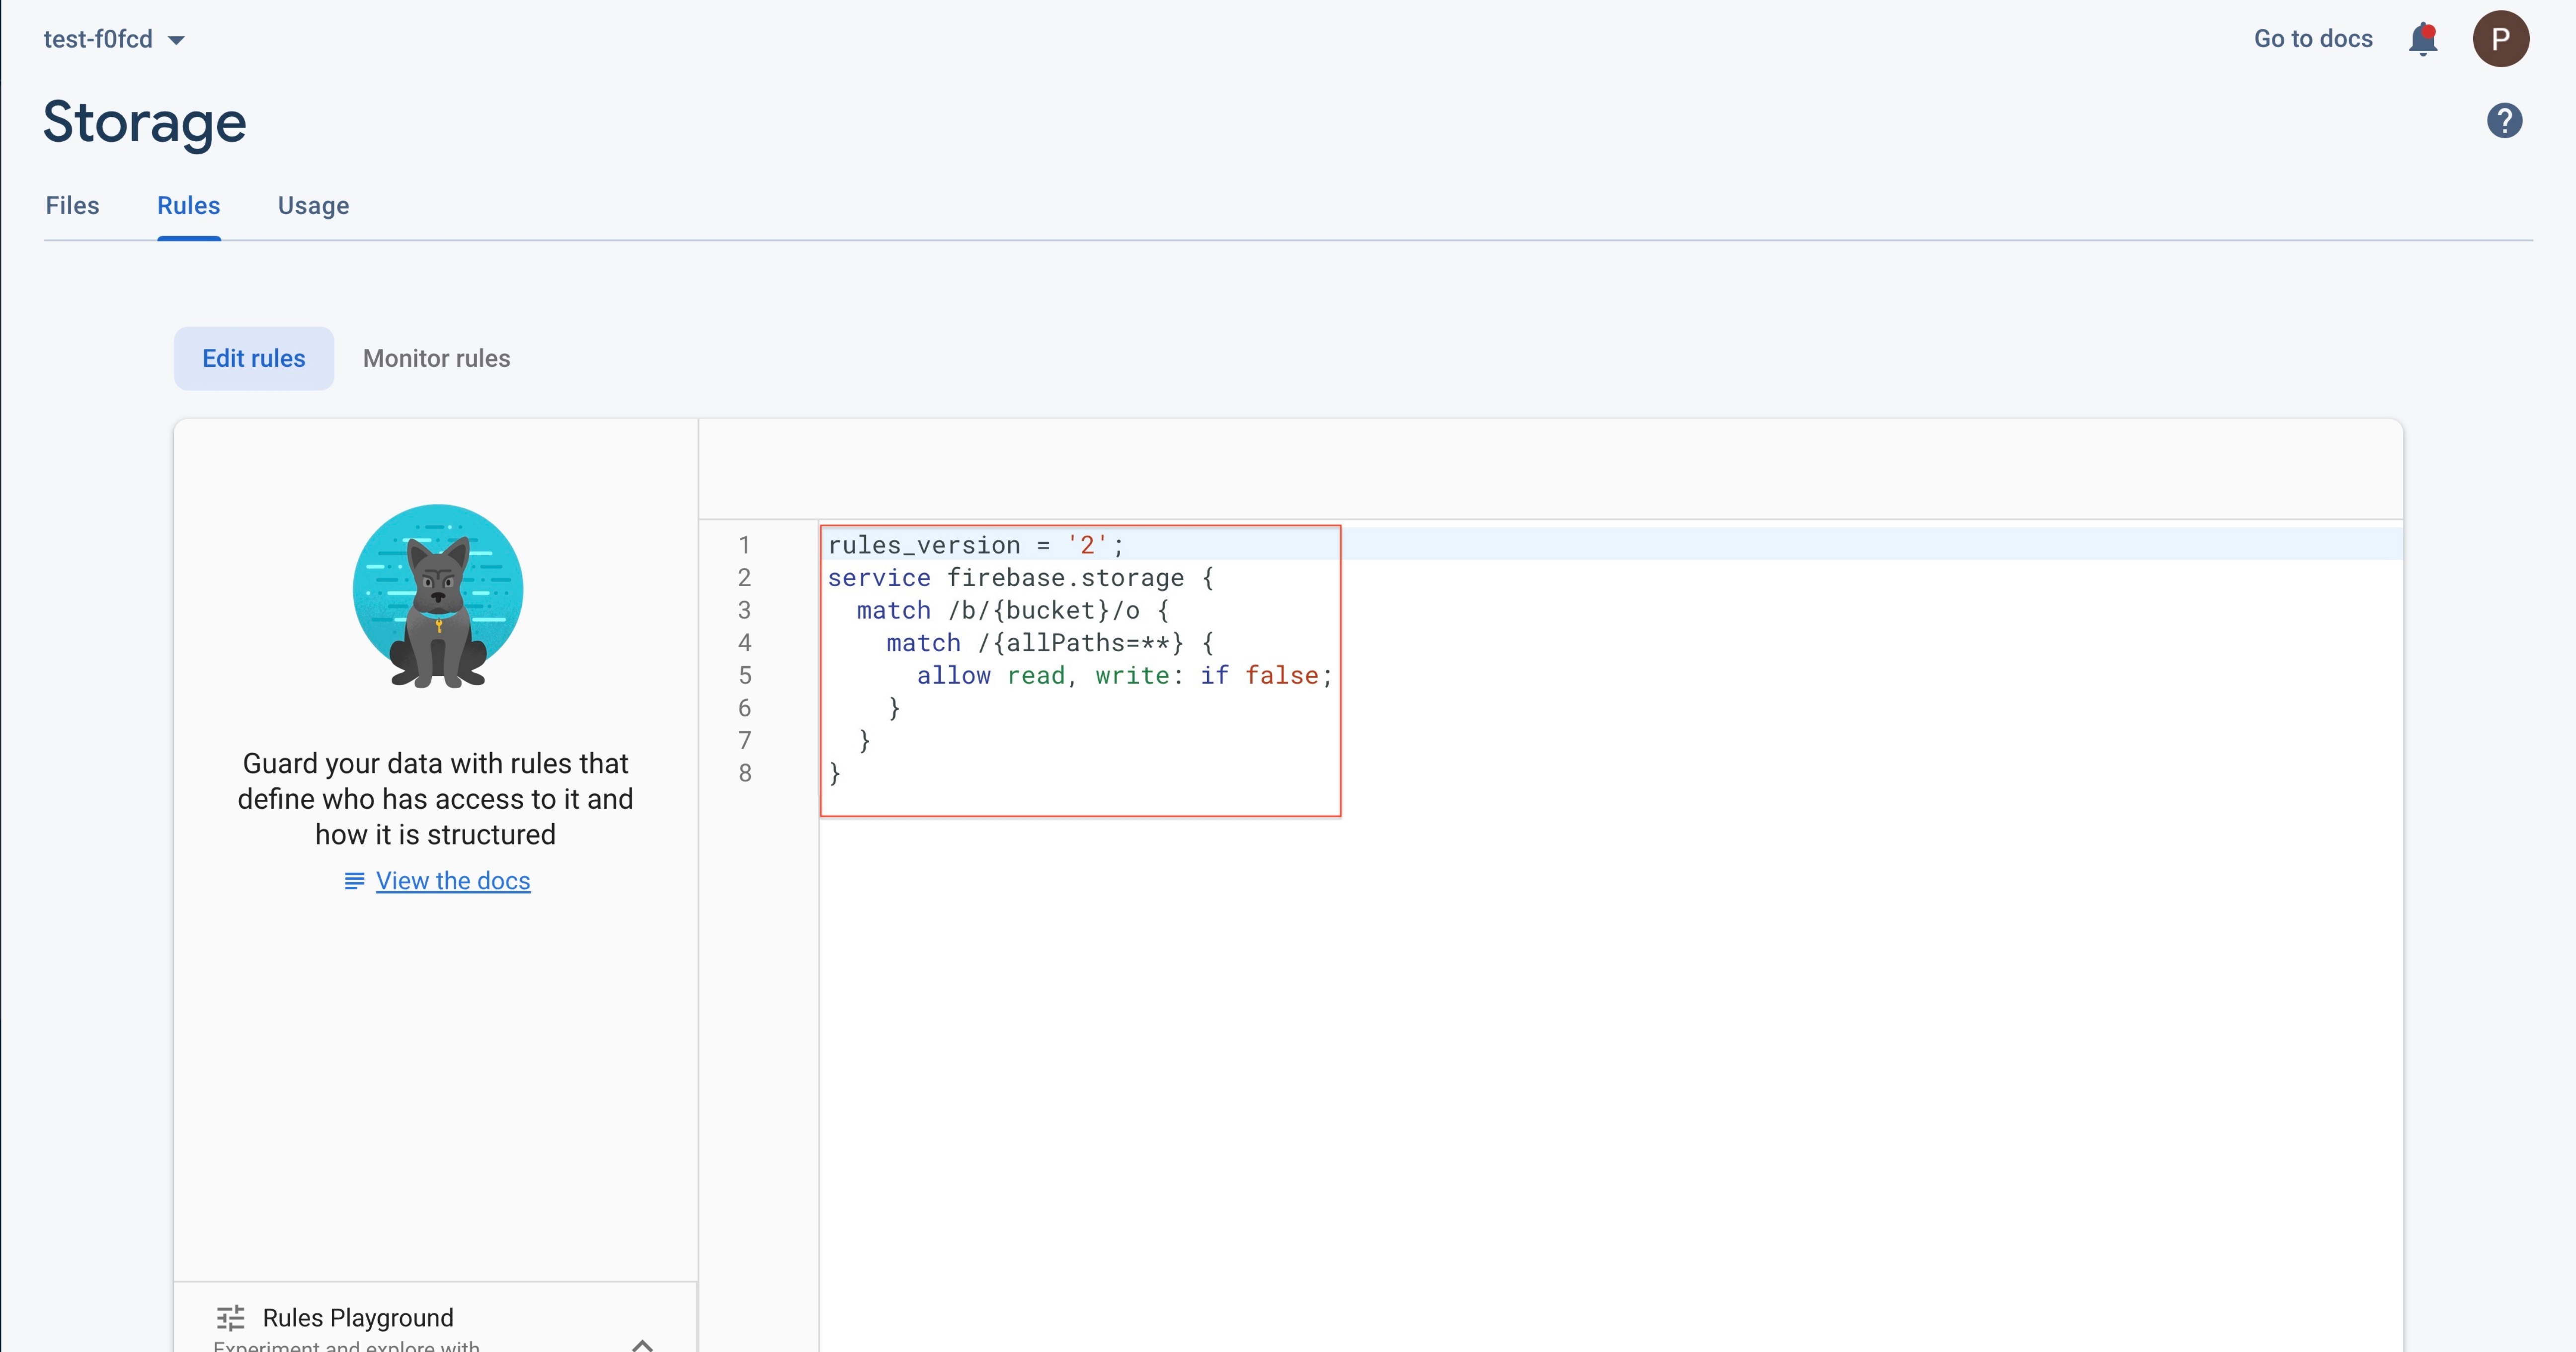
Step 37 : Now enter the following code, and click on Publish
service firebase.storage {
match /b/{bucket}/o {
match /{allPaths=**} {
allow read, write;
}
}
}